Configuring Filters in App Designer
- Applying filters in the Wavity platform is a simple process that can be done for any lists or reports. There are two types of filters available: Direct Filters and Advanced Filters.
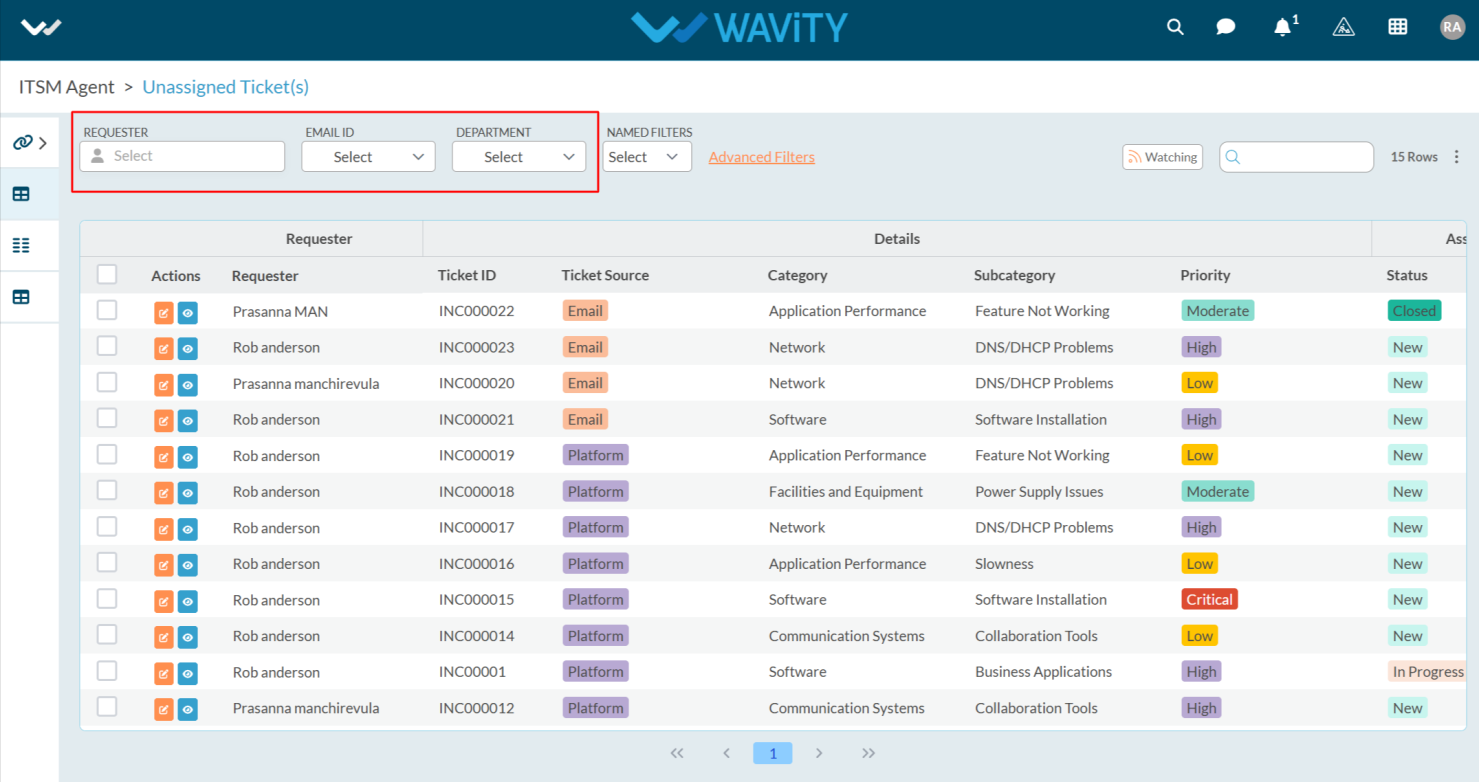
- Example to apply direct/simple filters is shown below. Direct Filters are easily accessible through dropdown boxes located beside advanced filters. These filters can be customized according to your requirements during implementation.
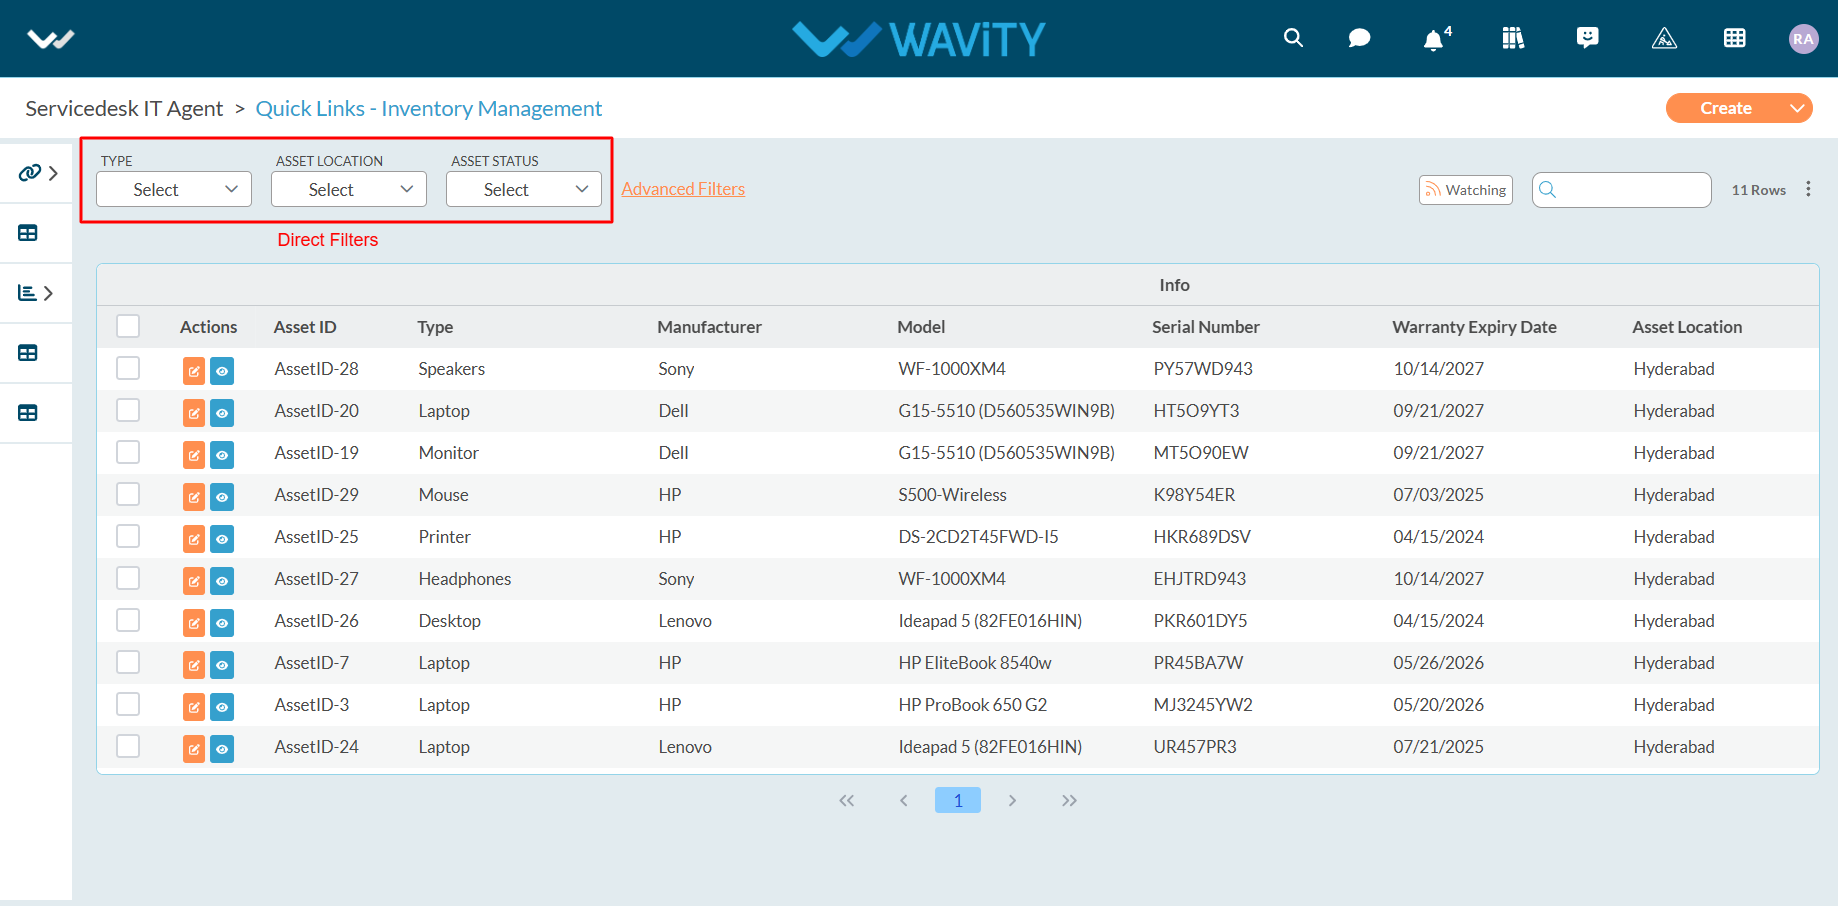
- Applying simple filters on the Wavity platform is a straightforward process.
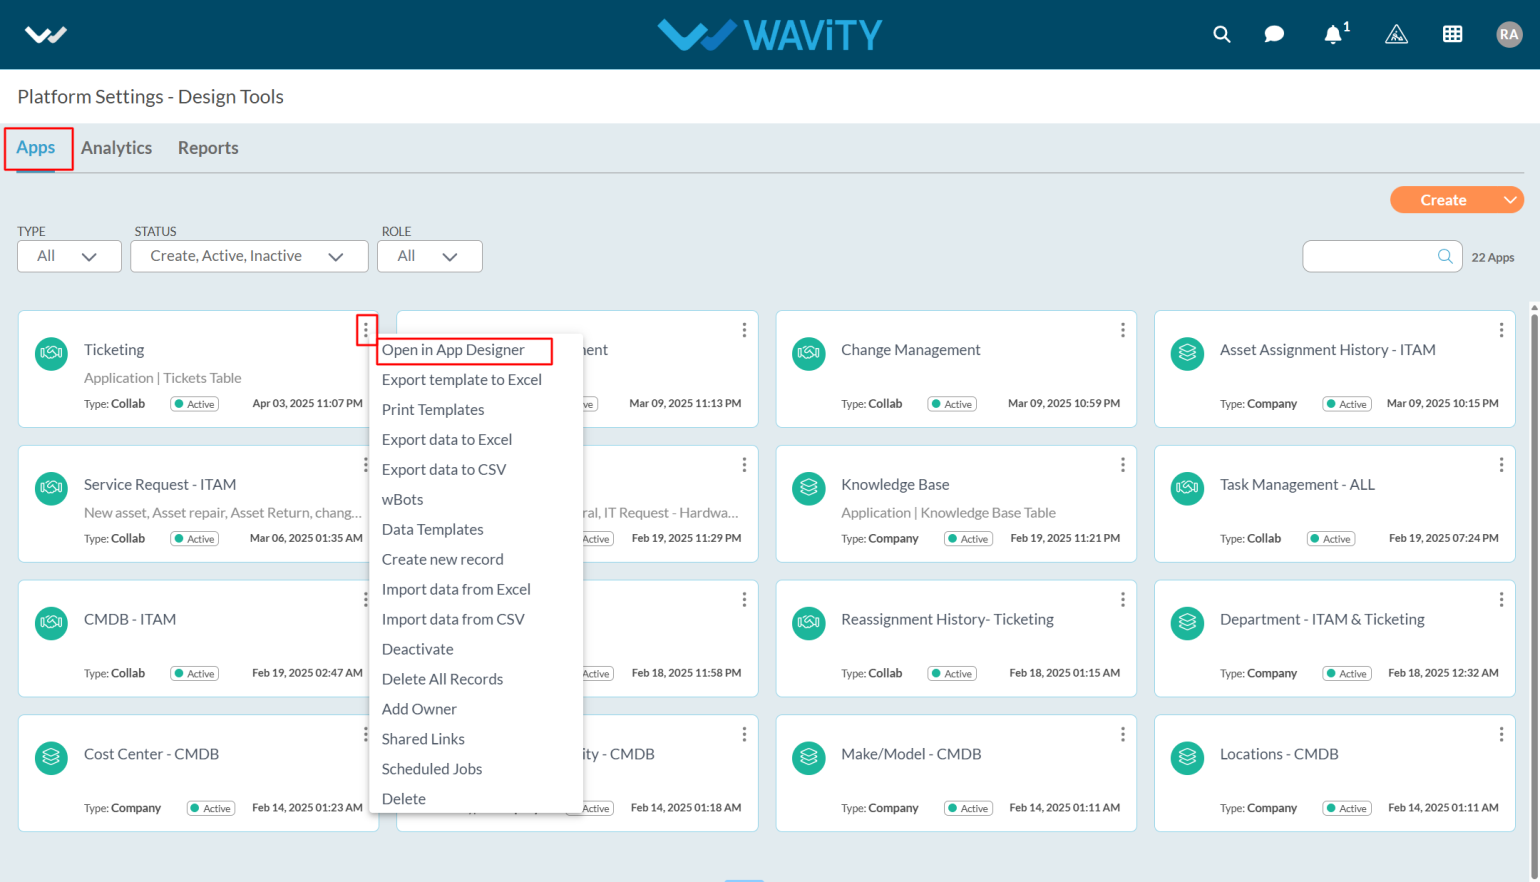
- Only Admin has access to advanced settings when creating an App.
- Click on the profile icon and select Design Tools (accessible only to Admin).

- In the App section, only the Admin can see all the existing applications in the tenant.
- Select the application where you want to apply simple filters and click on the three dots.
- From the options in the three dots menu, choose Open in App Designer.
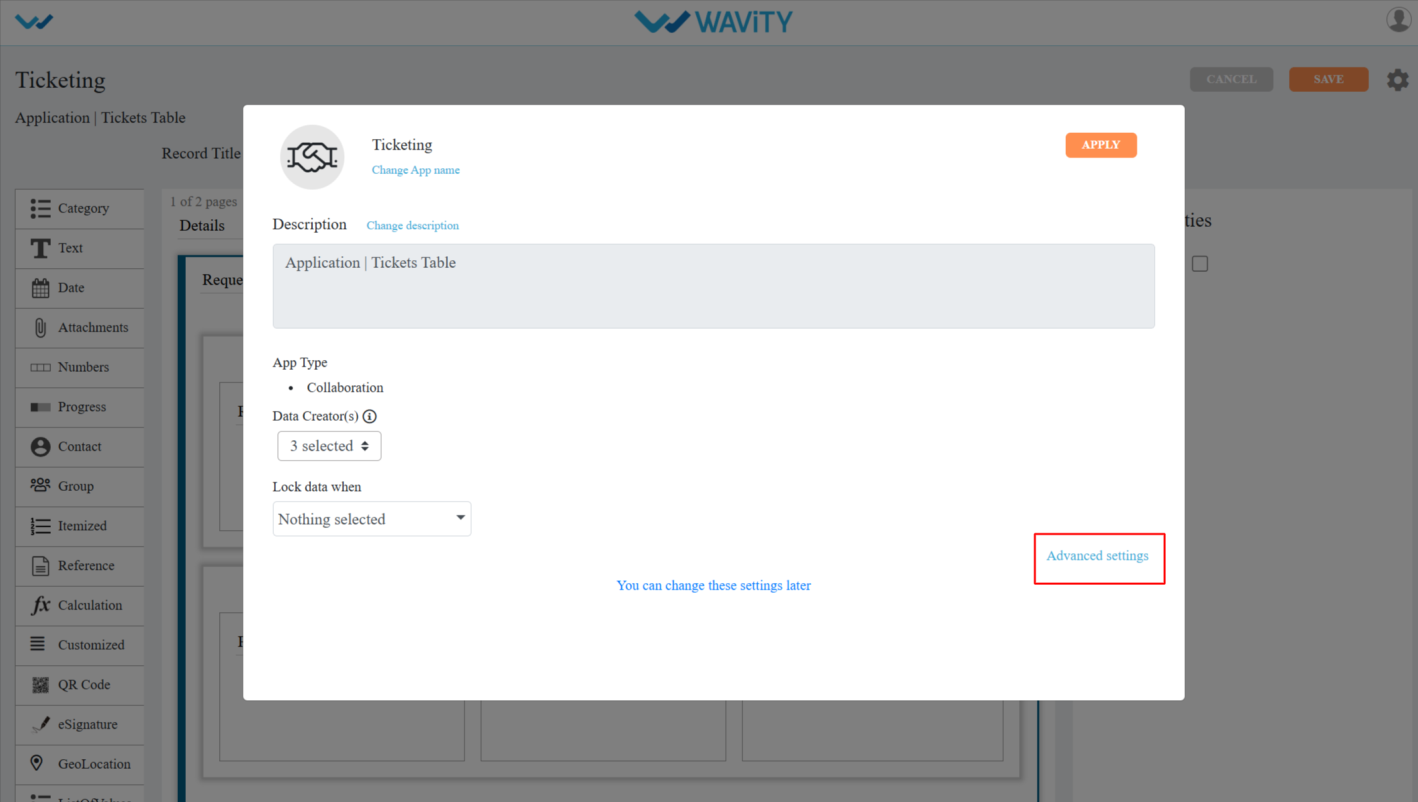
- Click the Settings icon, as shown in the image below, to view or edit the Application Settings.

- Click on Advanced settings to apply the simple filters.
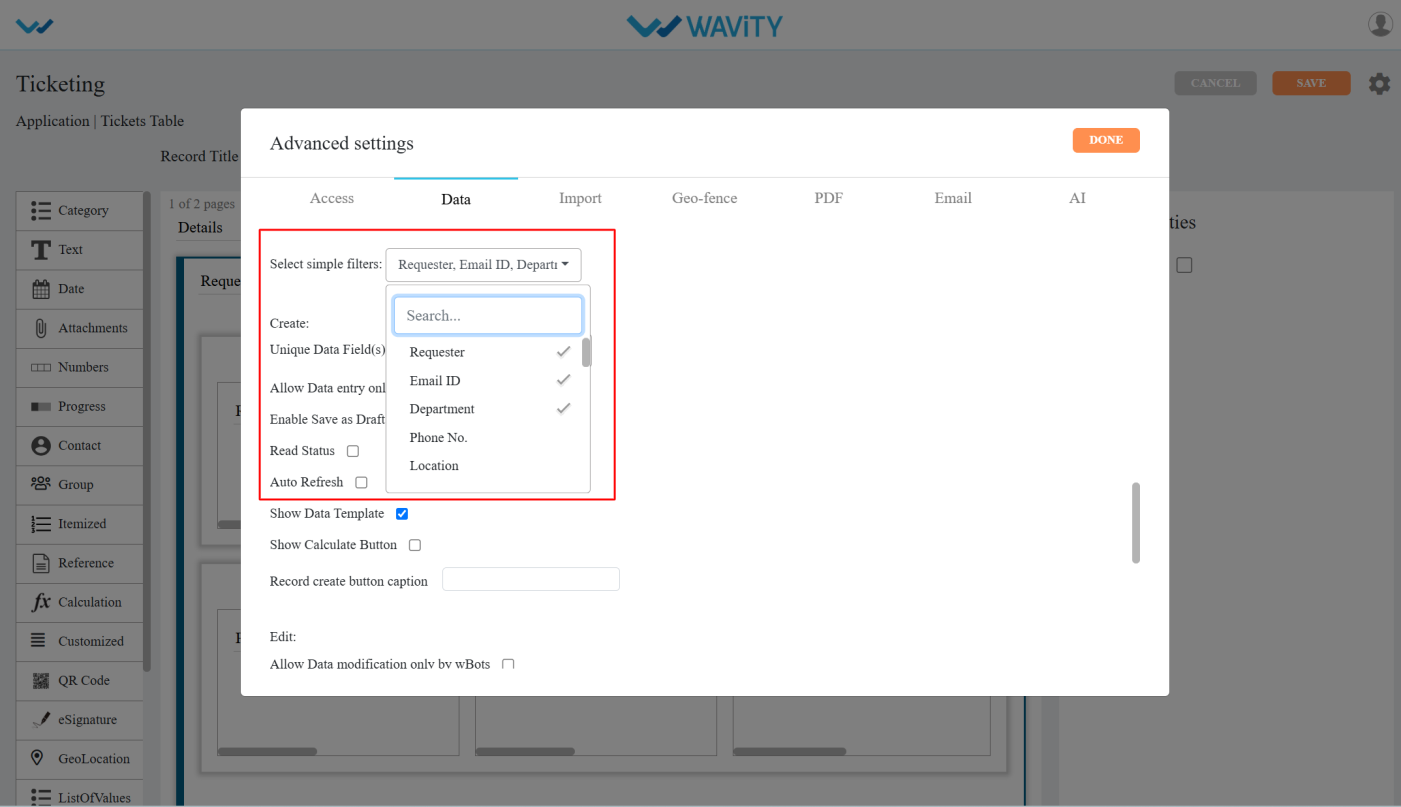
- In Advanced Settings, click on the Data tab and scroll down and you can see the select simple filters option.
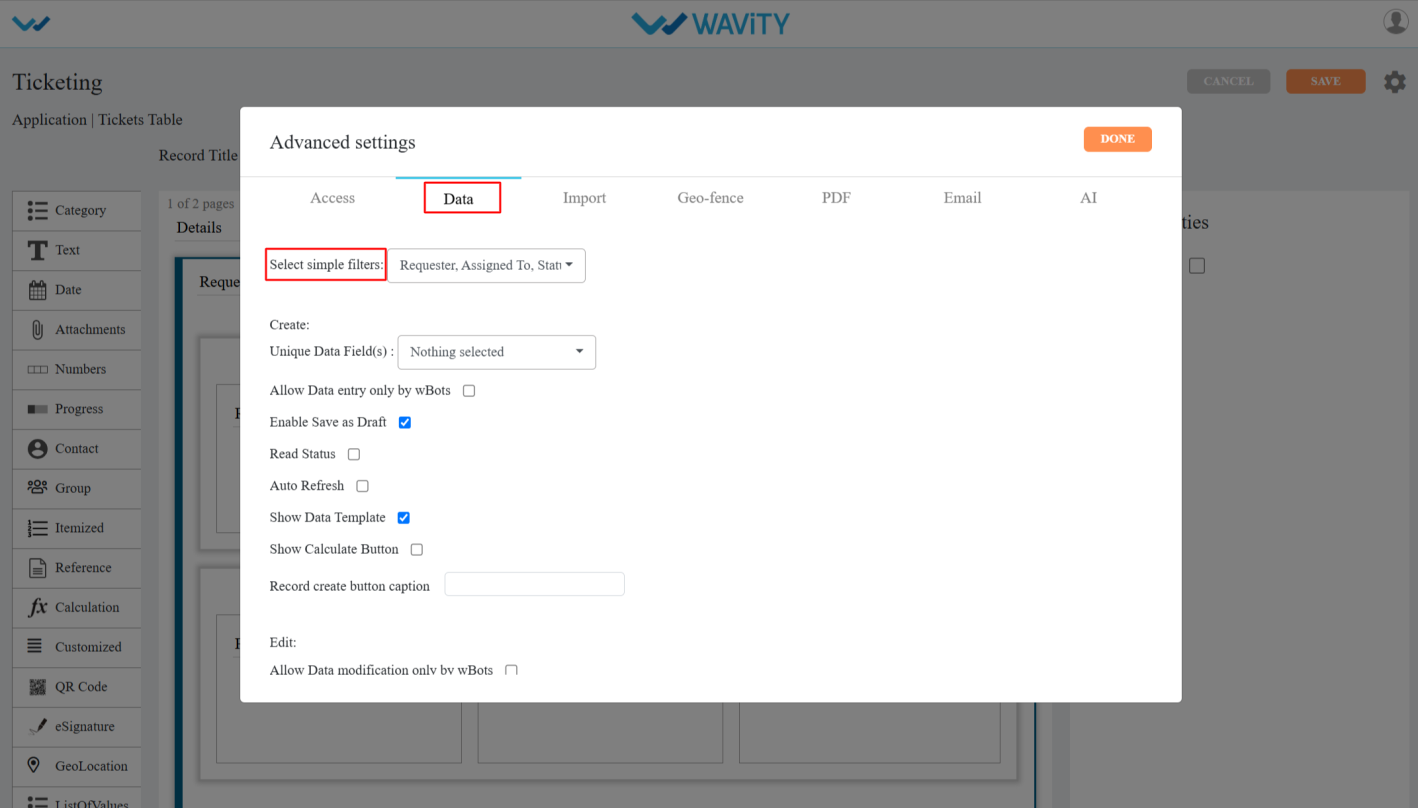
- In Simple filters dropdown’s you can select only 3 data controls/form fields which can be made visible as a simple filter on the listing page.
- After selecting the filters click on the Done & apply and click on the save button to save the filters.
- Now you can see the applied simple filters in the Record listening page.