Creating Global Widgets in Wavity
- Widgets in Wavity are interactive components or visual elements within a user interface (UI) that provide users with specific functionalities, data visualizations, or quick access to information and actions.
- Widgets can be added/edited to interfaces/dashboards in Wavity platform. This feature allows you to customize dashboards based on your requirements. For more details on creation of dashboards, please refer the following link: How To Create Role-Based Interface/Dashboards/Layouts | Wavity
- Global Widgets are pre-defined widgets available to all users in Wavity, providing universal functionality across the platform. These widgets enhance platform-wide visibility and collaboration.
- Only an Admin of your organization has the access to create or update widgets in Wavity.
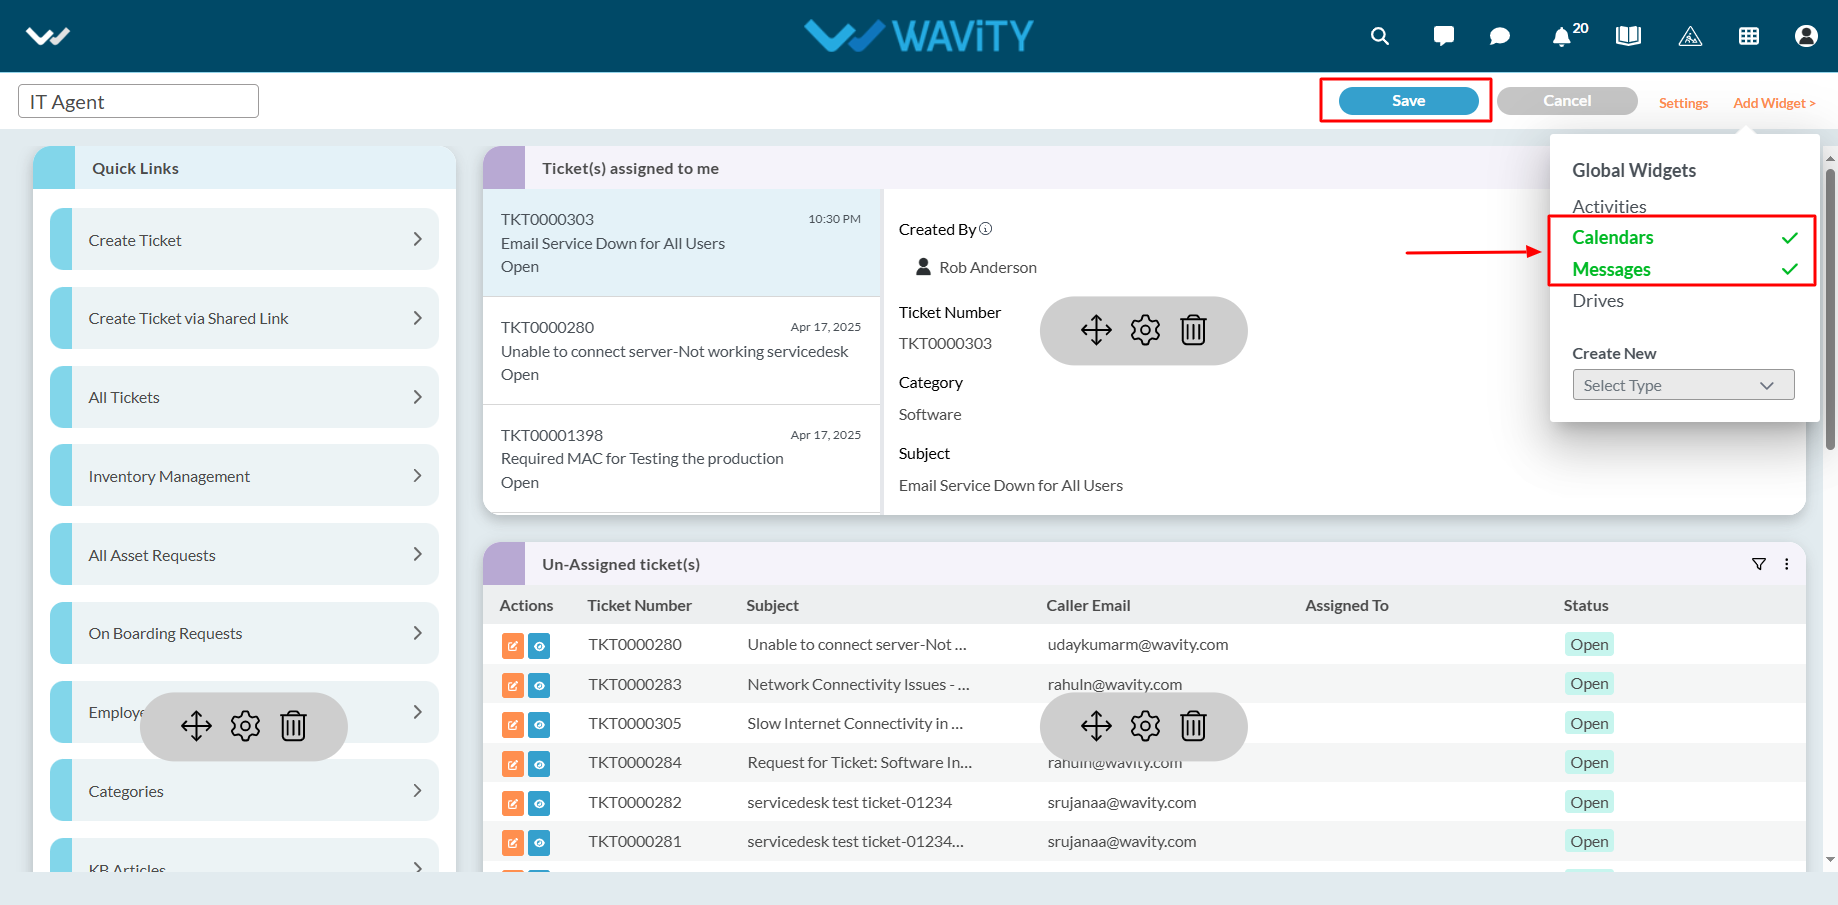
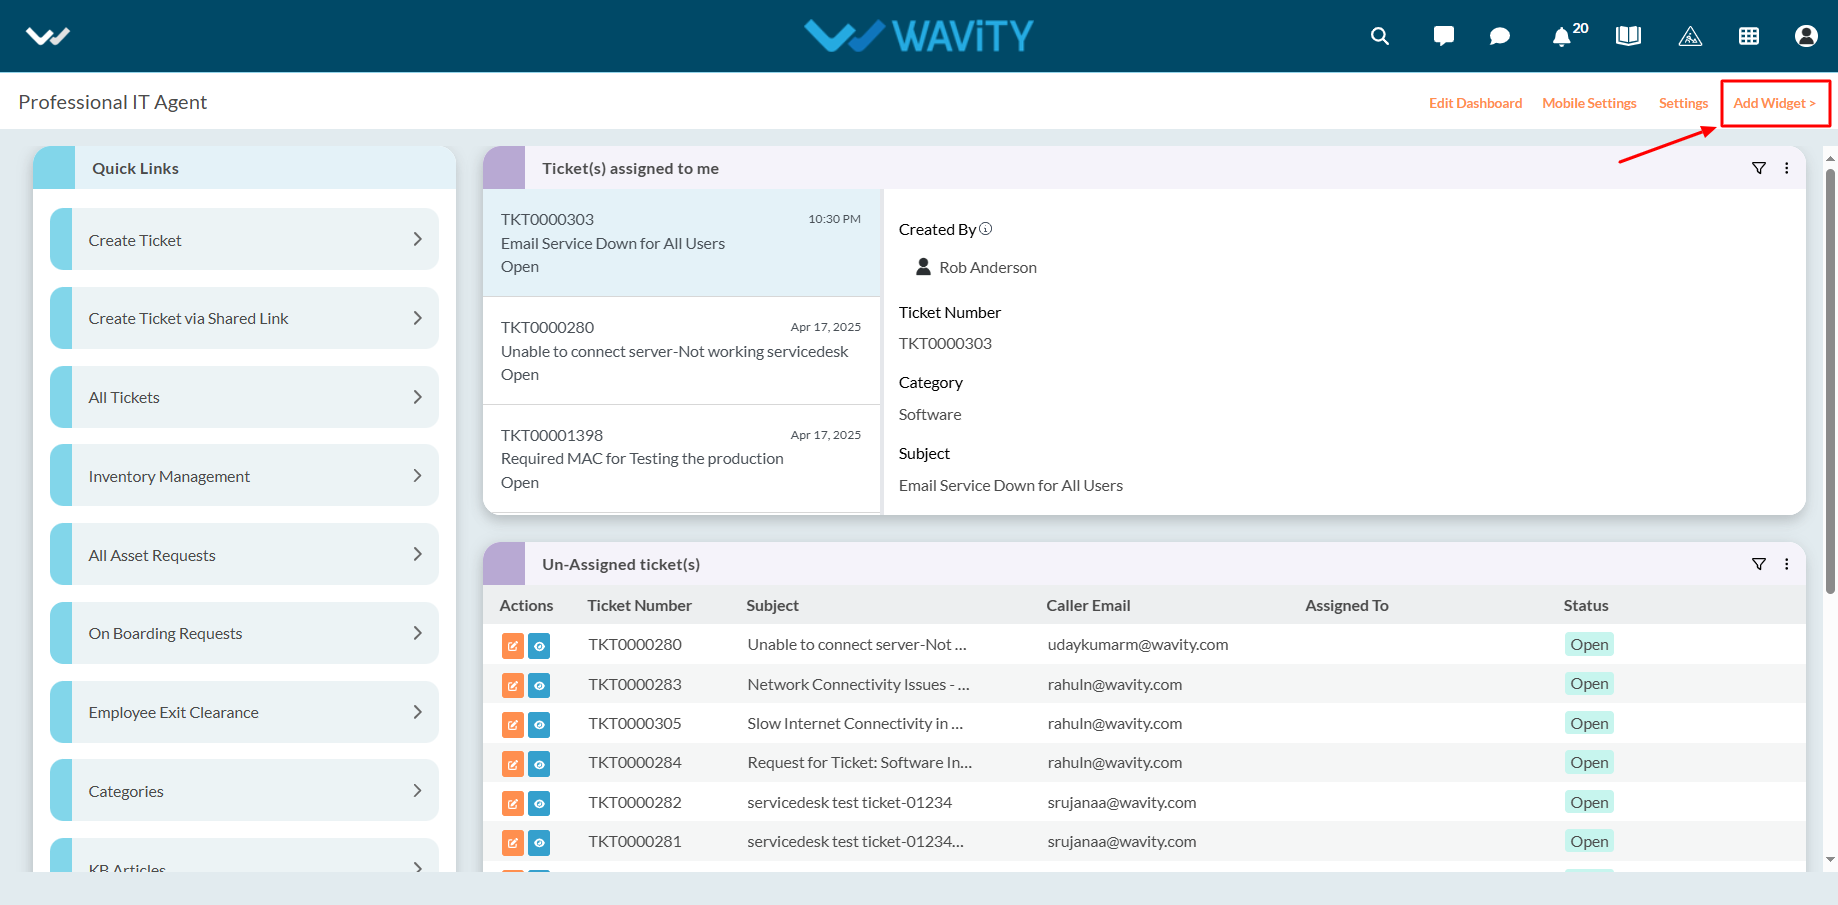
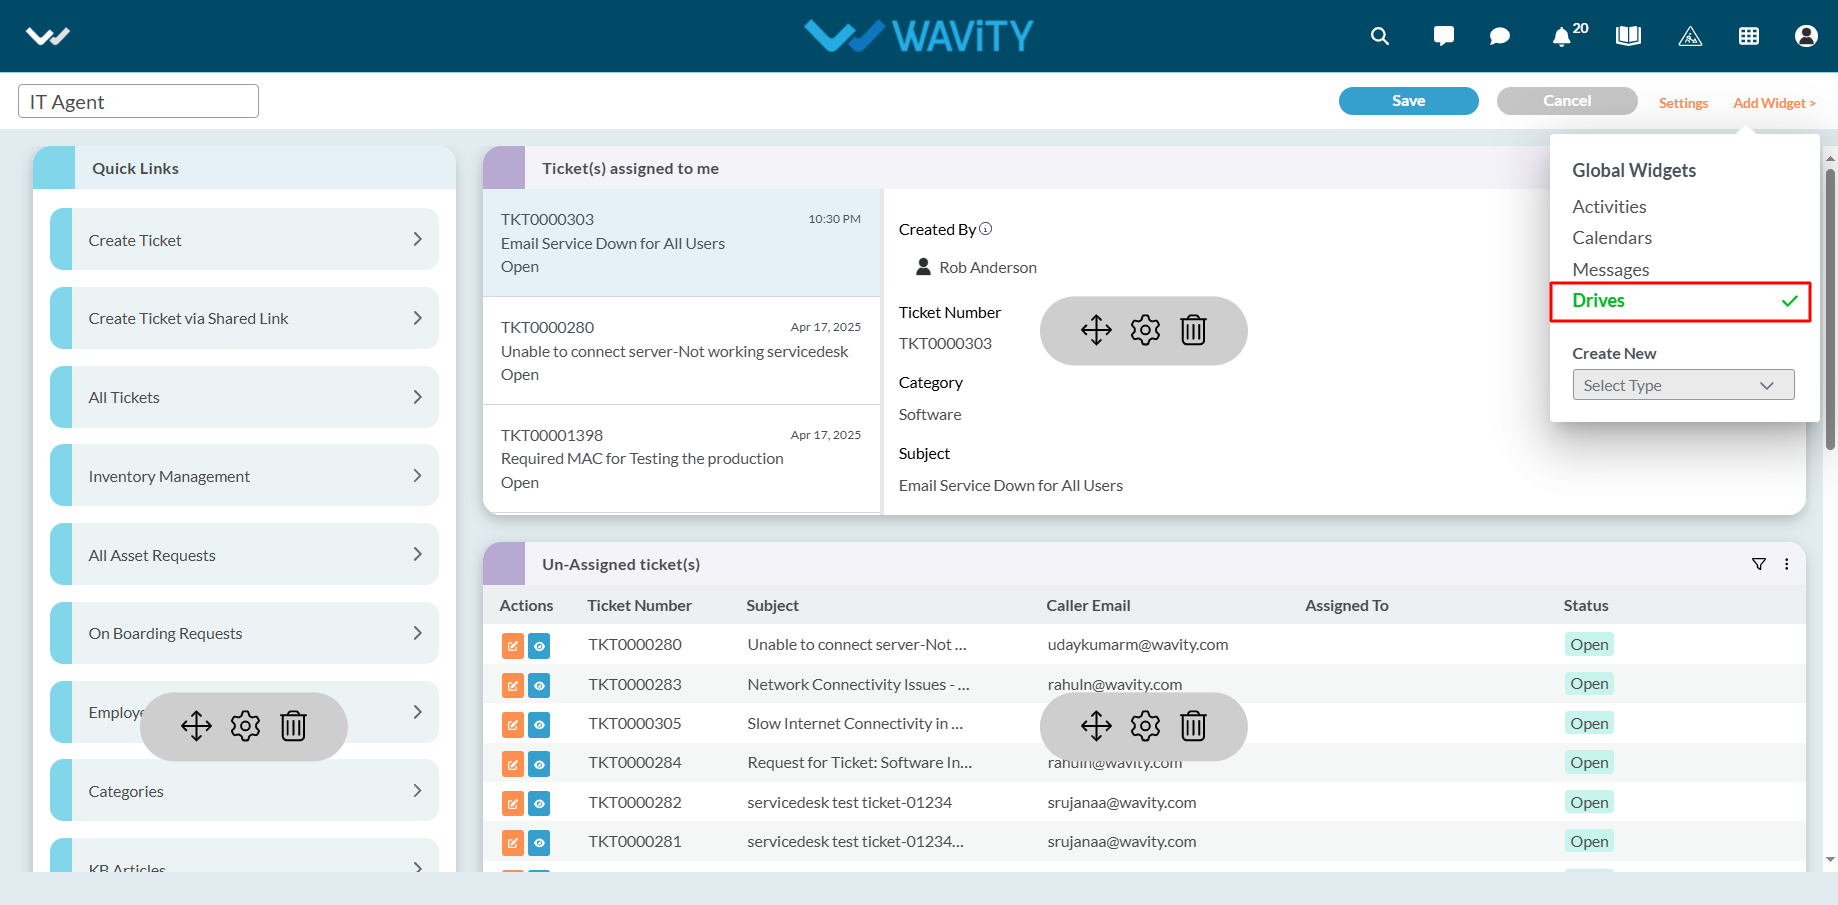
- Click on Add widget from your interface.
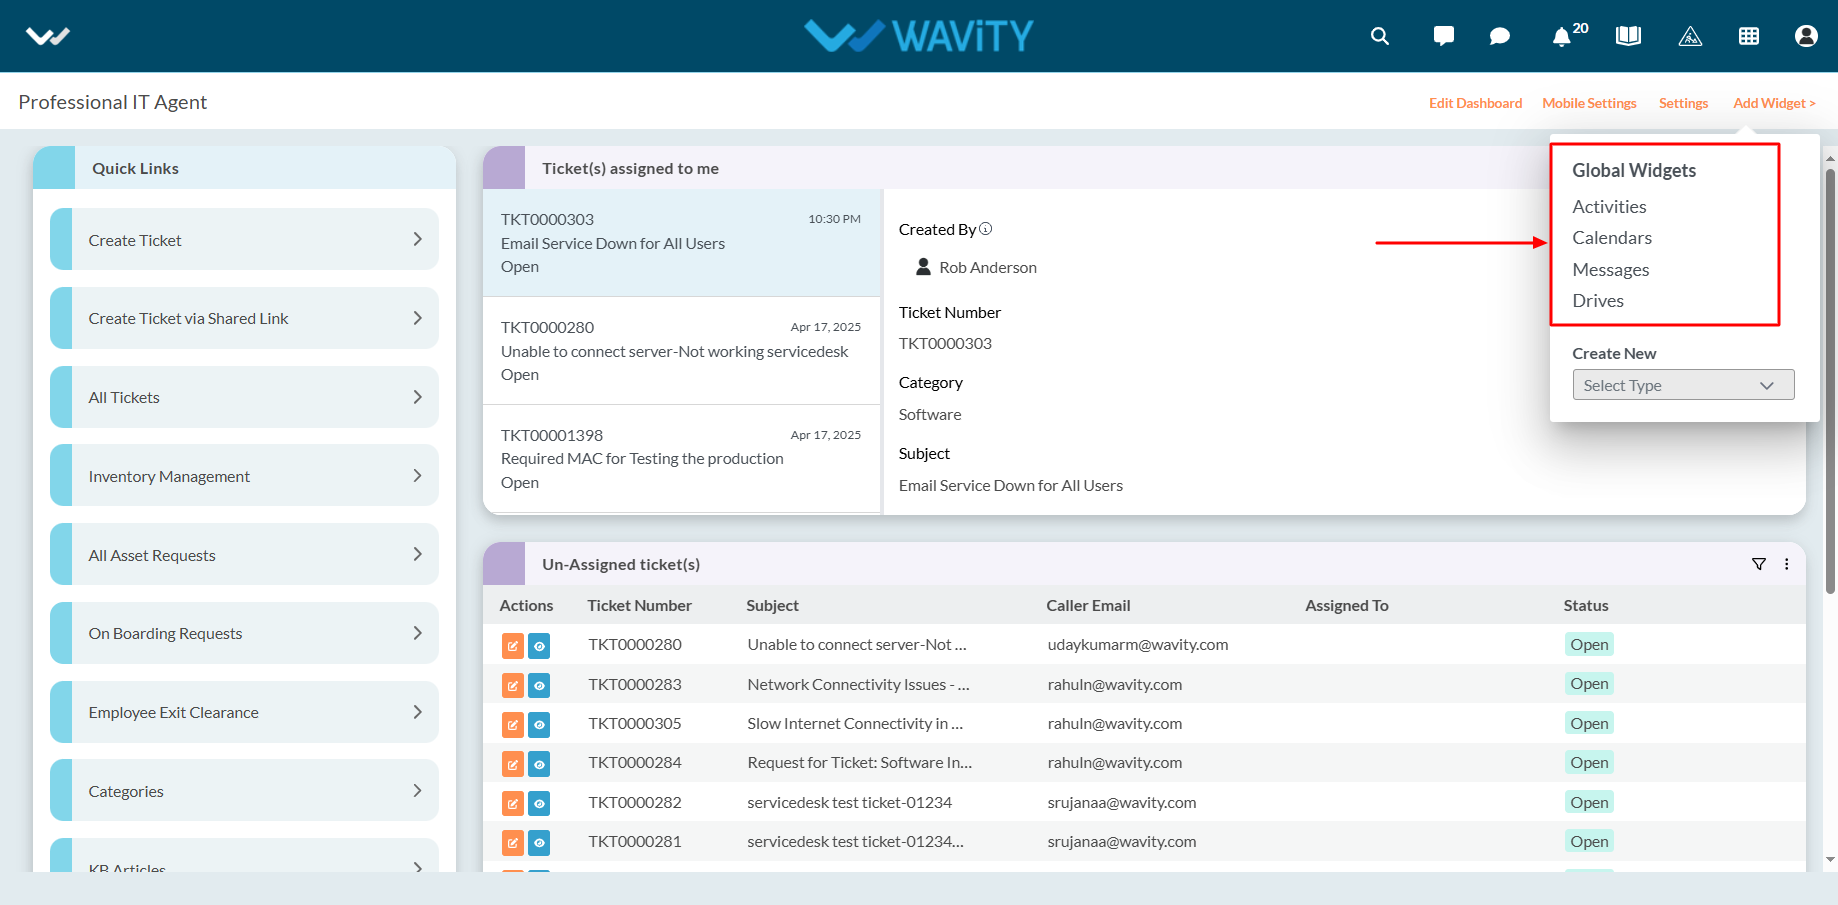
- All global widgets will be displayed as shown in the below image.
- Global widgets are are follows:
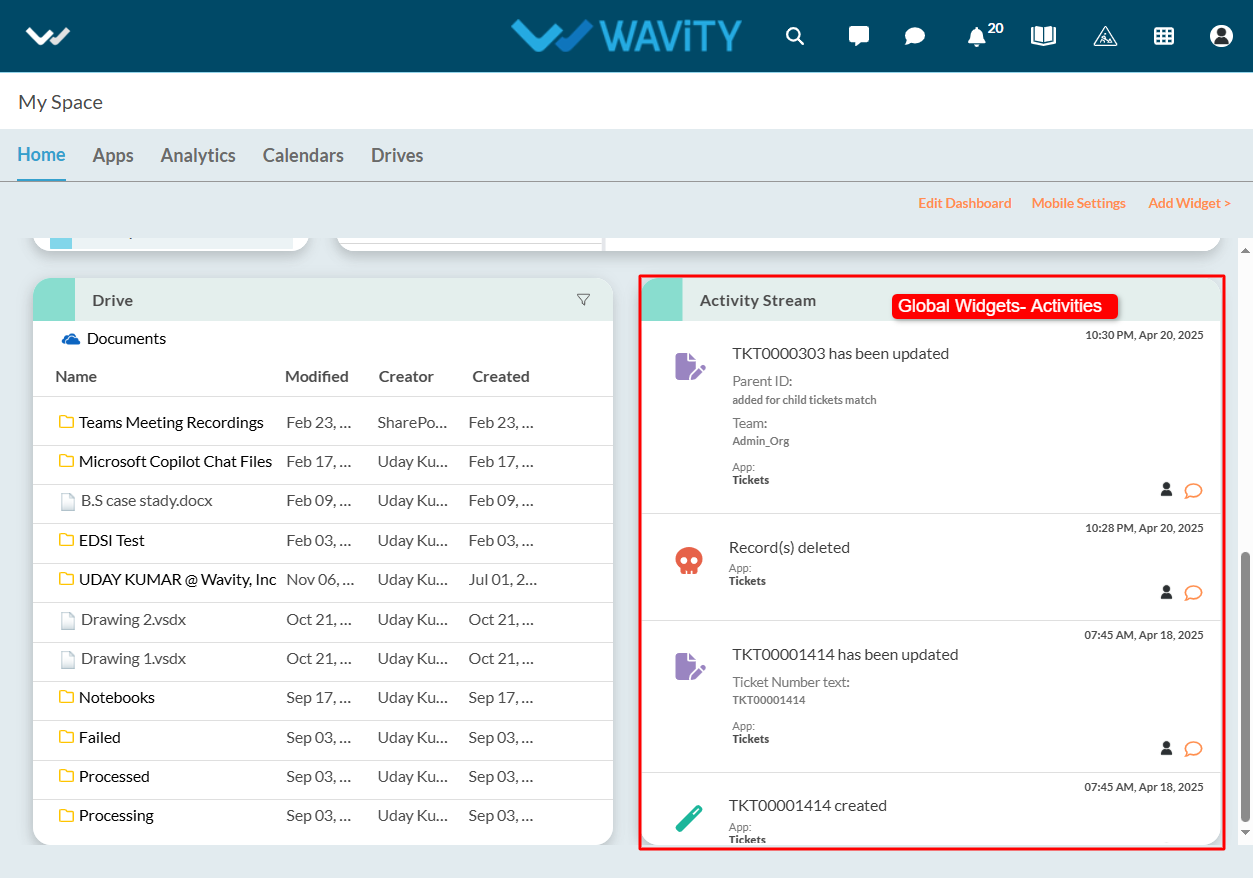
- Activities: Displays all platform activities including who performed the action, what was done, and when. Helps track engagement and updates across the system.
- Calendar: Shows events and schedules pulled from the linked calendar based on your Integration with your Google Calendar or Outlook Calendar.
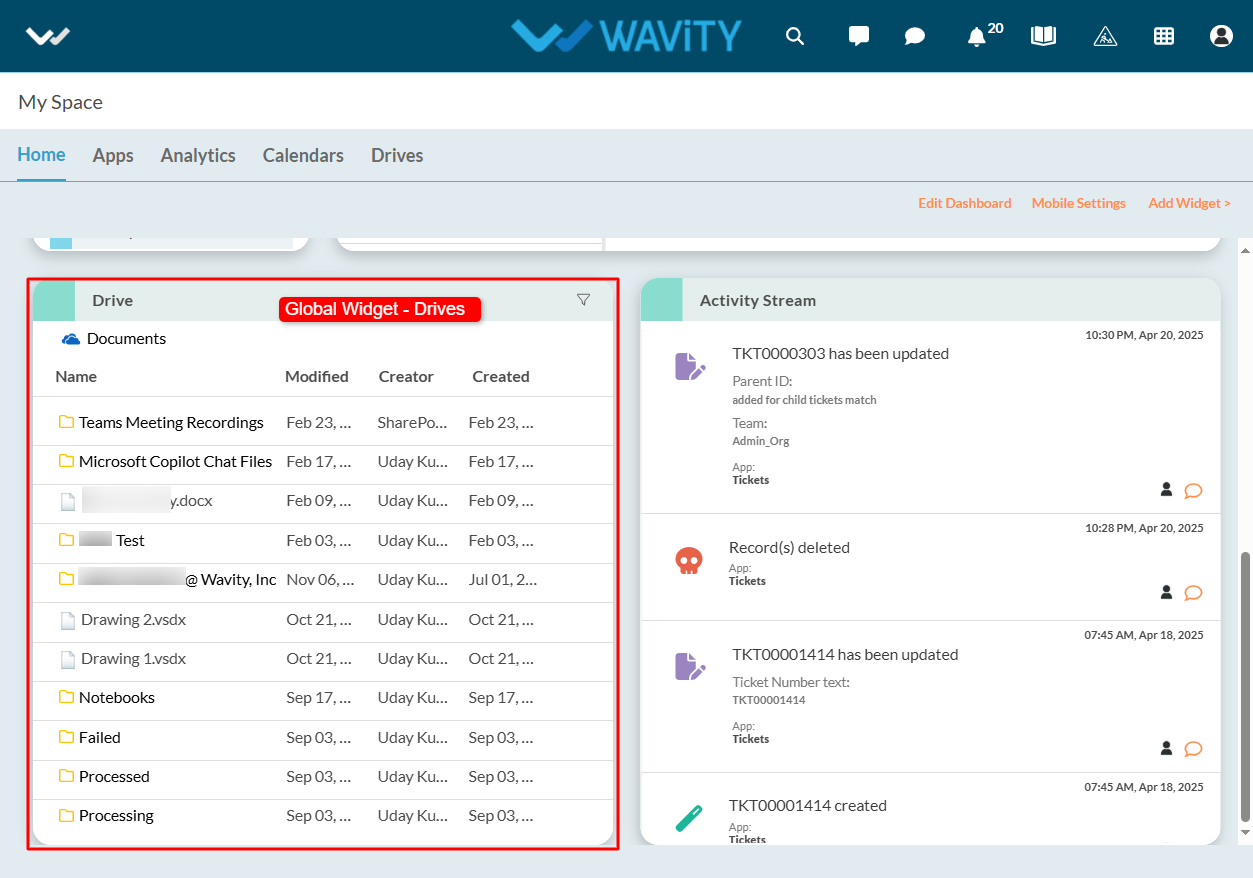
- Drives: Displays files stored in the connected drive accounts directly in the interface based on your Integration with your Google Drive or OneDrive.
- Messages: A built-in messaging tool enabling real-time communication among users within Wavity.
- Click on the widget you want to activate (e.g., Activities, Calendar, Drives, or Messages).
- Once selected, a green tick mark will appear next to the widget, indicating activation.
- Click Save to add the widget to your interface.
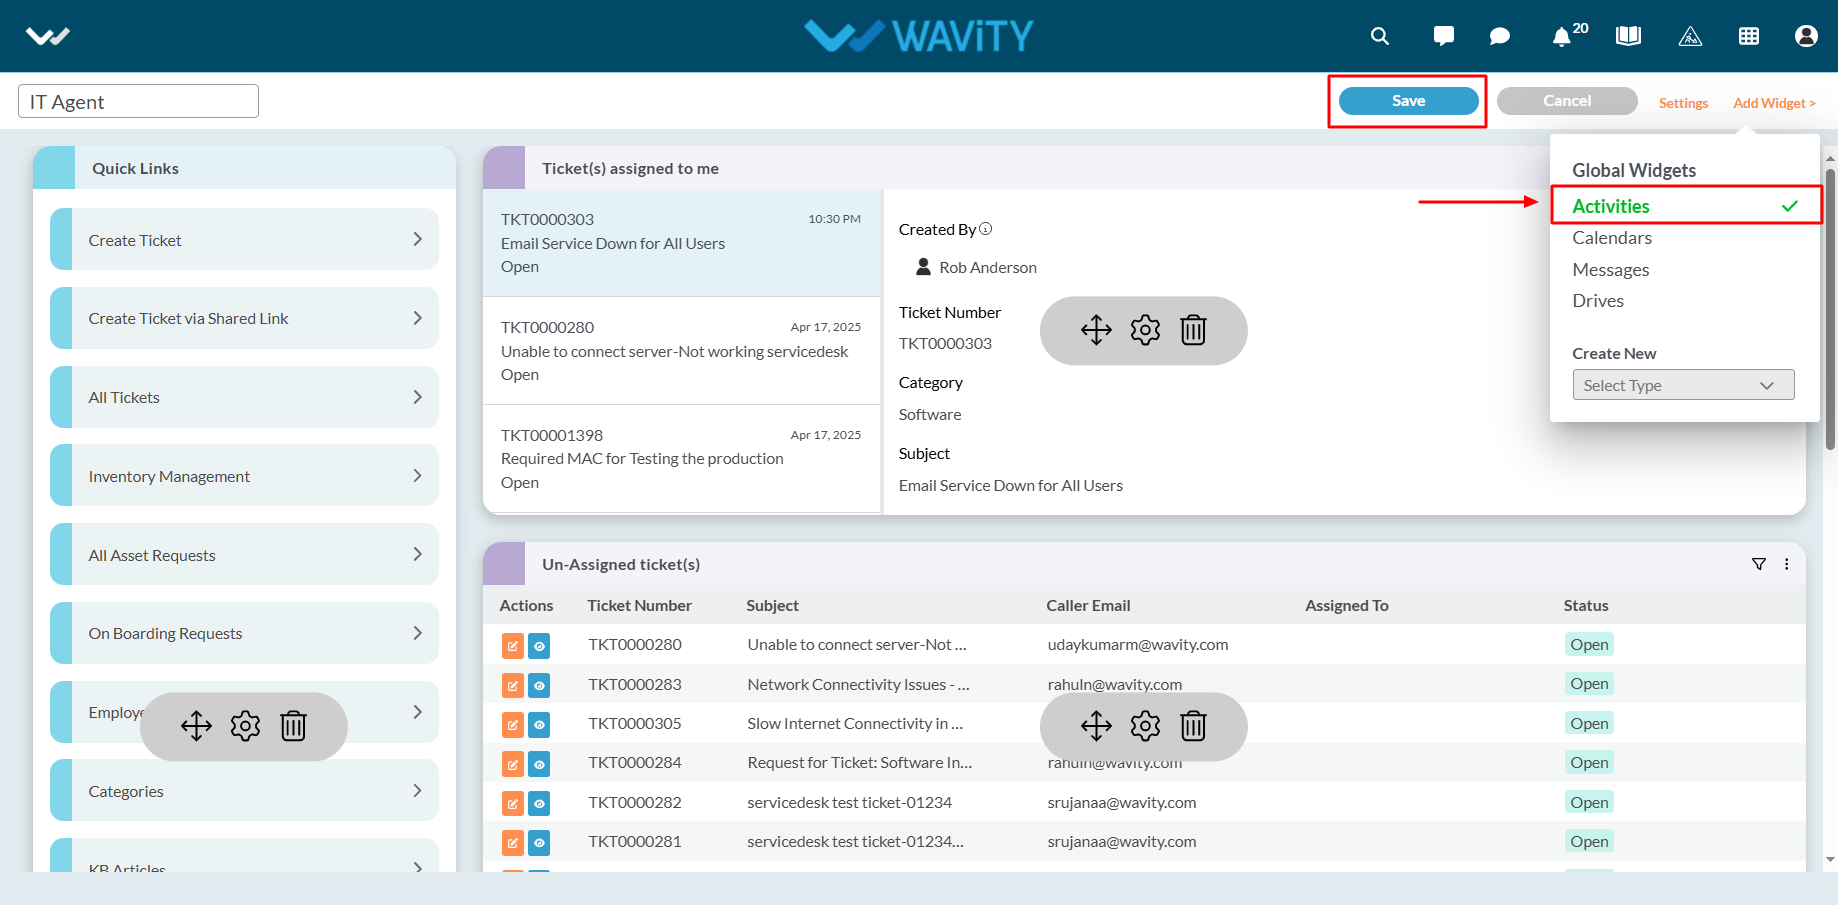
- When you activate the Activities Widget, it will display a list of recent actions taken across the platform—who did what and when.
- Click on the widget you want to activate (e.g., Activities, Calendar, Drives, or Messages).
- Once selected, a green tick mark will appear next to the widget, indicating activation.
- Click Save to add the widget to your interface.
- Activating the Drives Widget will show your cloud-stored files in an easy-to-access view.
- Similarly, you can enable and use the Calendar and Messages widgets for seamless scheduling and team collaboration.