Email Ticketing with Wbots: Setup and Configuration Guide
- WBots (Wavity Bots) allow you to automate workflows within hours, extending automation capabilities both within and beyond your organization. With WBots, you can seamlessly move data between applications based on the conditions you define.
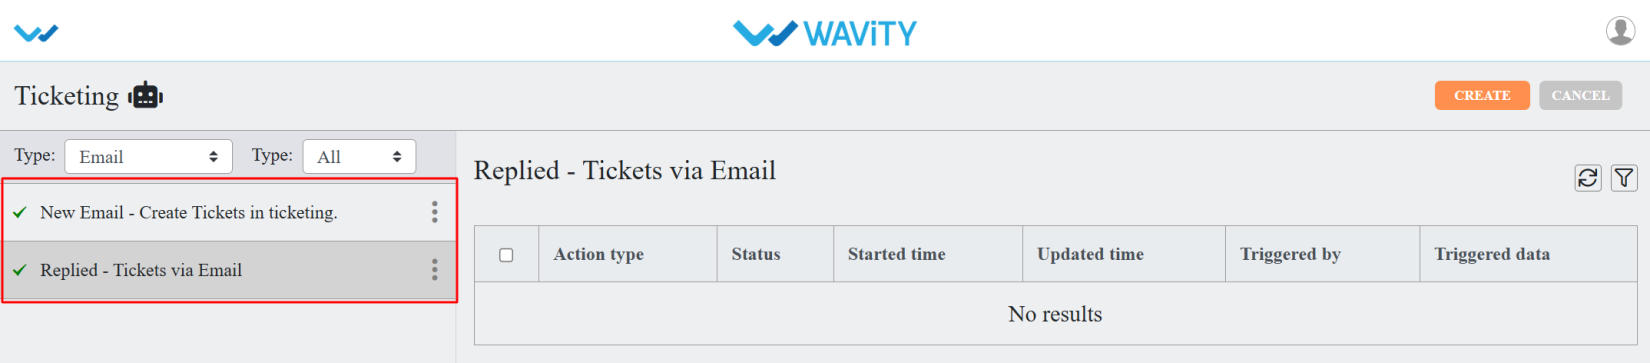
- In Wavity, tickets can be created via Email. To enable this functionality, you must integrate your Email with the Wavity platform.
- For integration steps, click on the link: How To Enable Email Integration with Microsoft Office 365 | Wavity
- For Email Ticketing, we need to configure the Wbot.
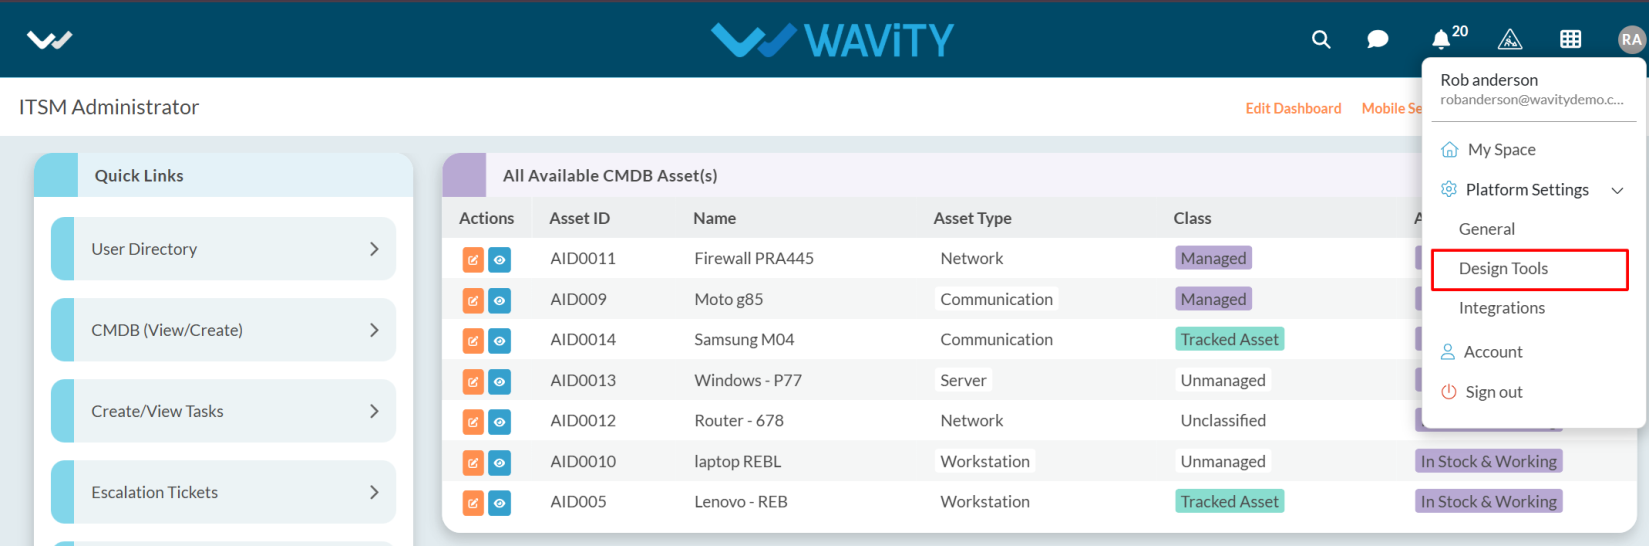
- Click on the Profile icon.

- Open Design Tools.
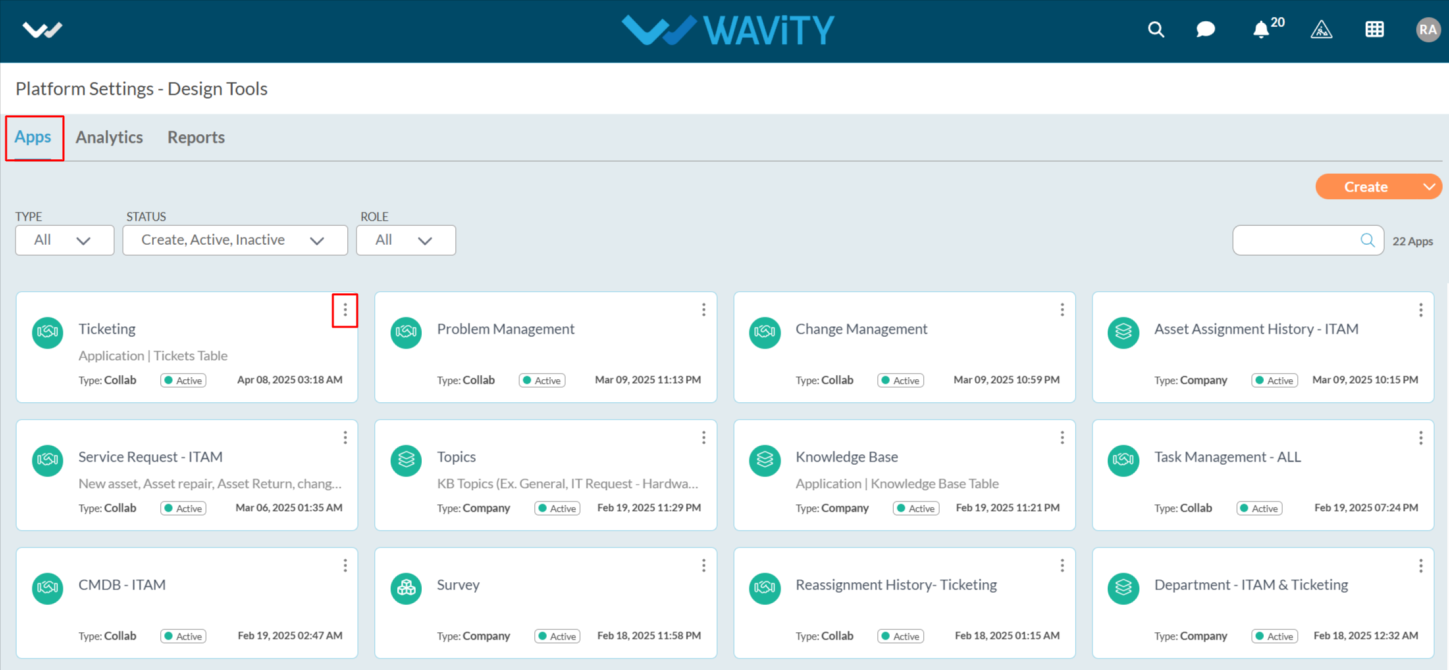
- Go to the Apps, pick the app you want, and click on the three dots.
- From the three-dot menu, choose Wbots.
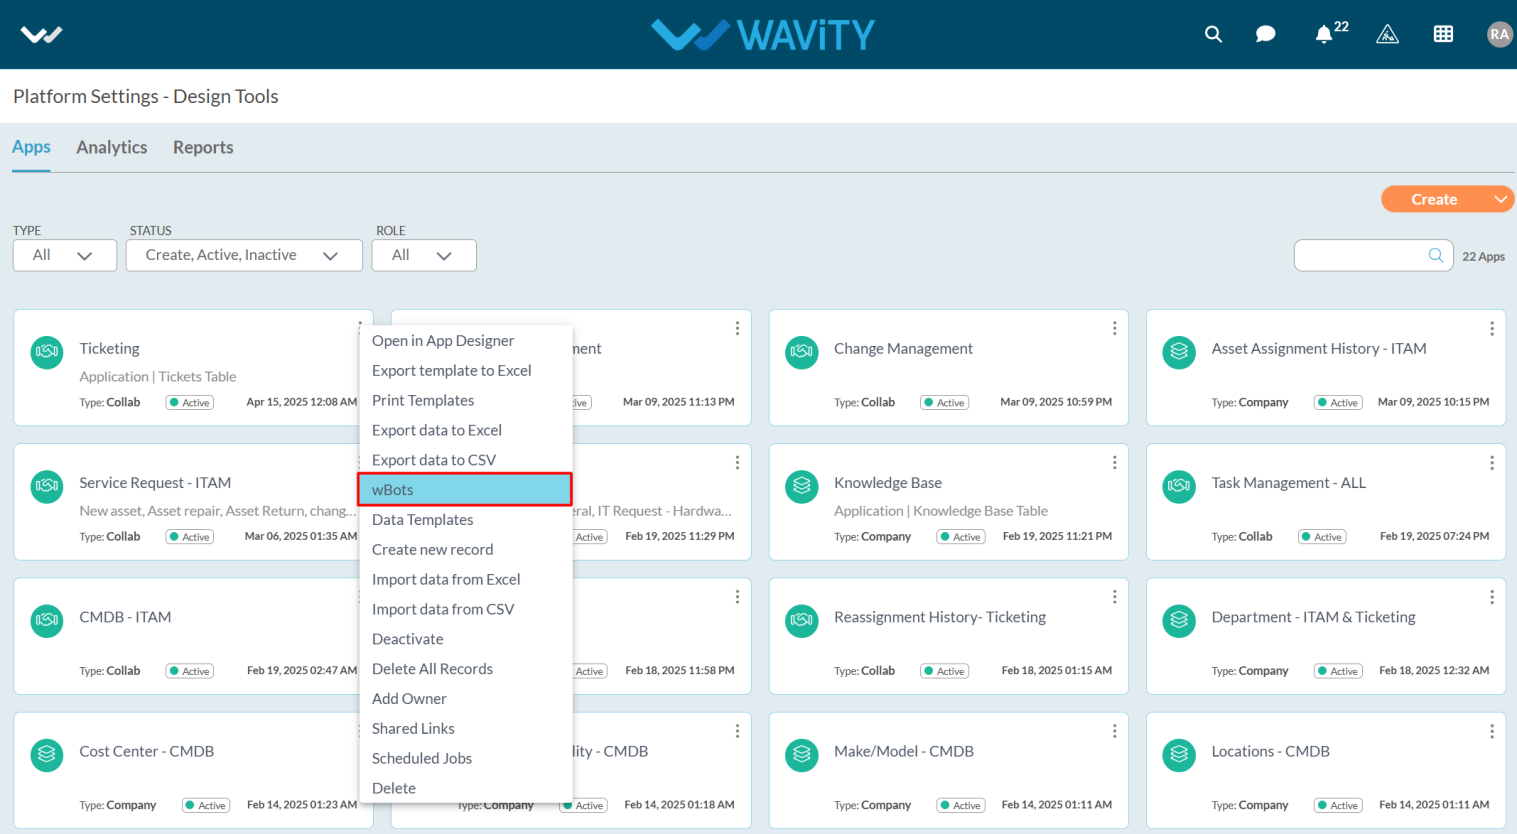
- After selecting the Wbots option, you will be directed to the Wbots Configuration page.
- Click on the Create button.

- Provide a Caption and Description to help easily identify the bot.
- In Start wBots when, select the email.
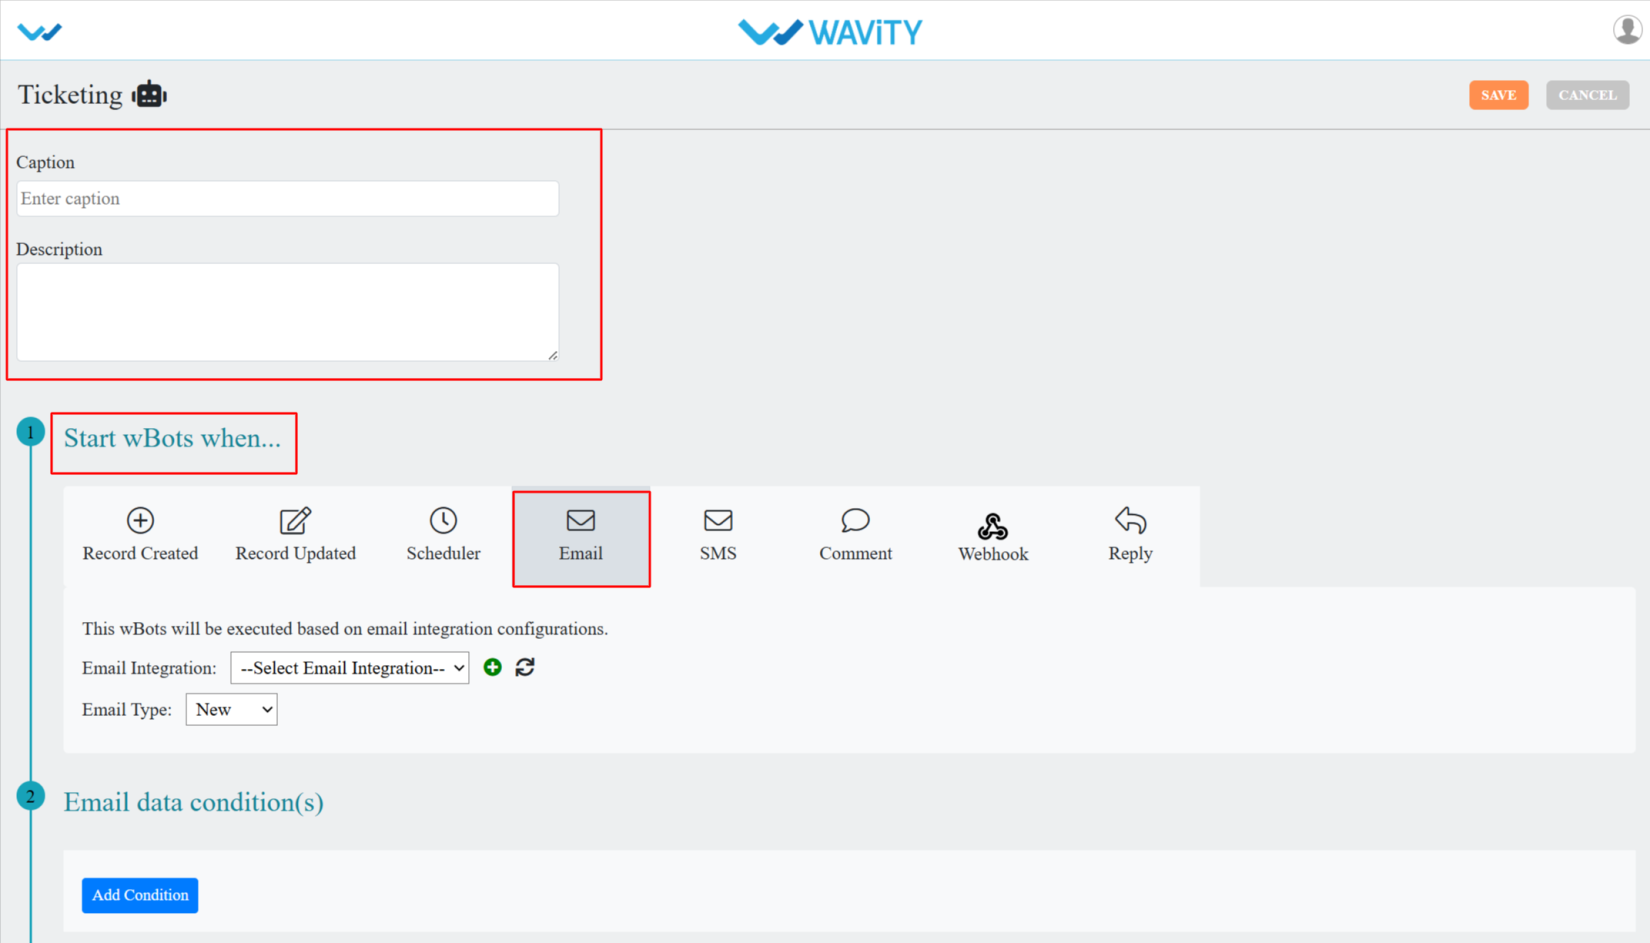
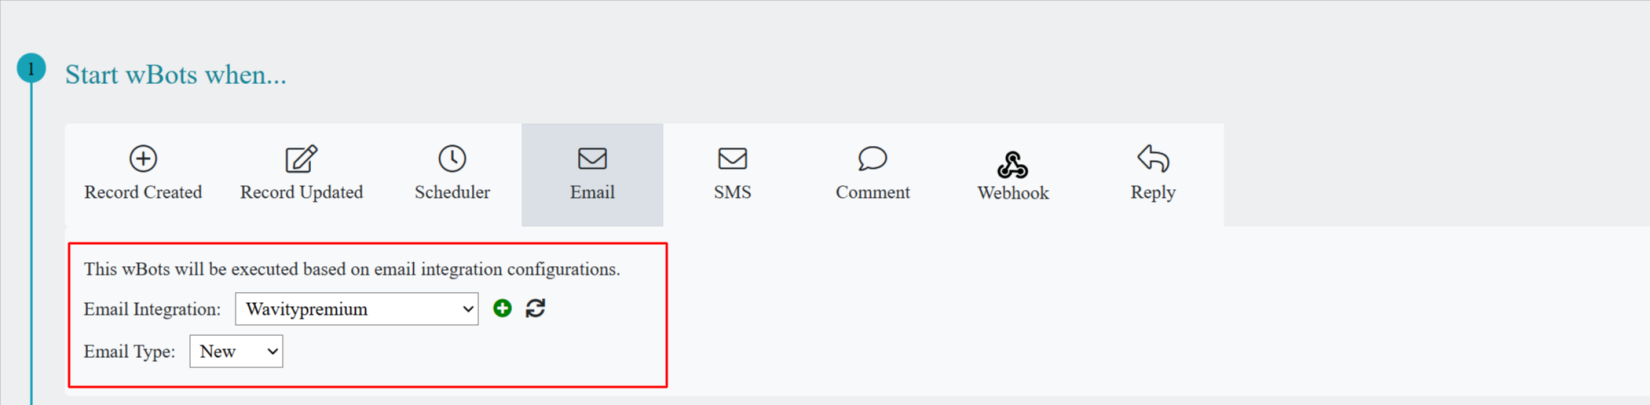
- Select your Email integration and Email type as New.
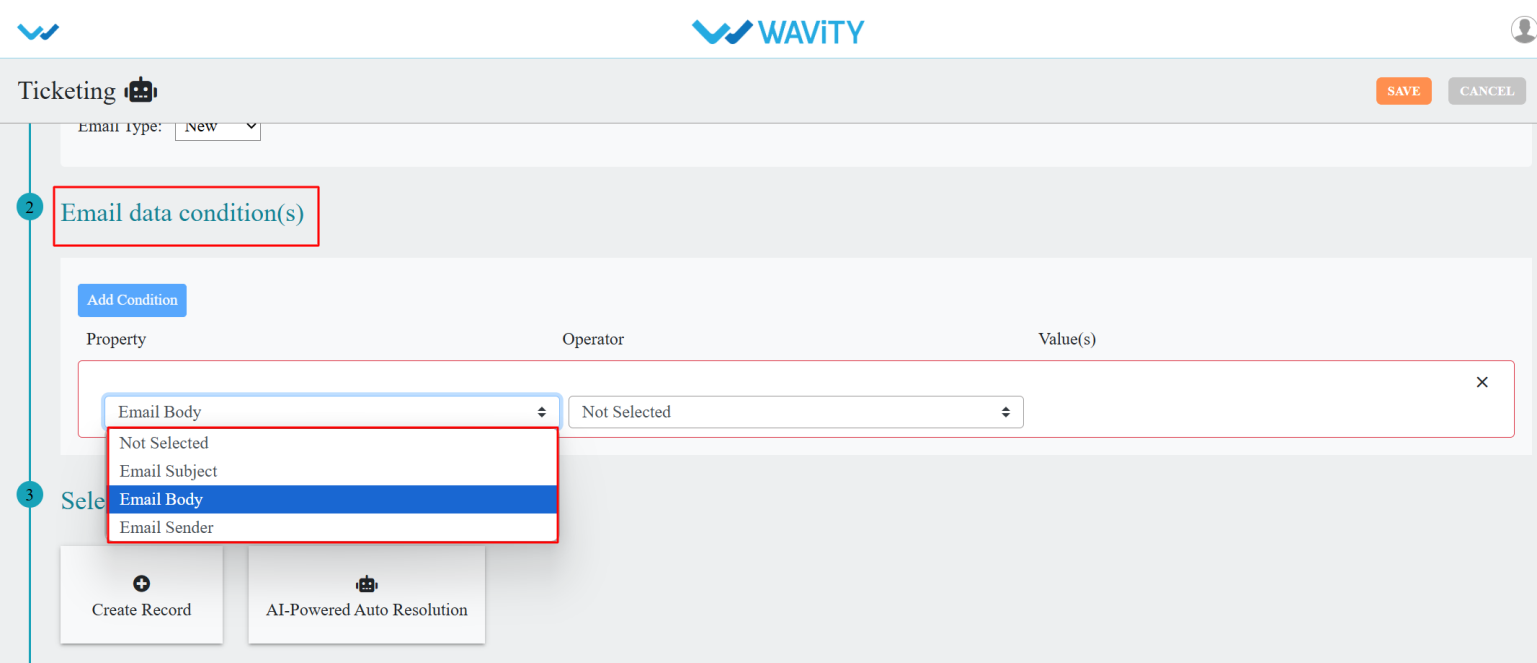
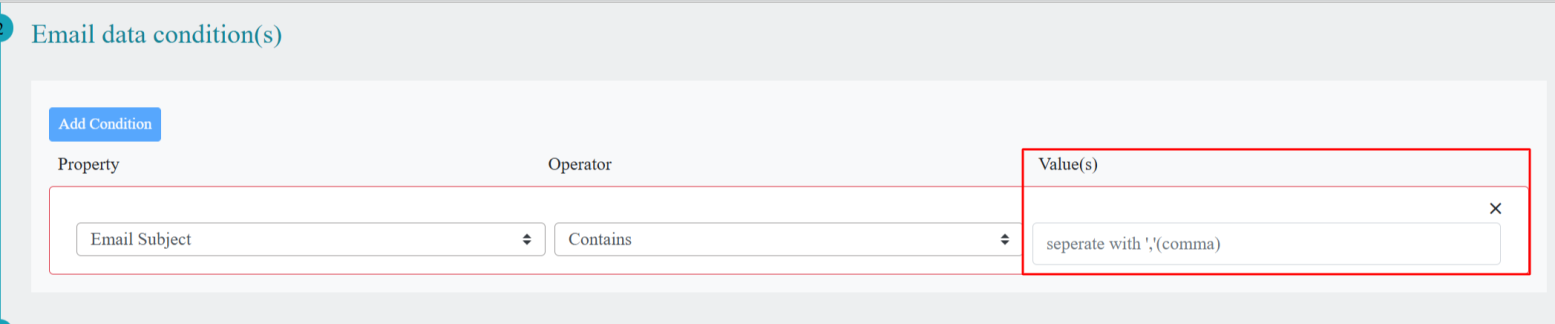
- Email Data Condition is considered important, as it determines when the bot will be triggered and a ticket will be created.
- Set an Email Data Condition to trigger the WBot based on your specified criteria.
- You need to select the property as per your requirement whether Email subject, Email body and Email sender.
- Select the operator from the dropdown’s option.
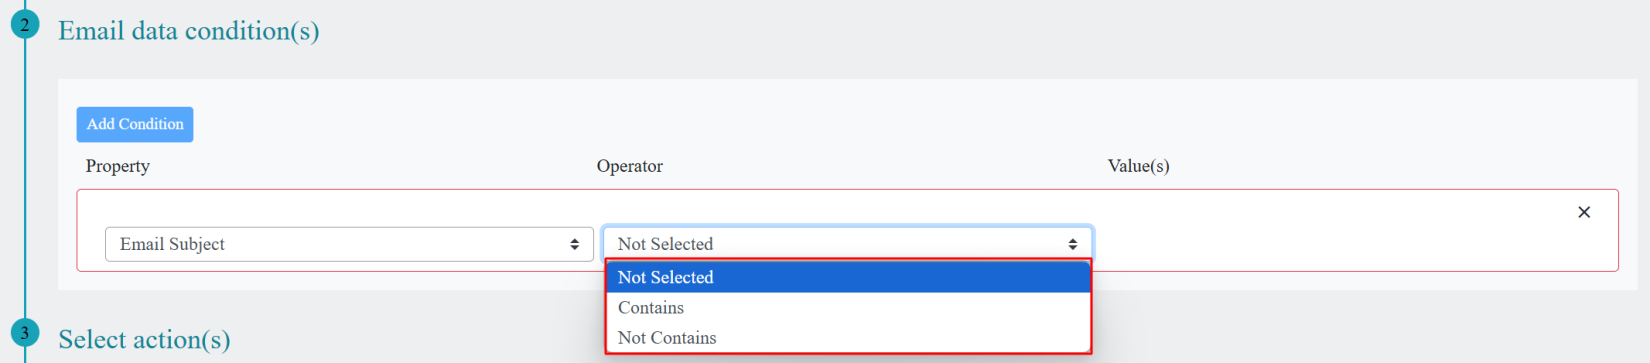
- Enter the value in value(s) field.
- In the Value(s) field, enter a Keyword. When the end user creates a ticket via email, the bot will detect this keyword and trigger the ticket creation process.
- In the Select action(s) section, click on Create Record and choose the options based on your requirements.
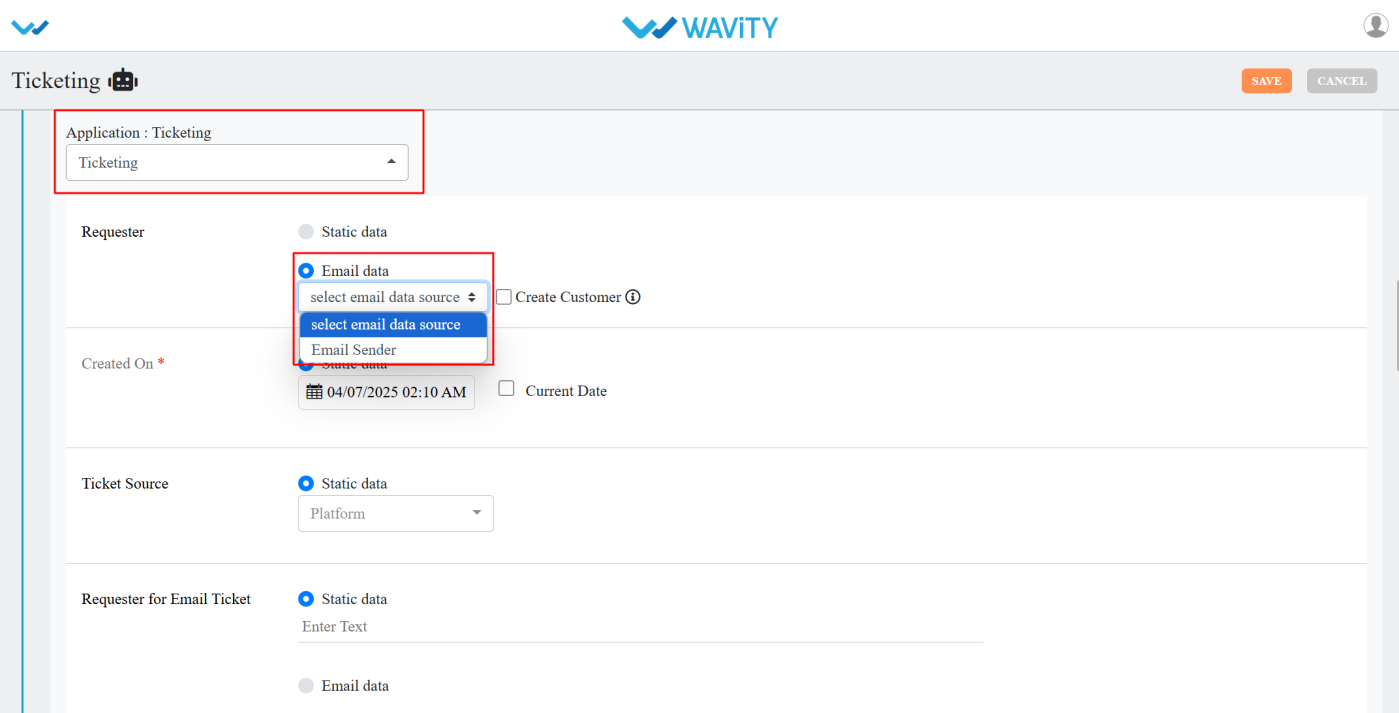
- Select the application where the record should be created via email.
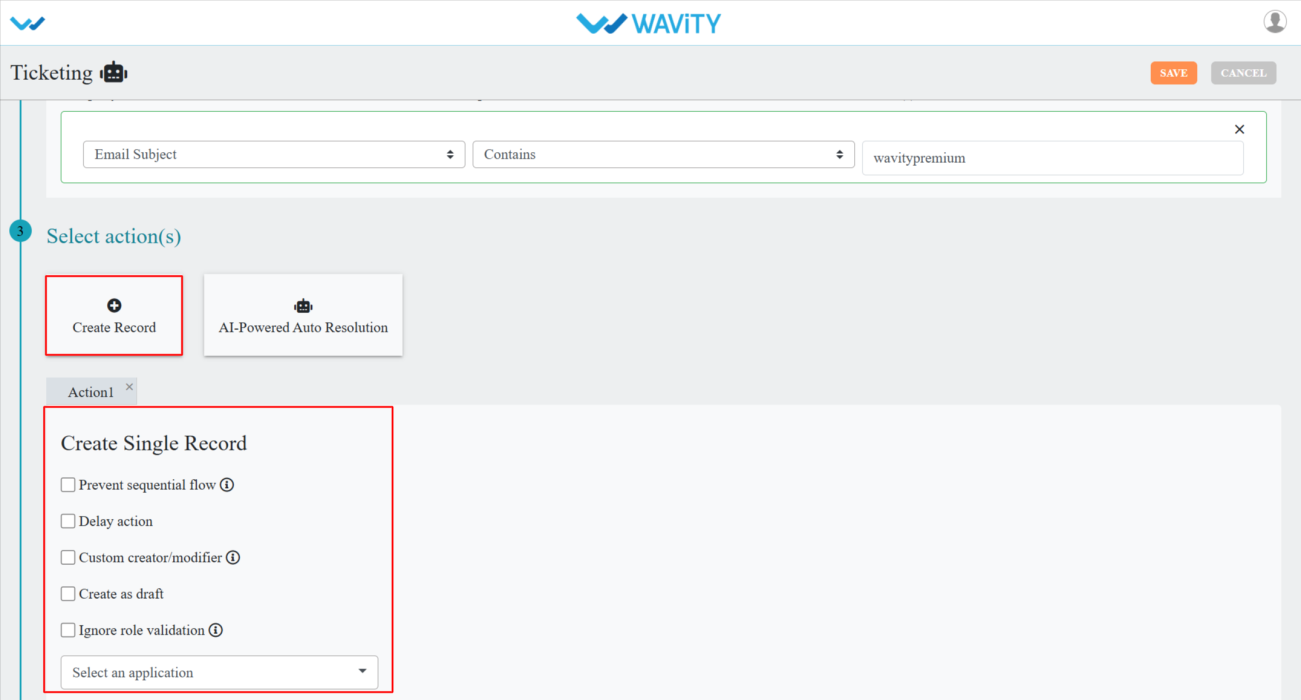
- Select required the details as per your requirement.
- After selecting the actions, click on the save button.
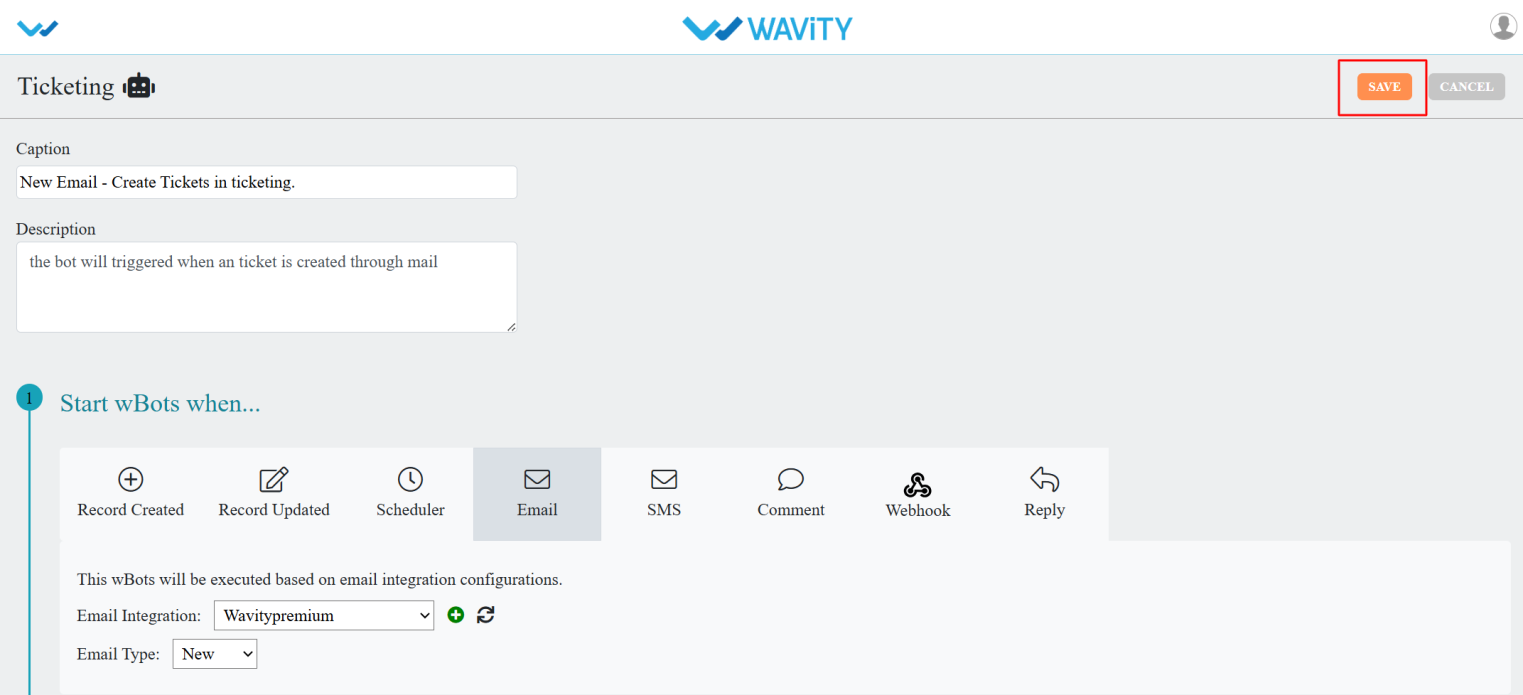
- You can see the Wbot is in active mode.