How to create a new Macro?
- The Wavity platform provides Macros functionality which is a set of predefined sequences of actions or commands that can be executed automatically to perform repetitive tasks efficiently. They help streamline workflows, reduce manual effort, and ensure consistency in handling routine processes.
- Wavity Macros offer full customization, allowing you to tailor them to your specific needs and workflow. Whether it's inserting predefined responses, updating ticket statuses, or assigning tickets to the right team members, Wavity Macros can be customized to optimize your ITSM processes.
Adding a New Macro:
- Note: Only admin can create or edit Macros in Wavity.
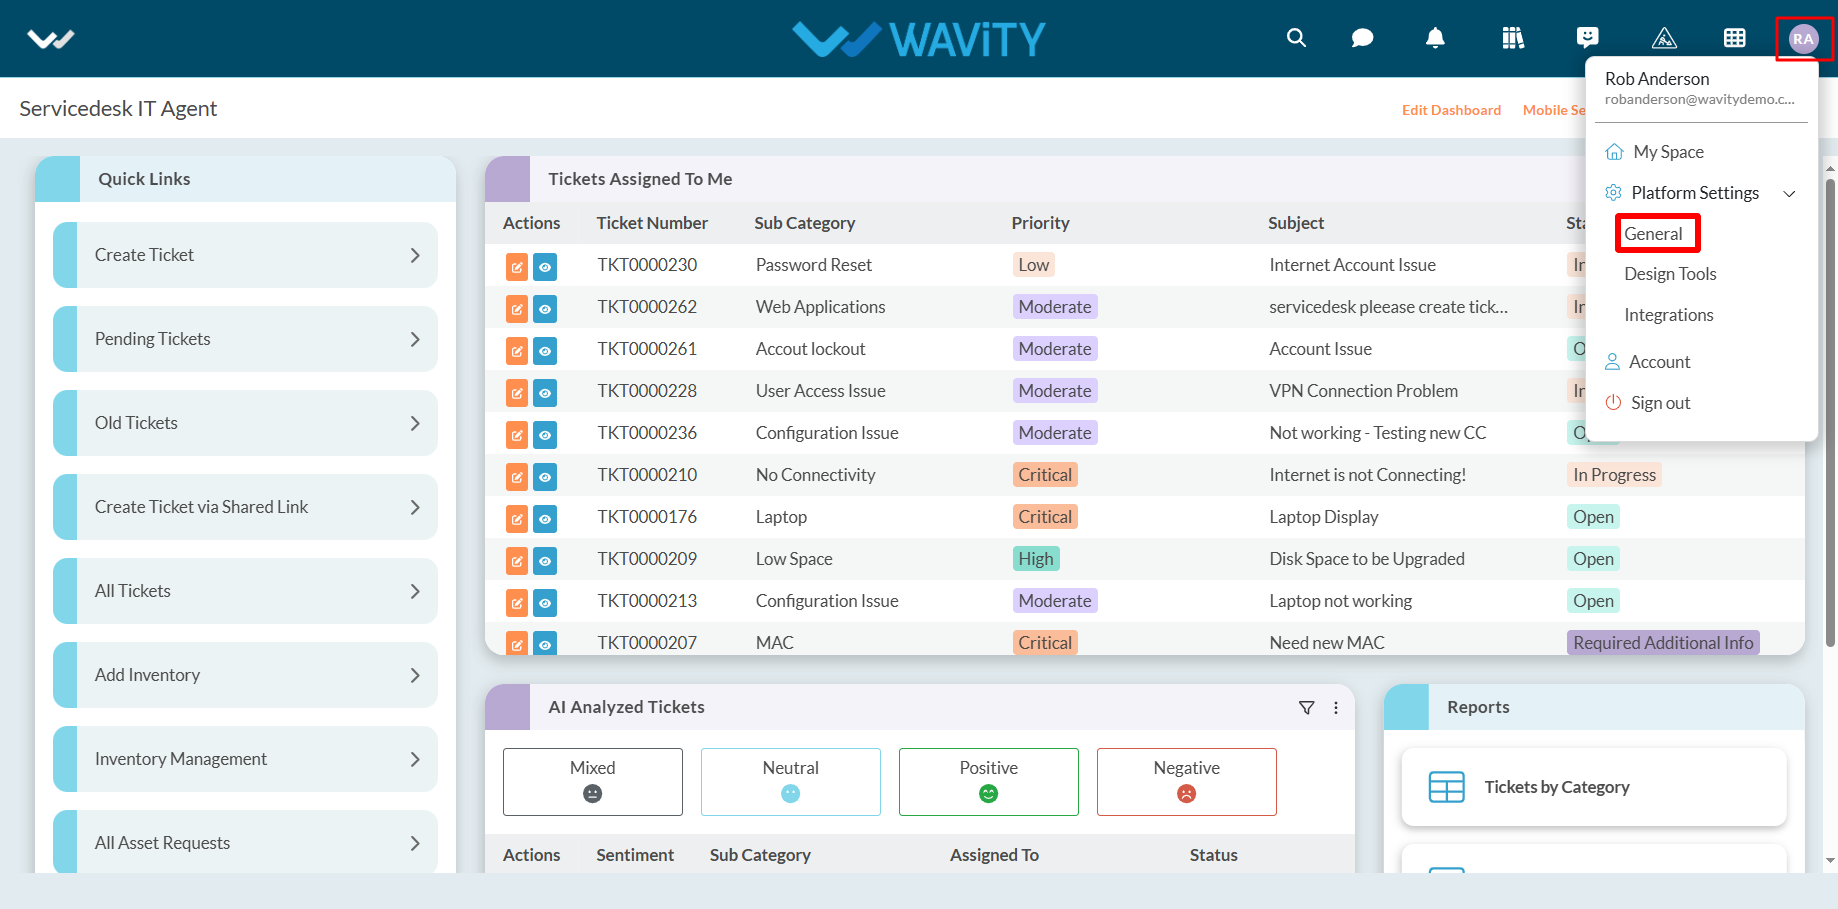
- Navigate to “General” as shown in below image.
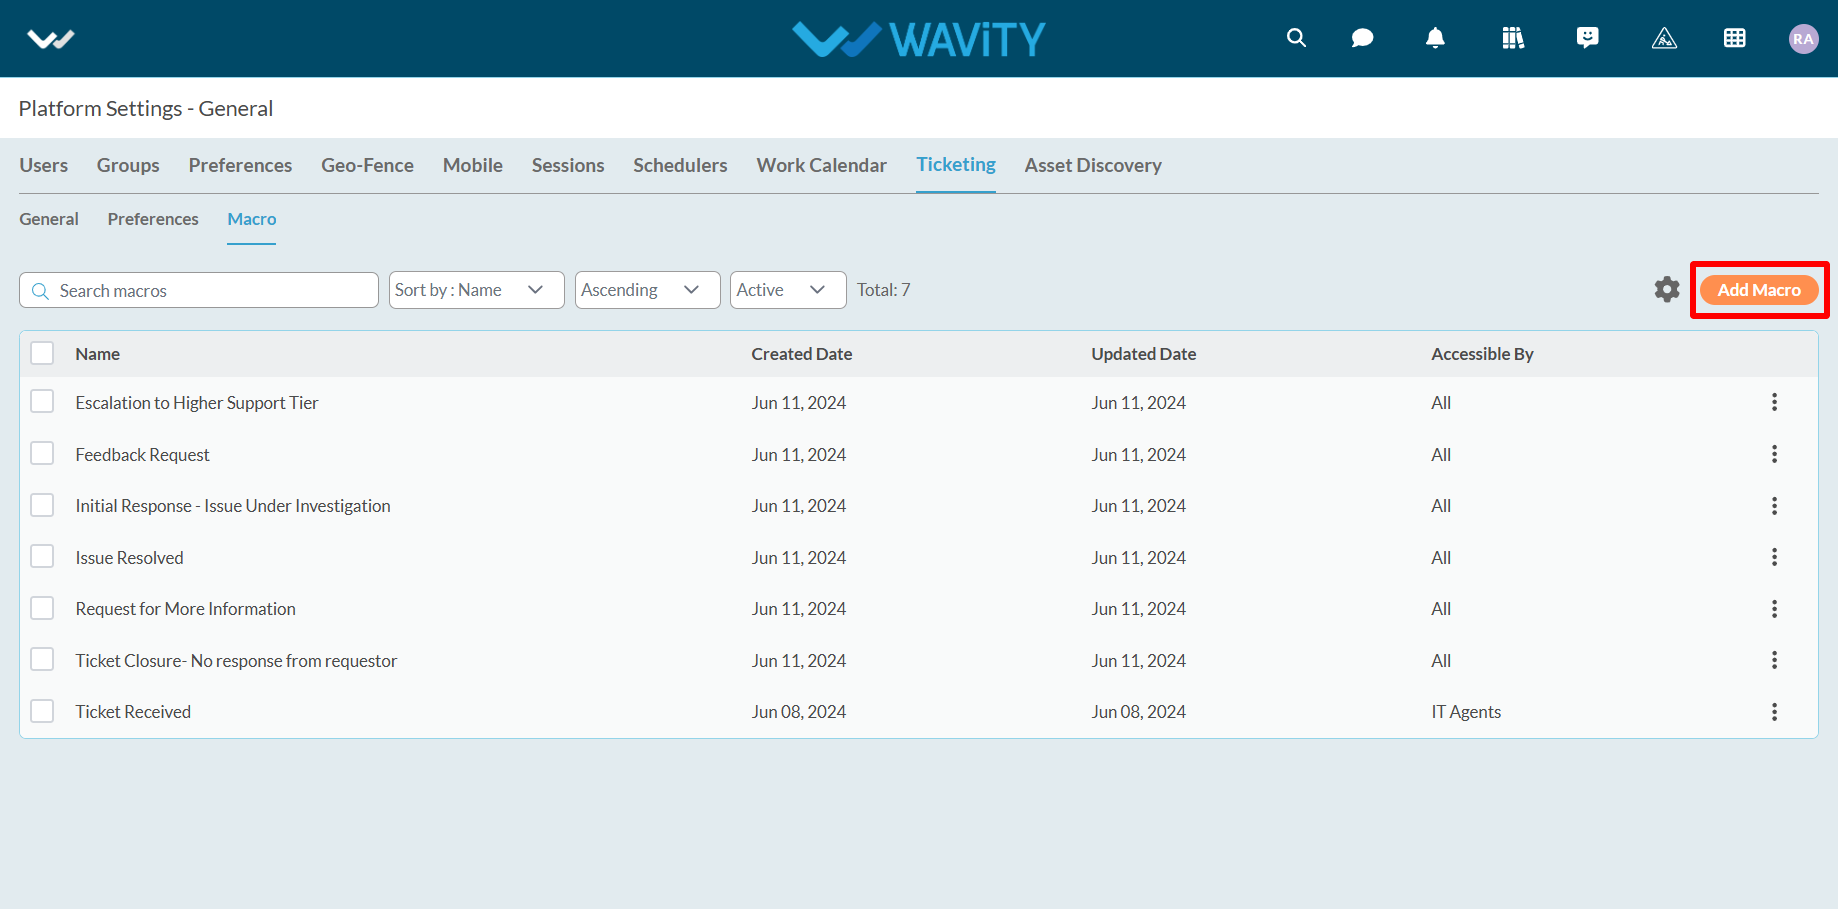
- Click on “Macros” under ‘Ticketing’ section.

- Click on “Add Macro” button as shown in below image.
- Provide the Title and Description of the new macro.
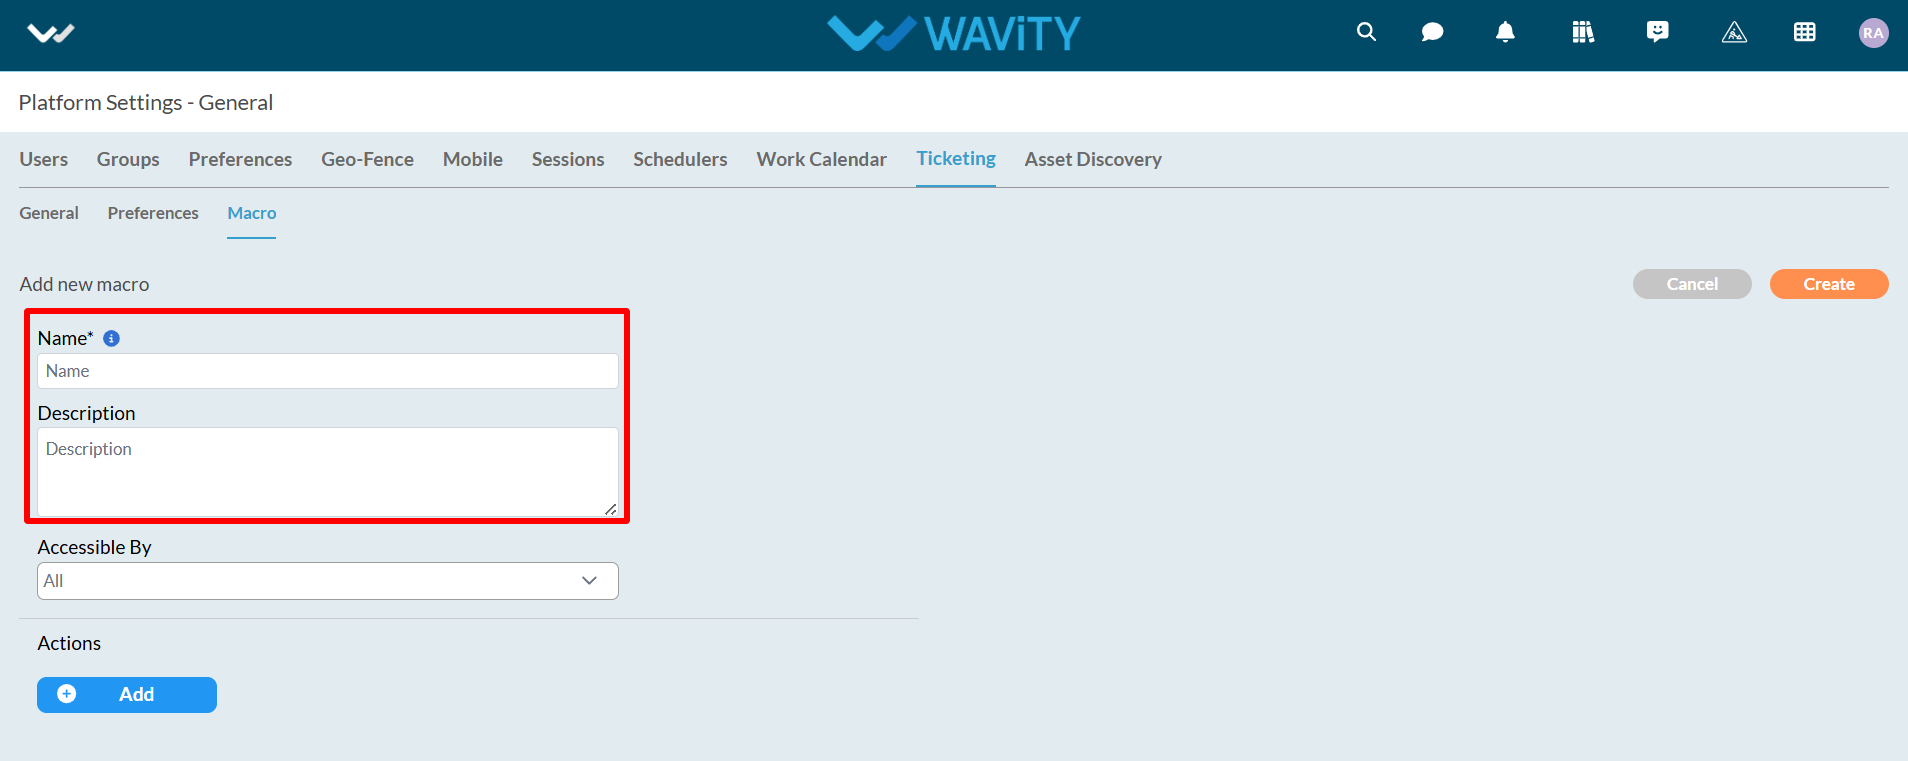
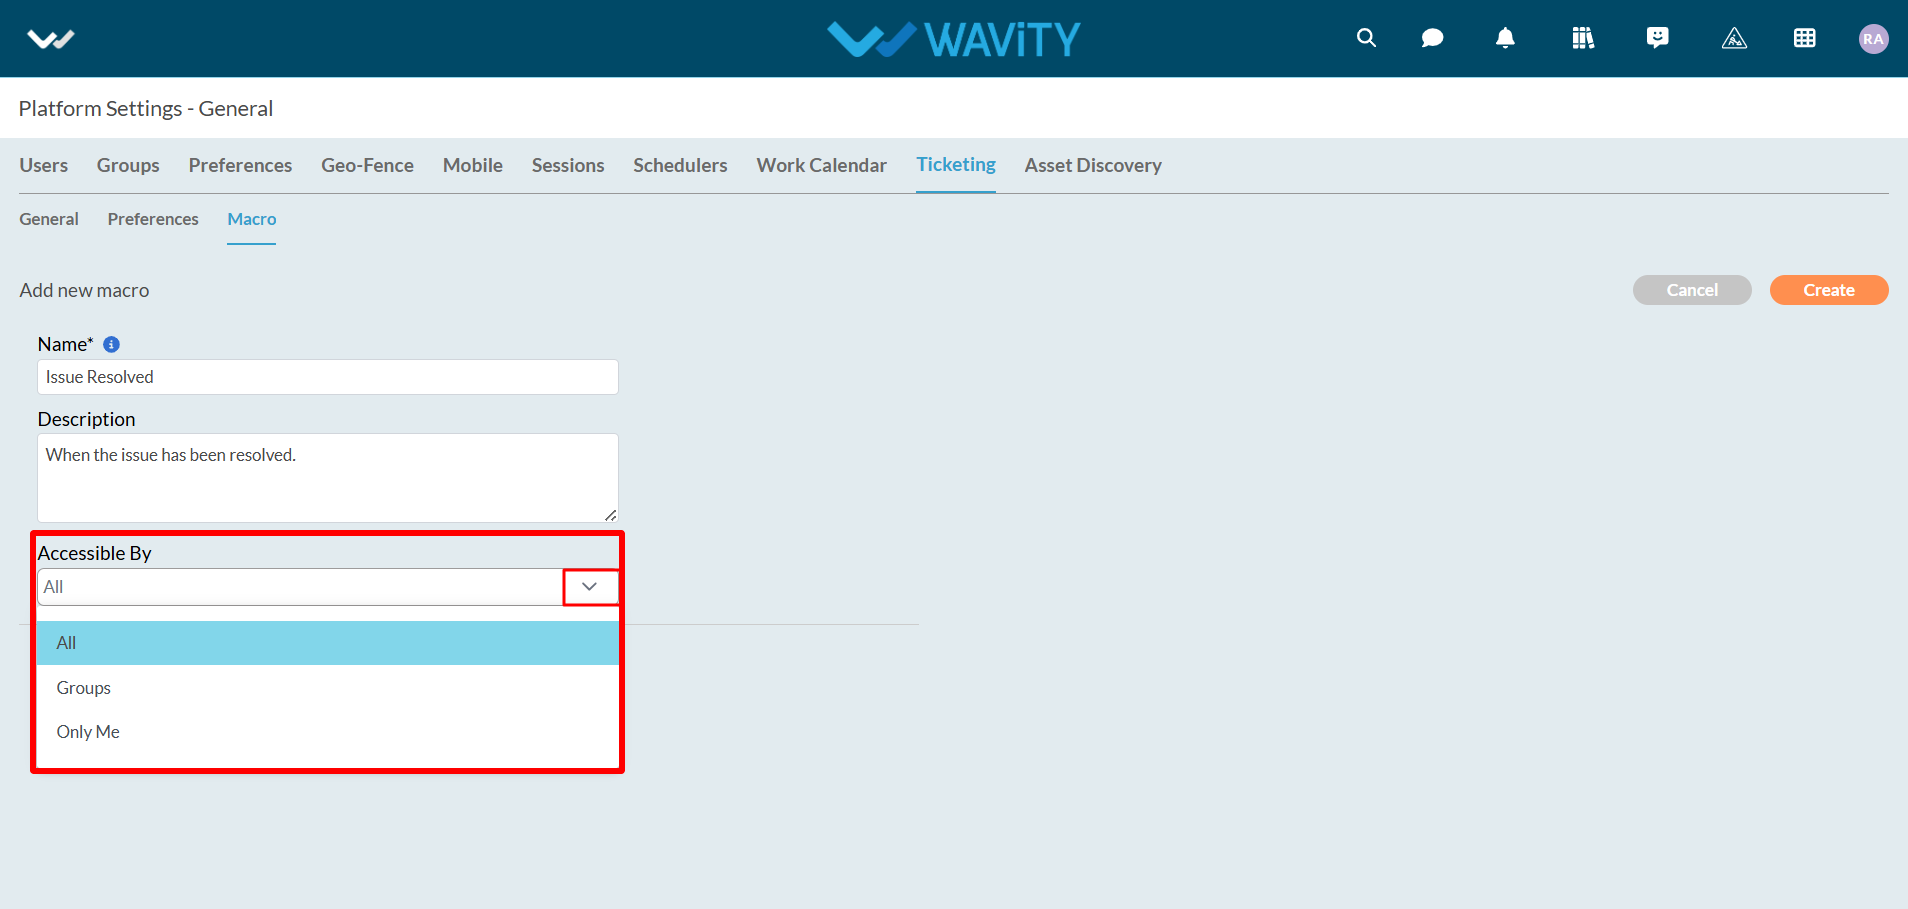
- Now, select the accessibility options from the dropdown. Accessible users will be able to execute the macros.
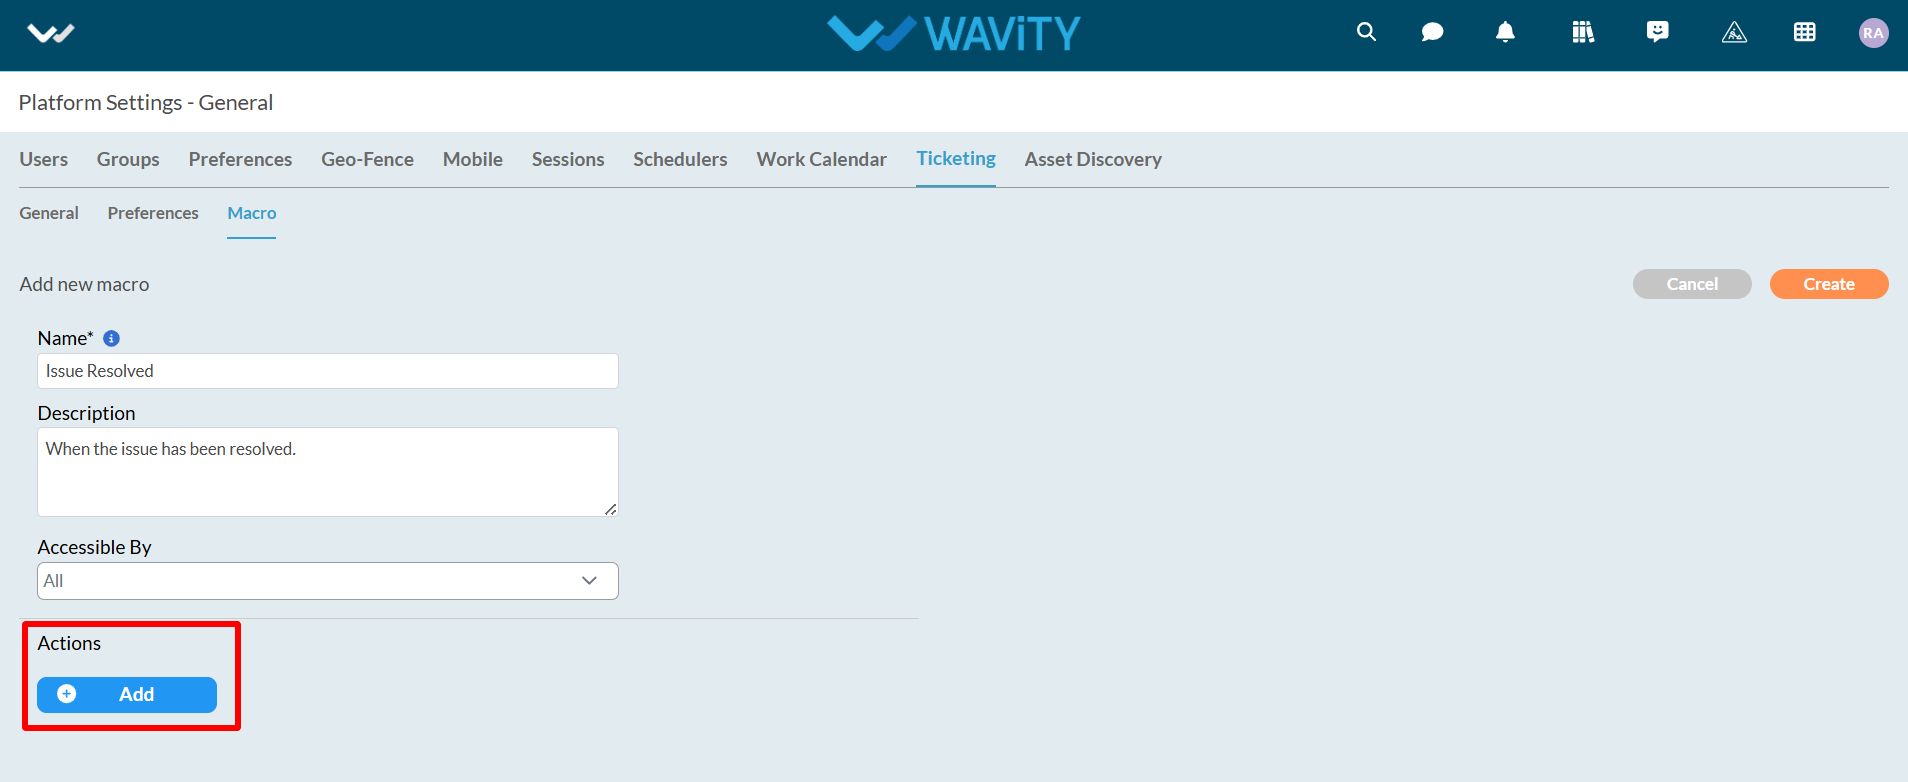
- Click on "Add" as shown below. A maximum of 5 actions can be executed for an individual macro.
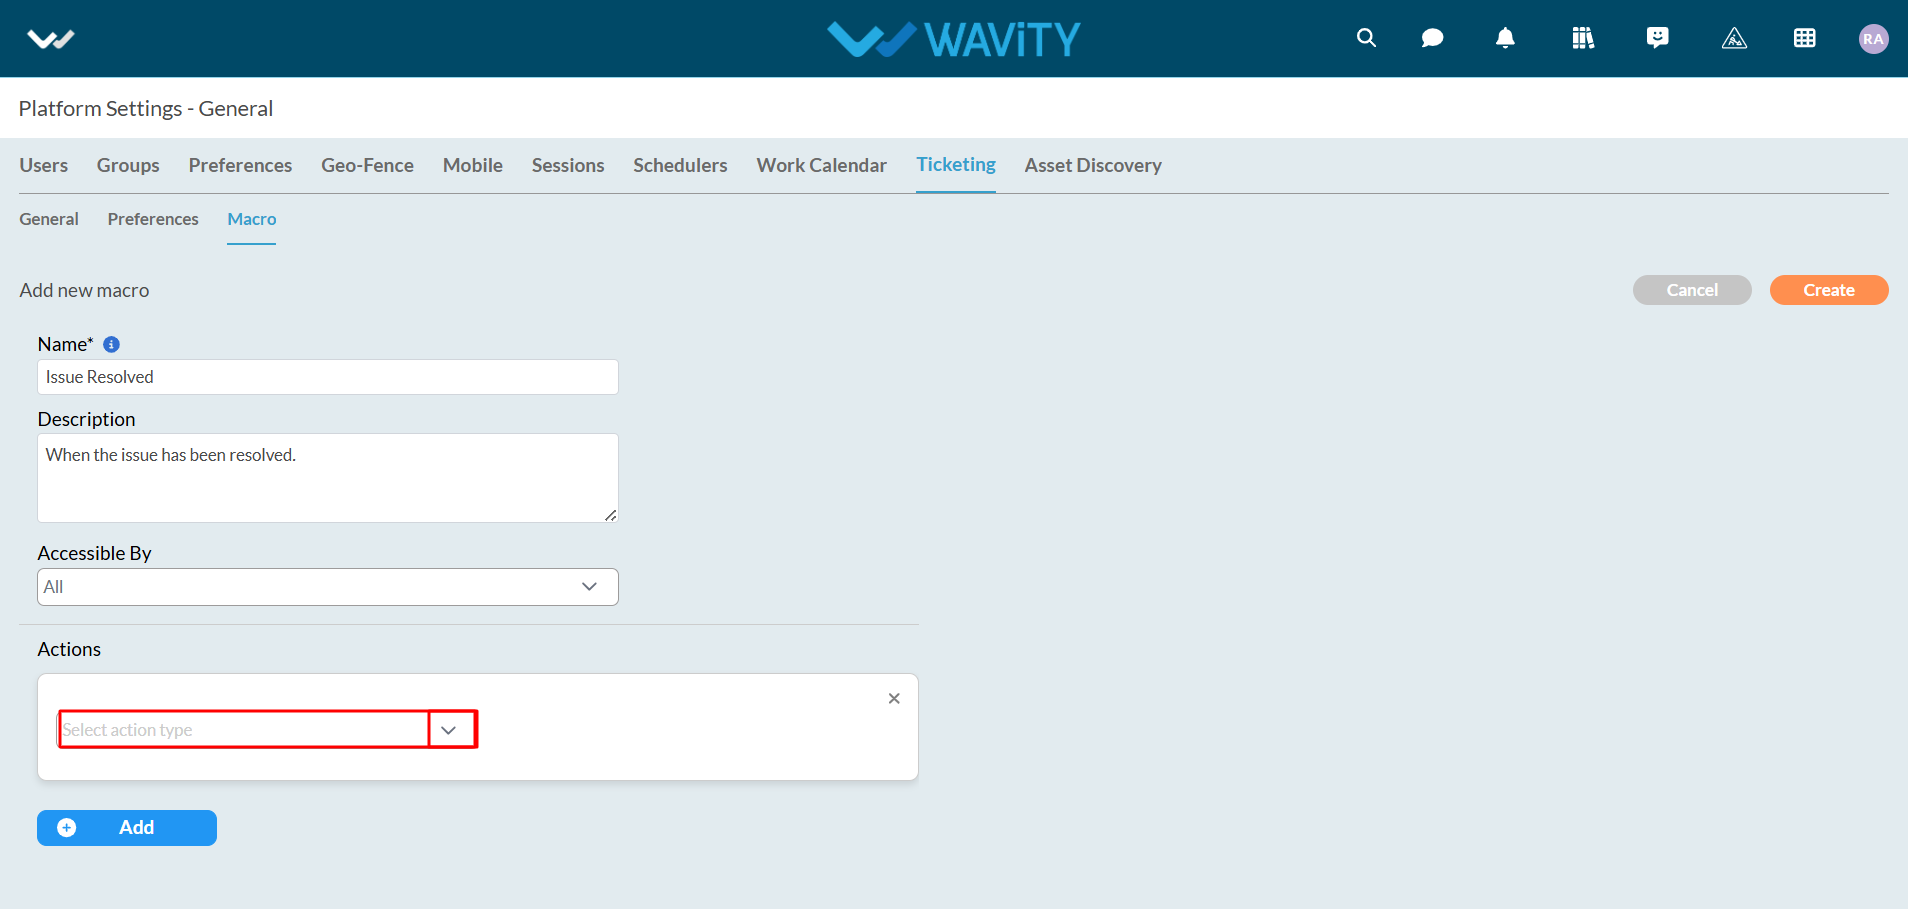
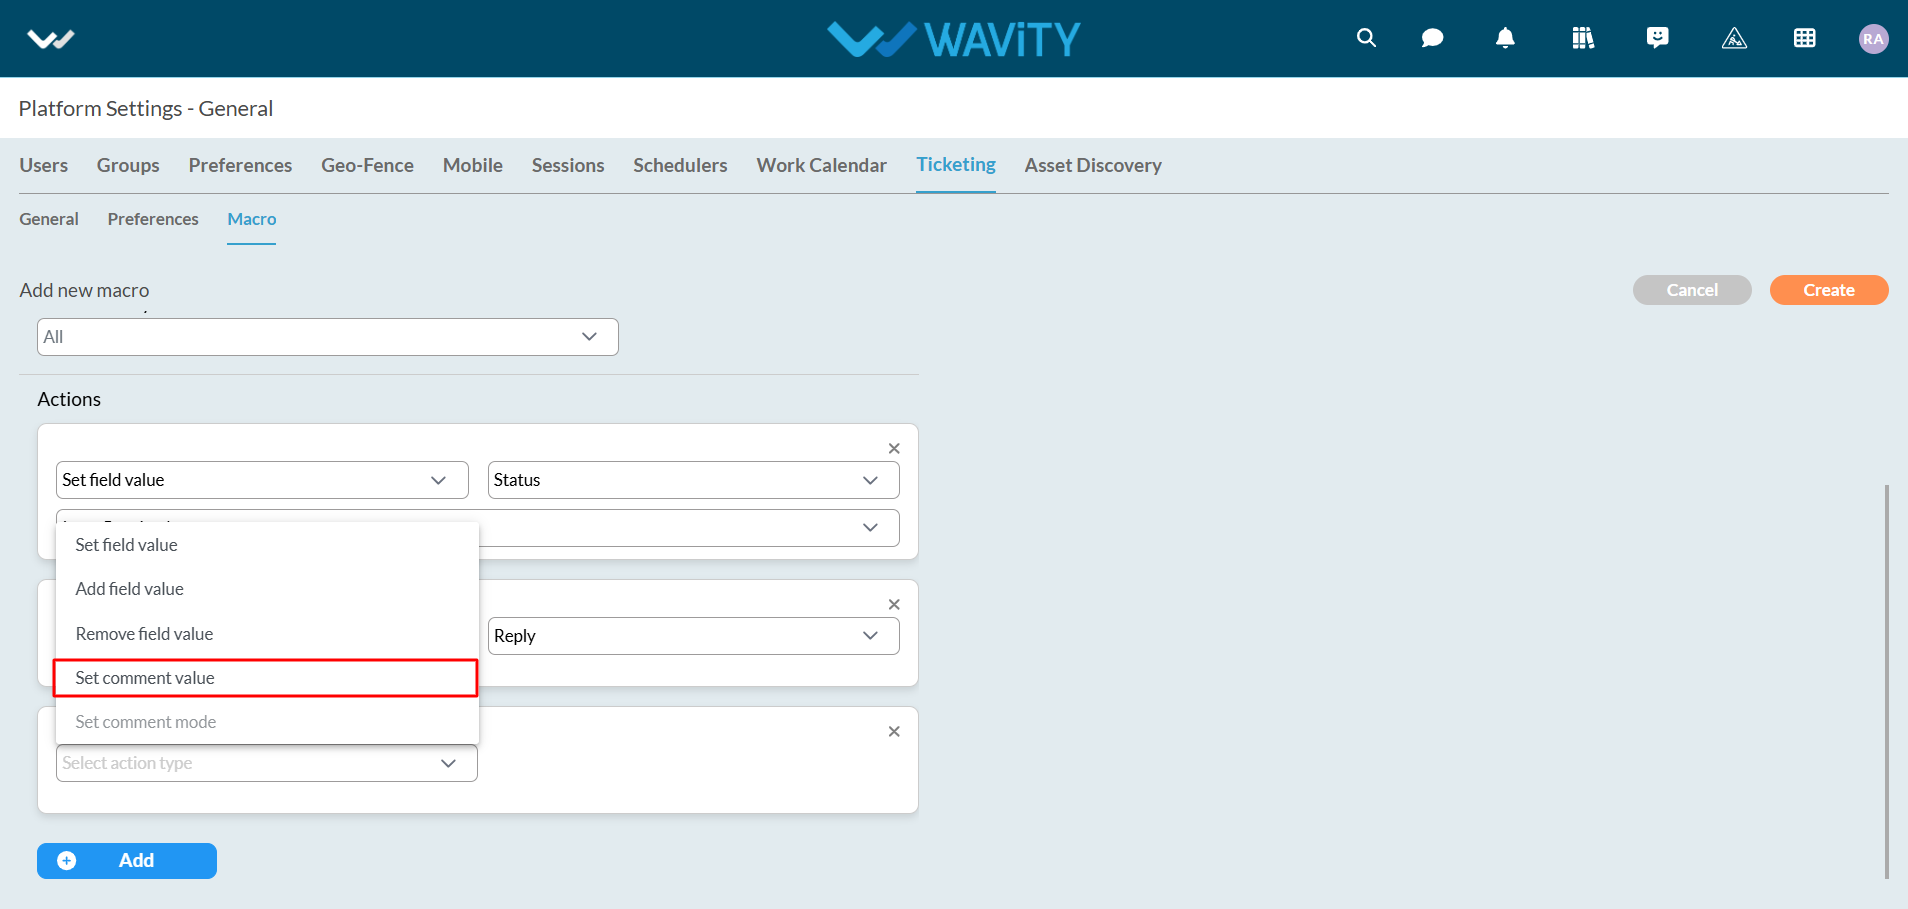
- Click on dropdown arrow to select the action type.
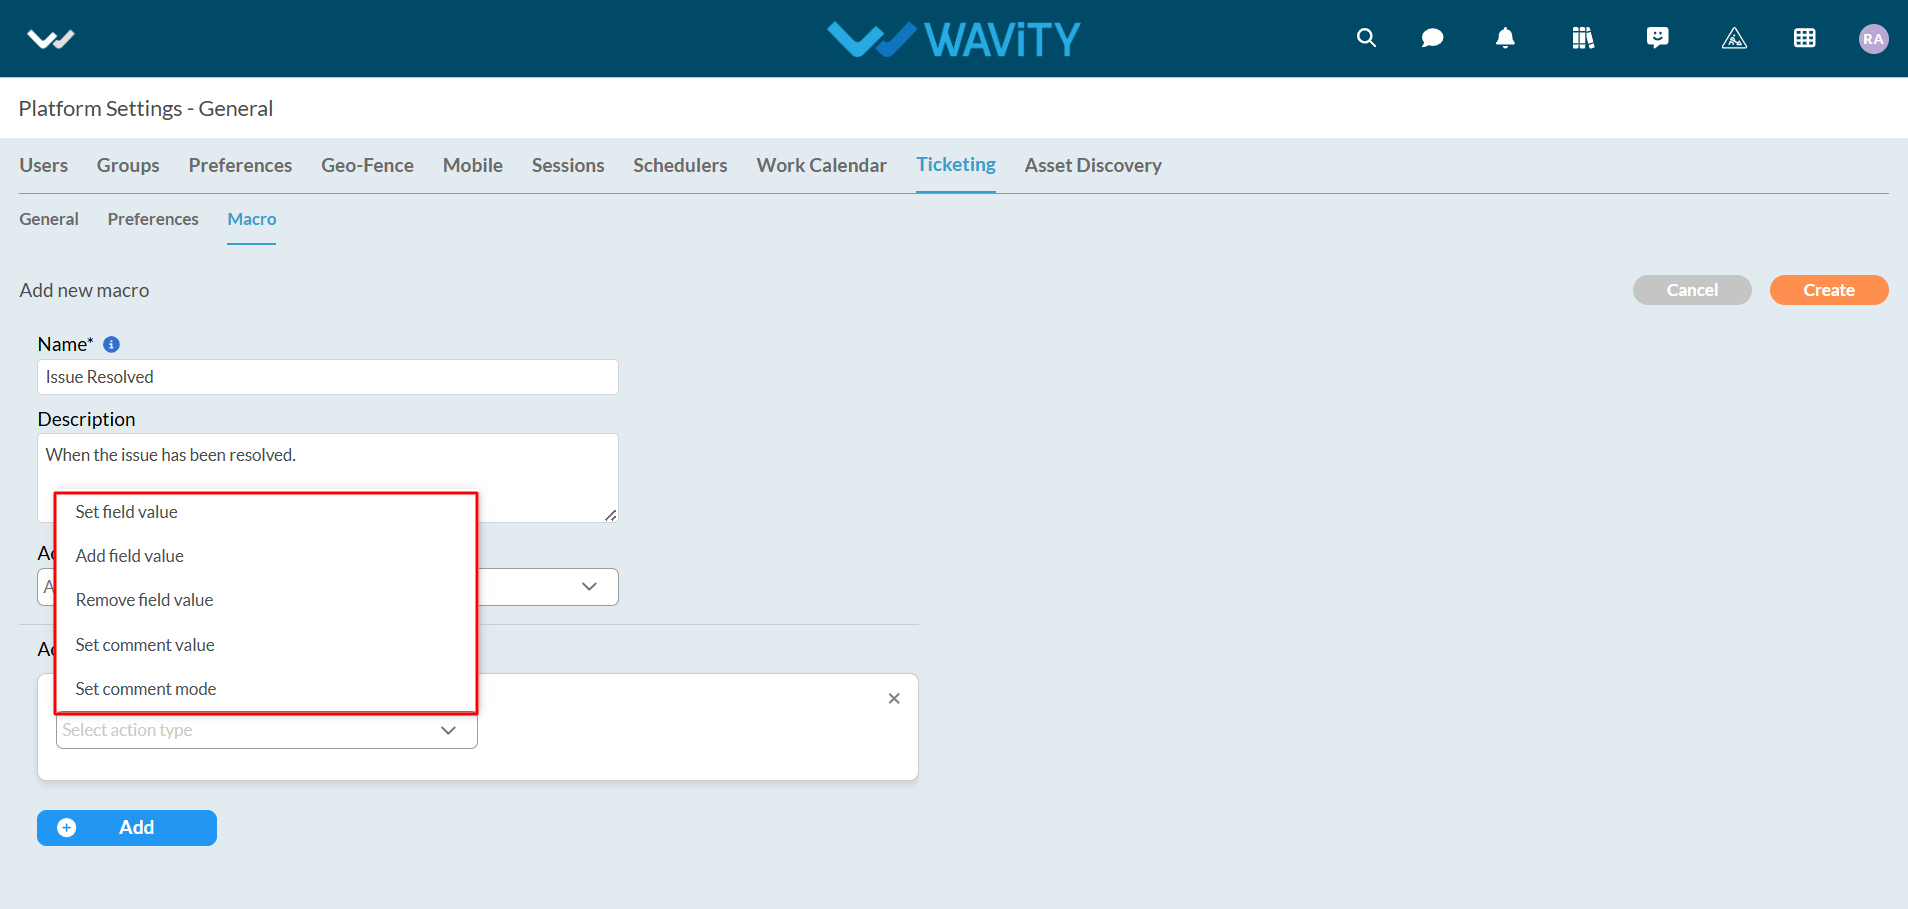
Following options will be provided under action type.
- Set Field Value: Changes or sets a new field value upon macro execution.
- Add Field Value: Adds a new field value for the selected data field.
- Remove Field Value: Removes a field value upon macro execution.
- Set Comment Value: Adds a comment during macro execution.
- Set Comment Mode: Selects the comment mode during macro execution.
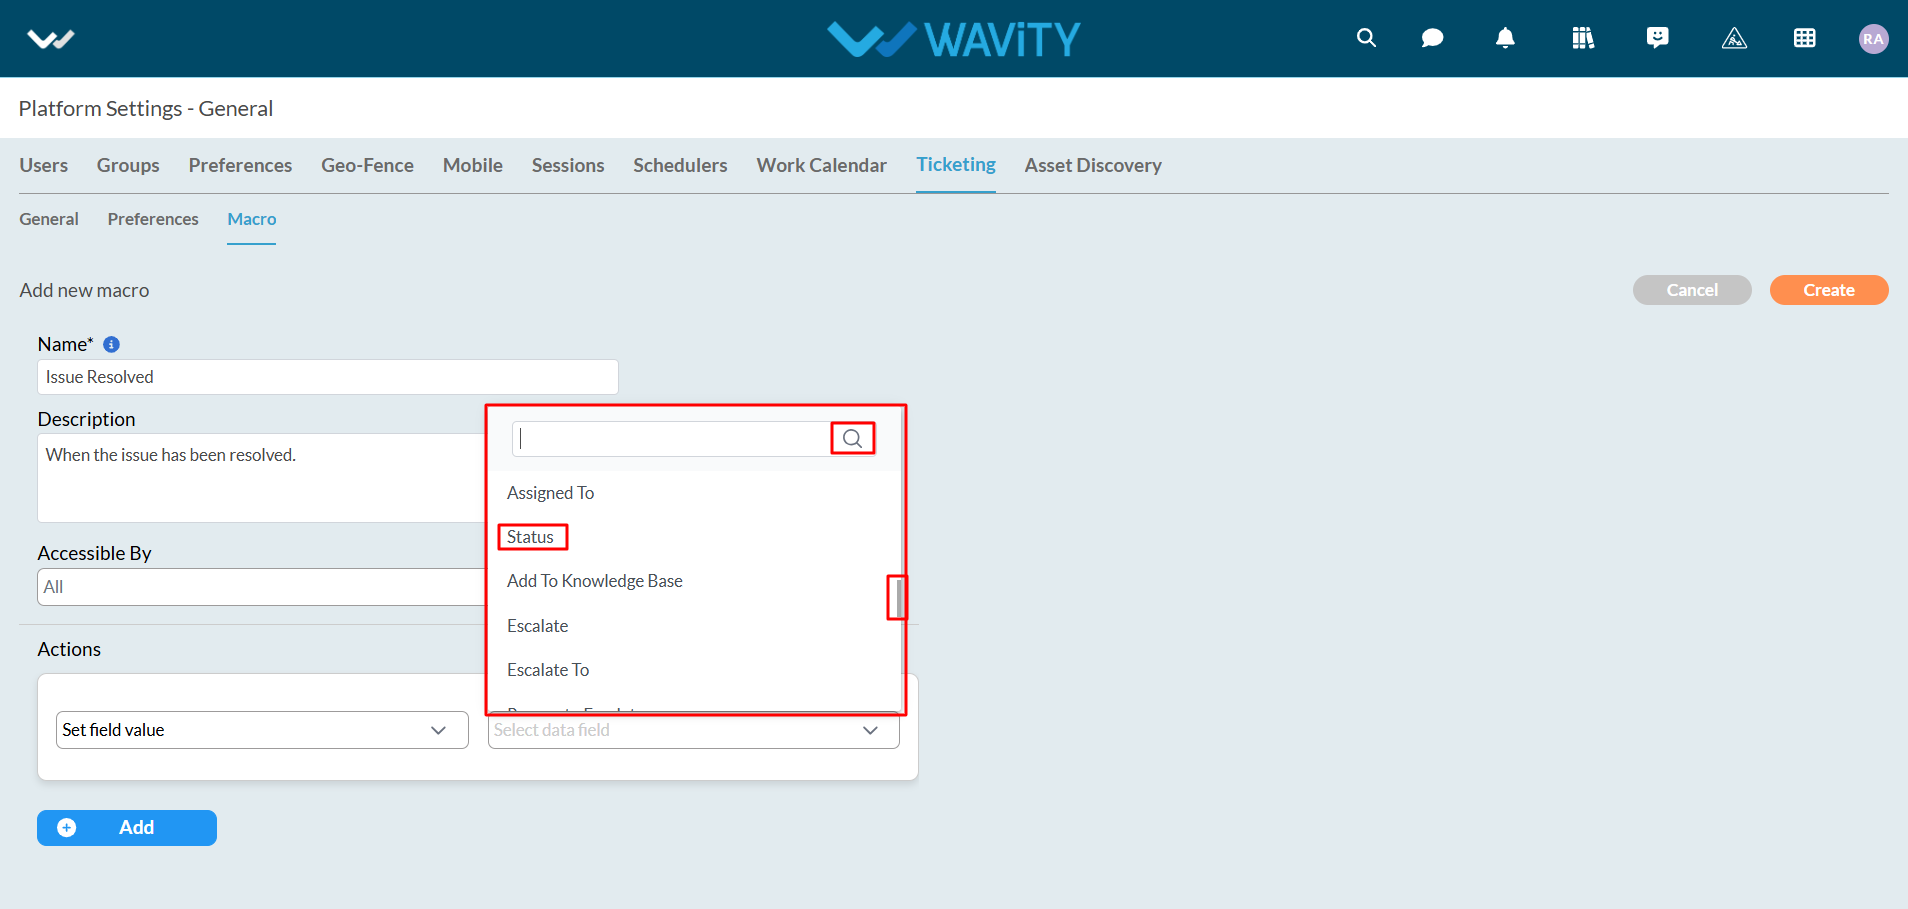
- As an example, "Set Field Value" will be used. Select "Set Field Value" and choose the data field to change, as shown in the image below.
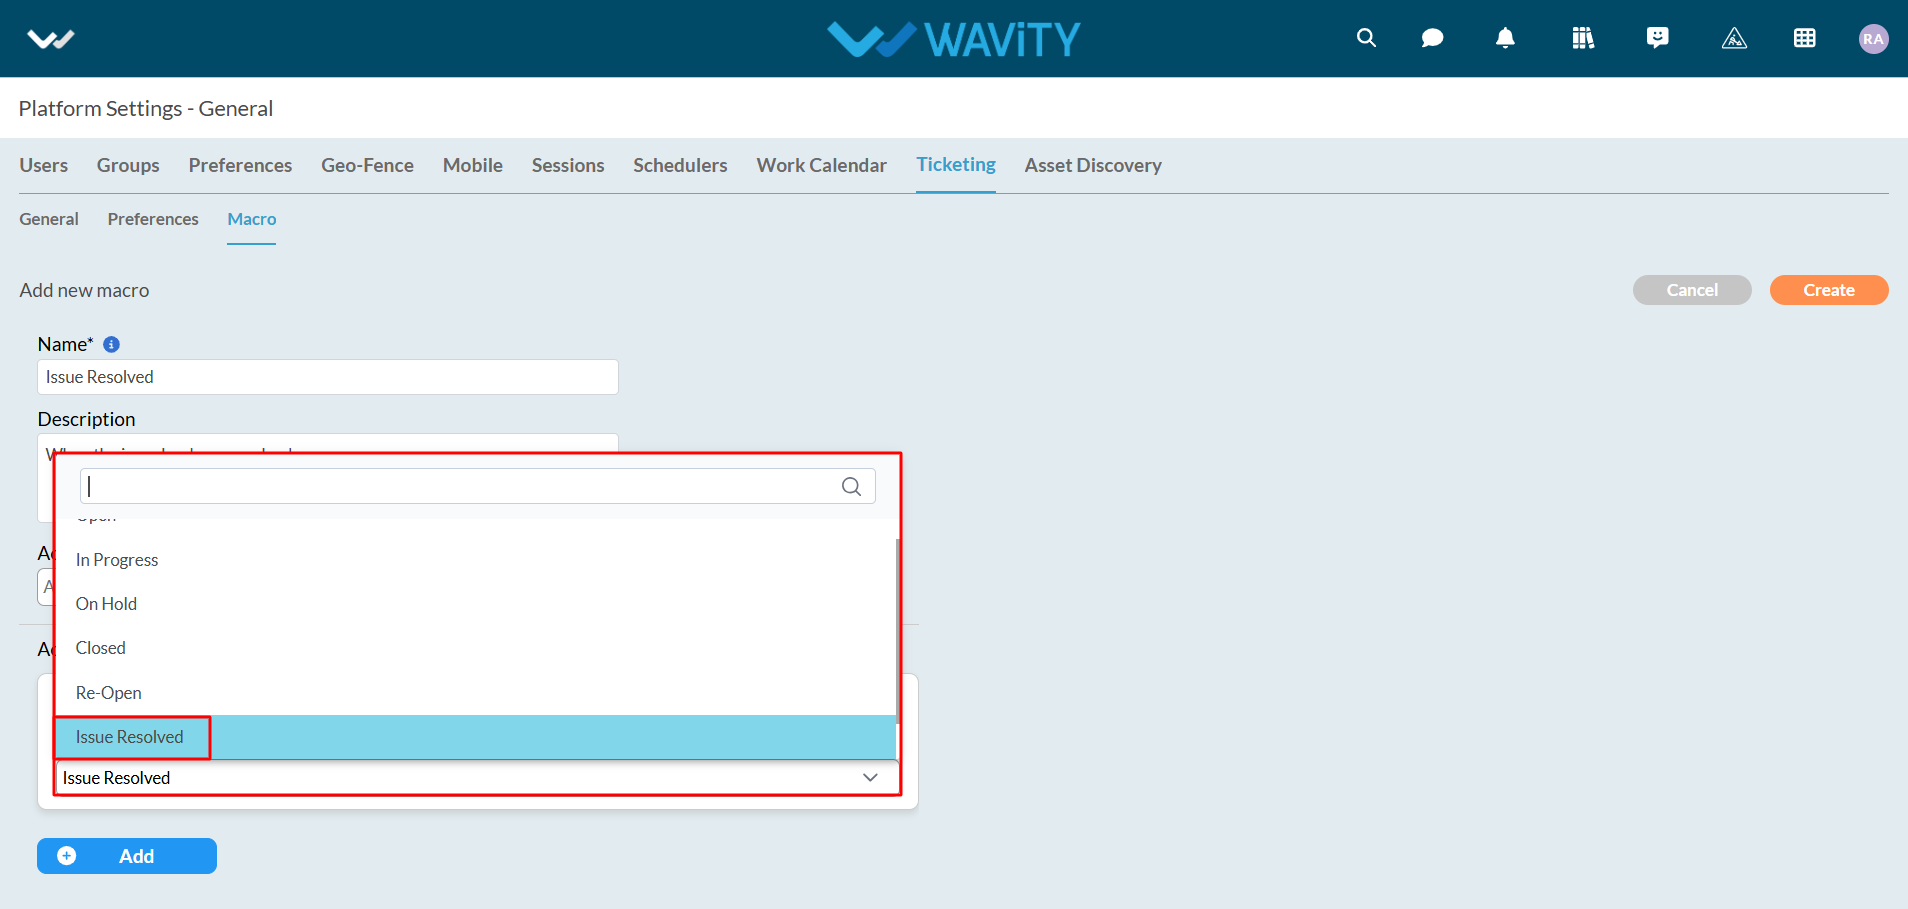
- Now, select the value to change.
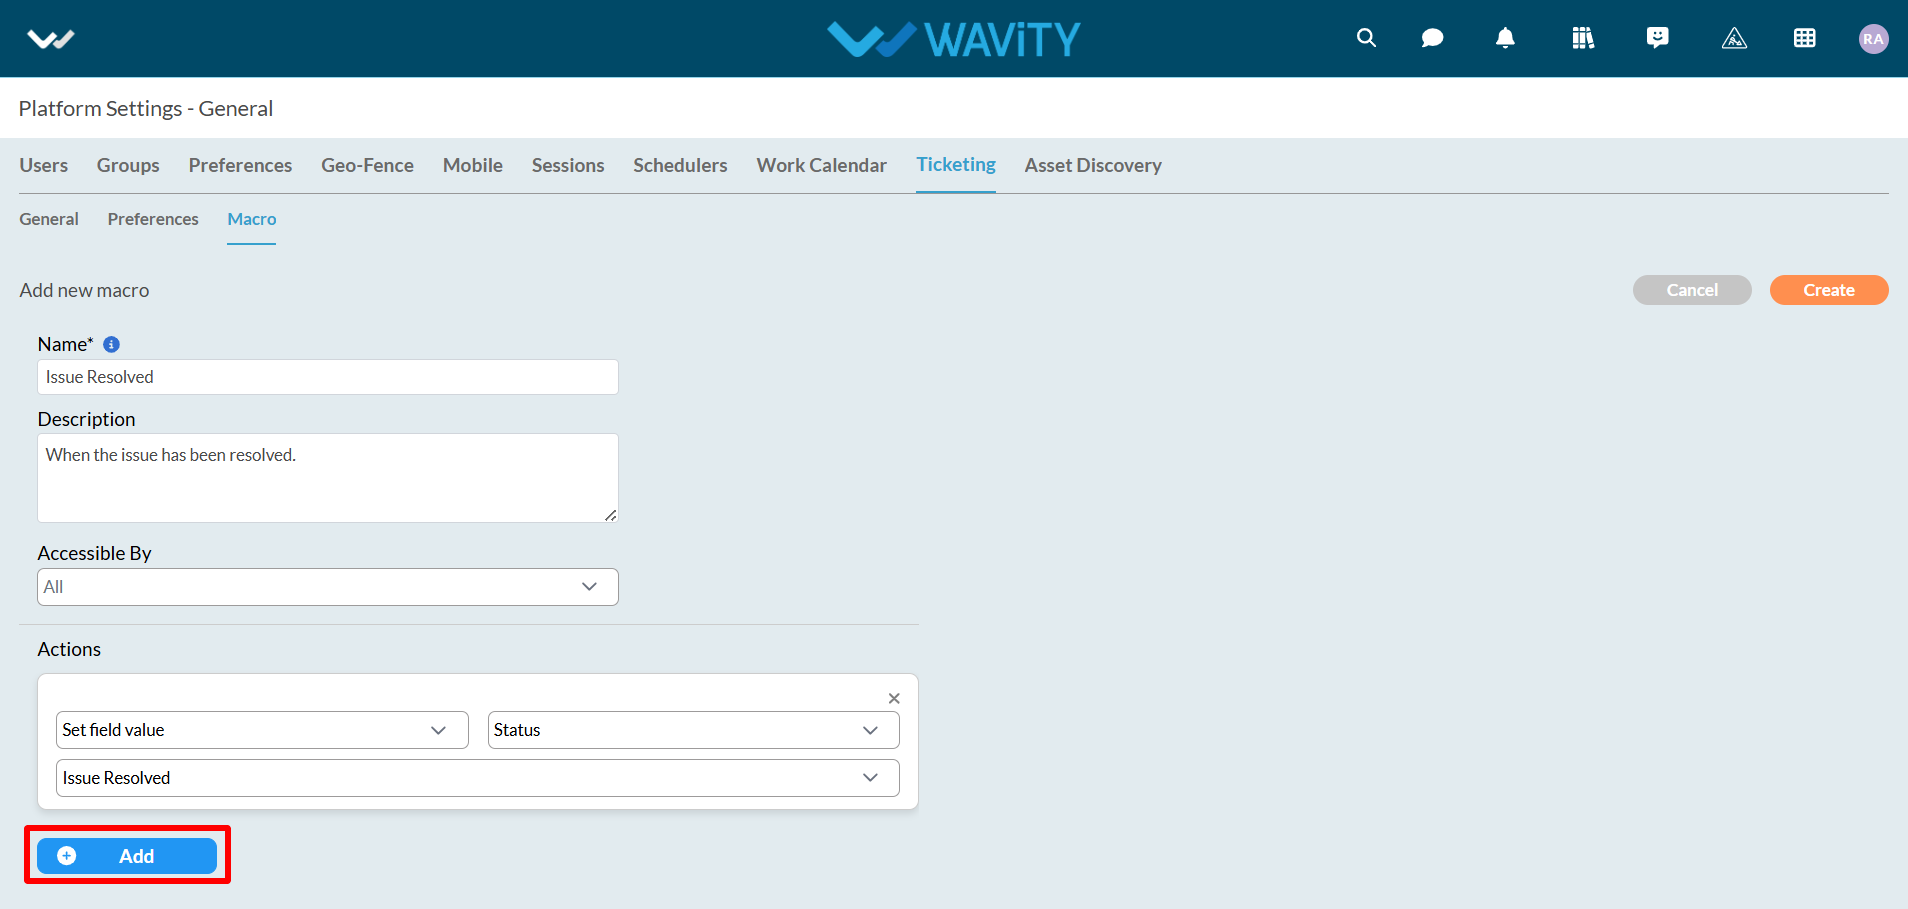
- As shown in the image below, the first action type is completed. Changes can be made if needed.

- Click on the "Add" button to add a new action. However, it is important to note that all actions will be executed simultaneously.
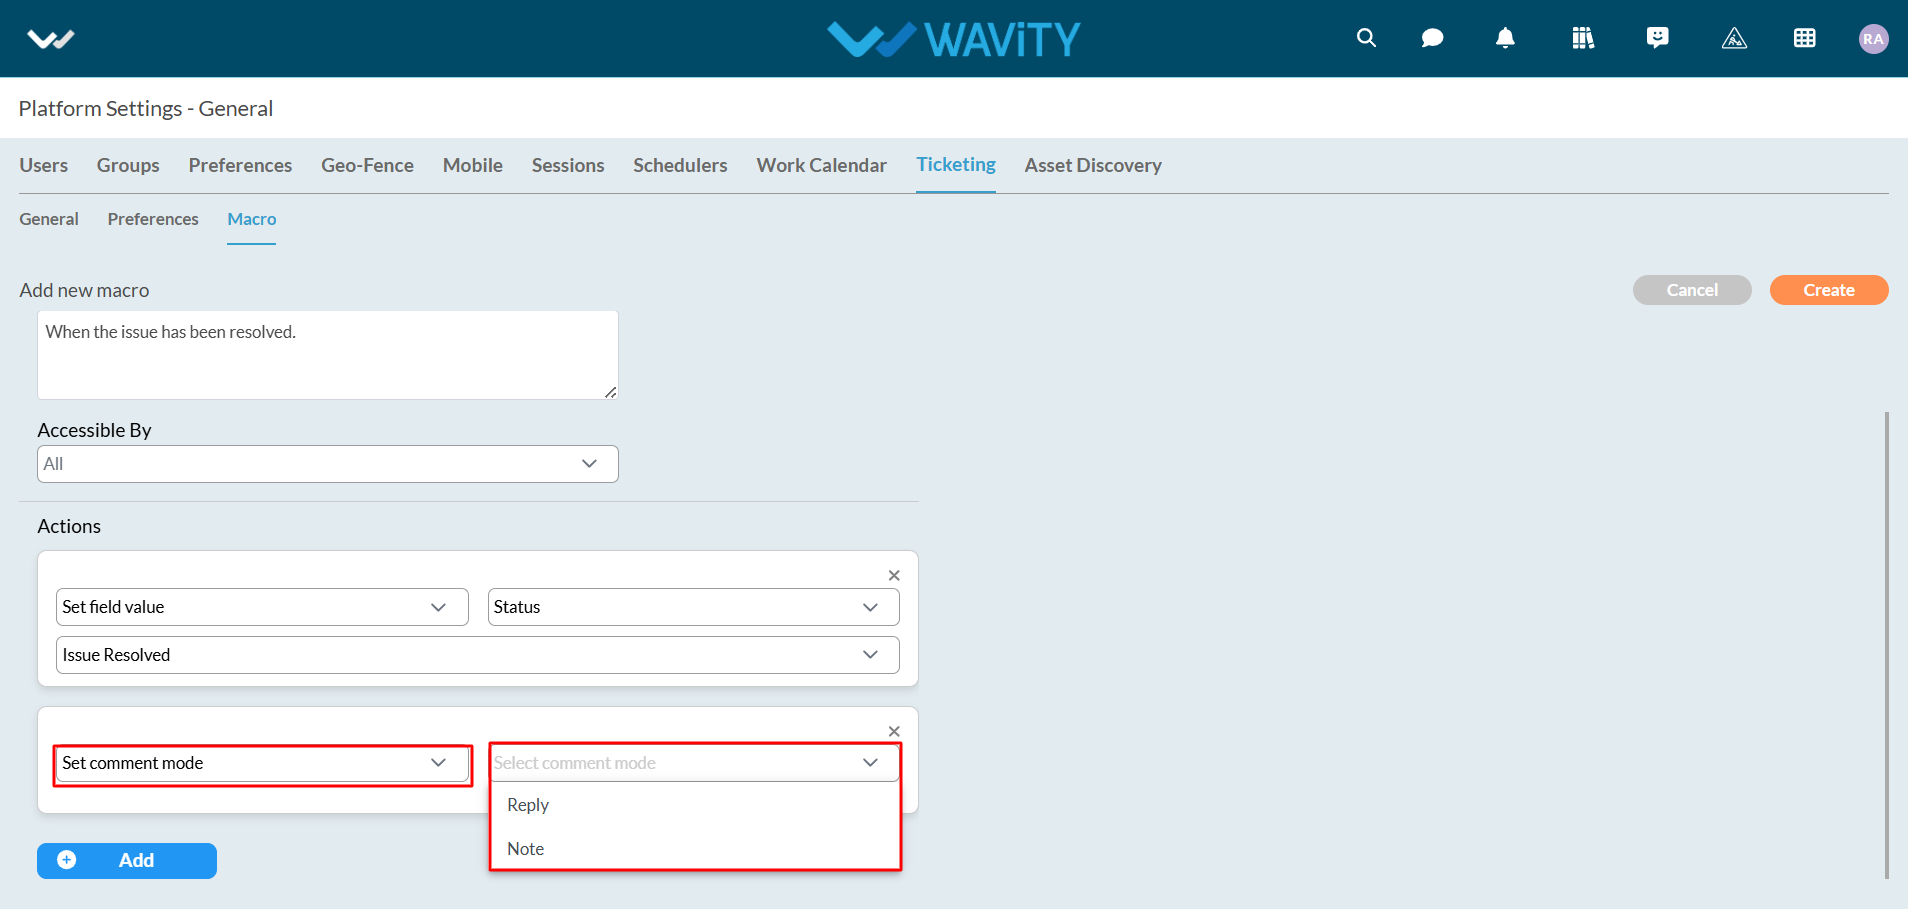
- Select "Set Comment Mode" as the action type. Two options will be provided: Reply or Note. In this example, Reply will be used.
- Select "Set Comment Value" as the action type.
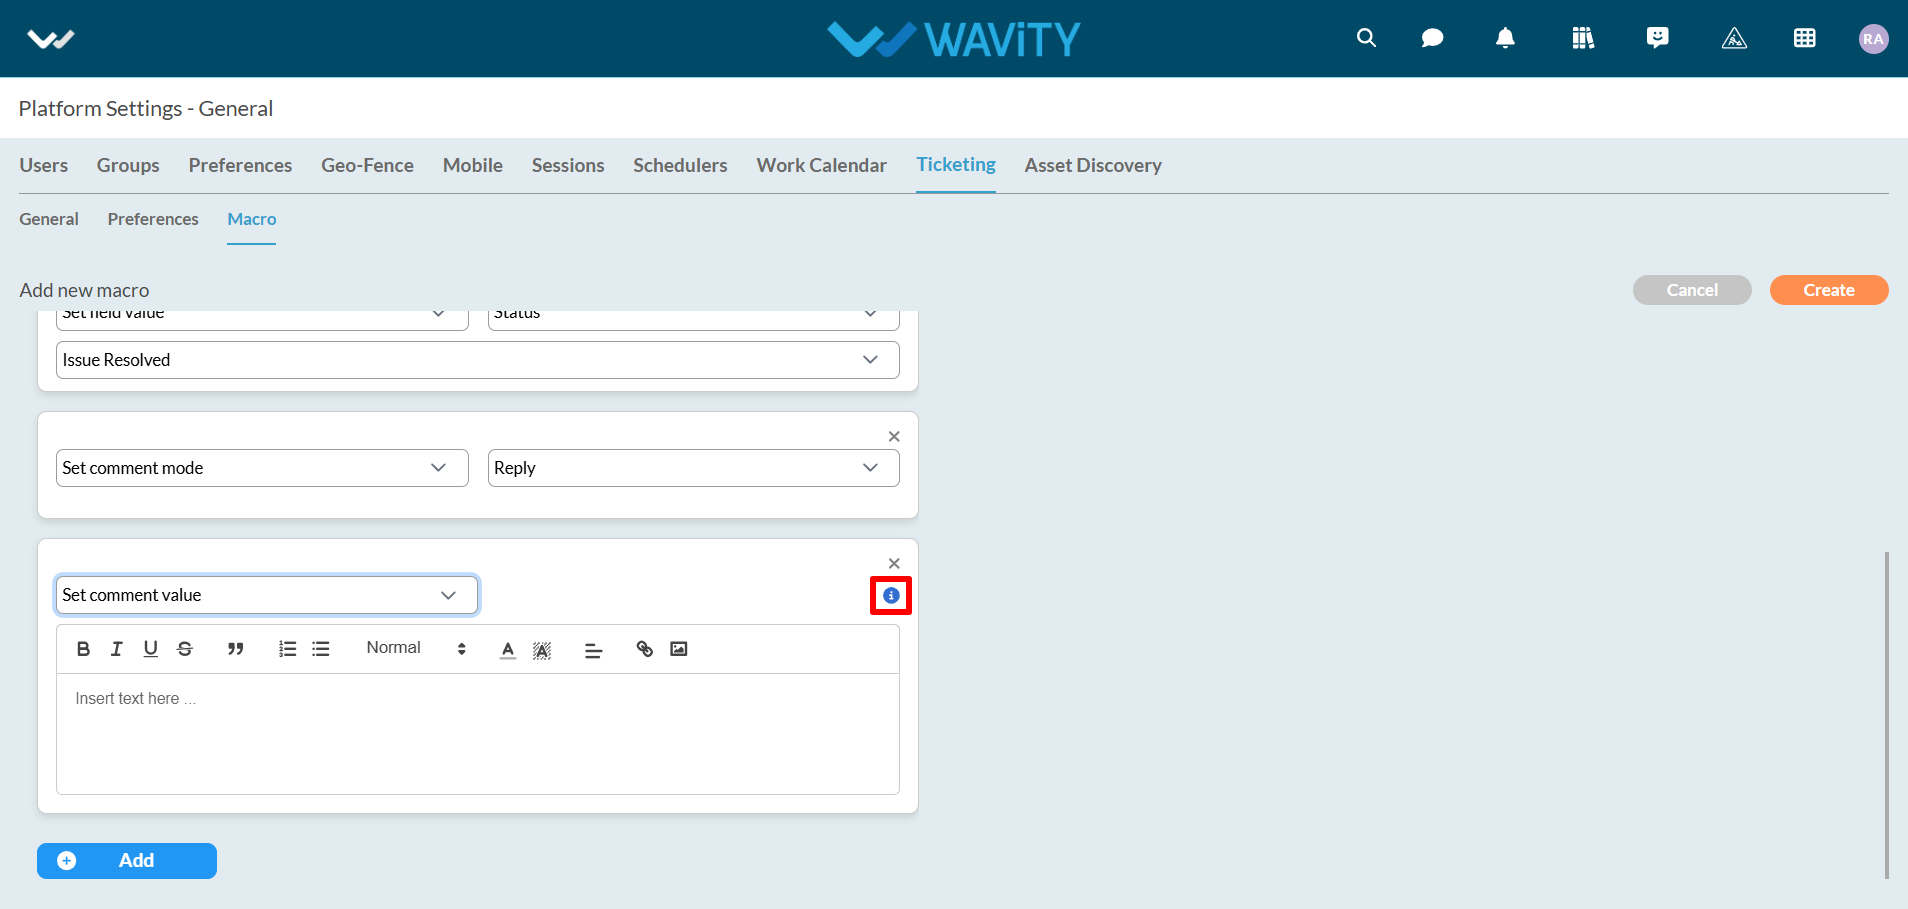
- A text box will then be displayed to enter the comment to be applied after executing the macro. When hovering the cursor over the "Question Mark" icon (refer to the image below), instructions for using the comment box will be displayed.
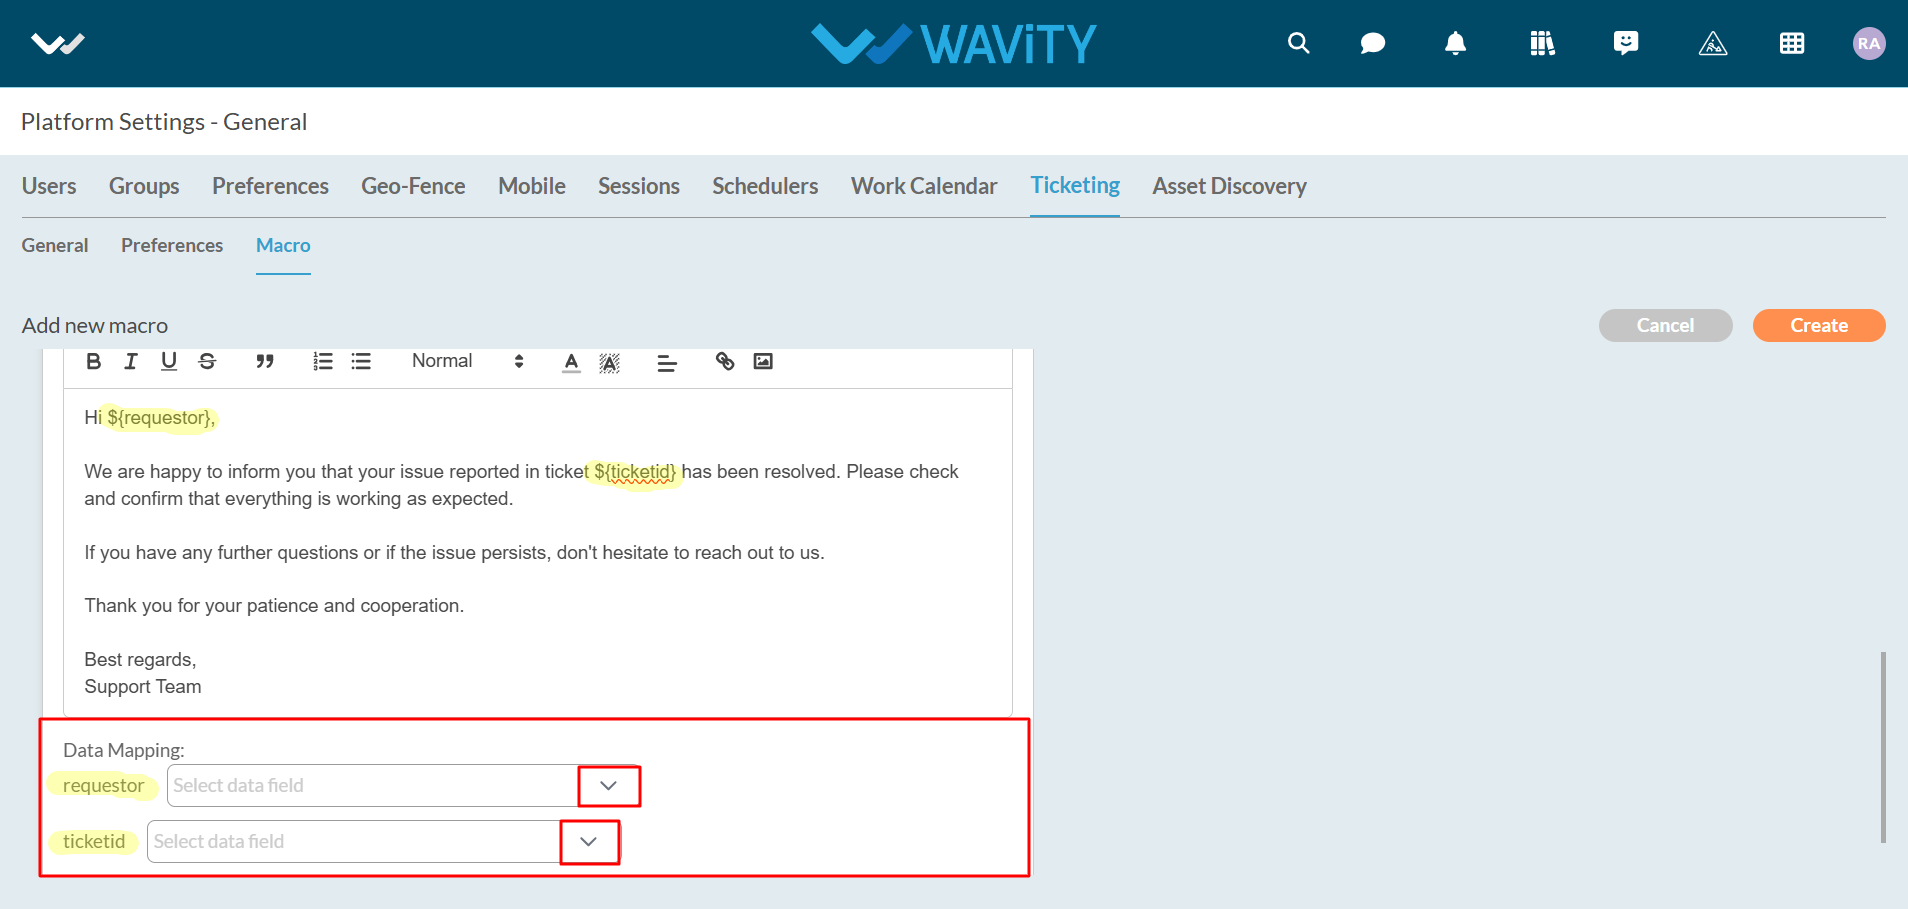
- The instructions are as follows: "Use the pattern${key} to insert data fields into comments. For example, Hello ${username} will be replaced with the actual username."
- After using the pattern as instructed above, select the appropriate data fields for mapping the data, as shown in the image below.
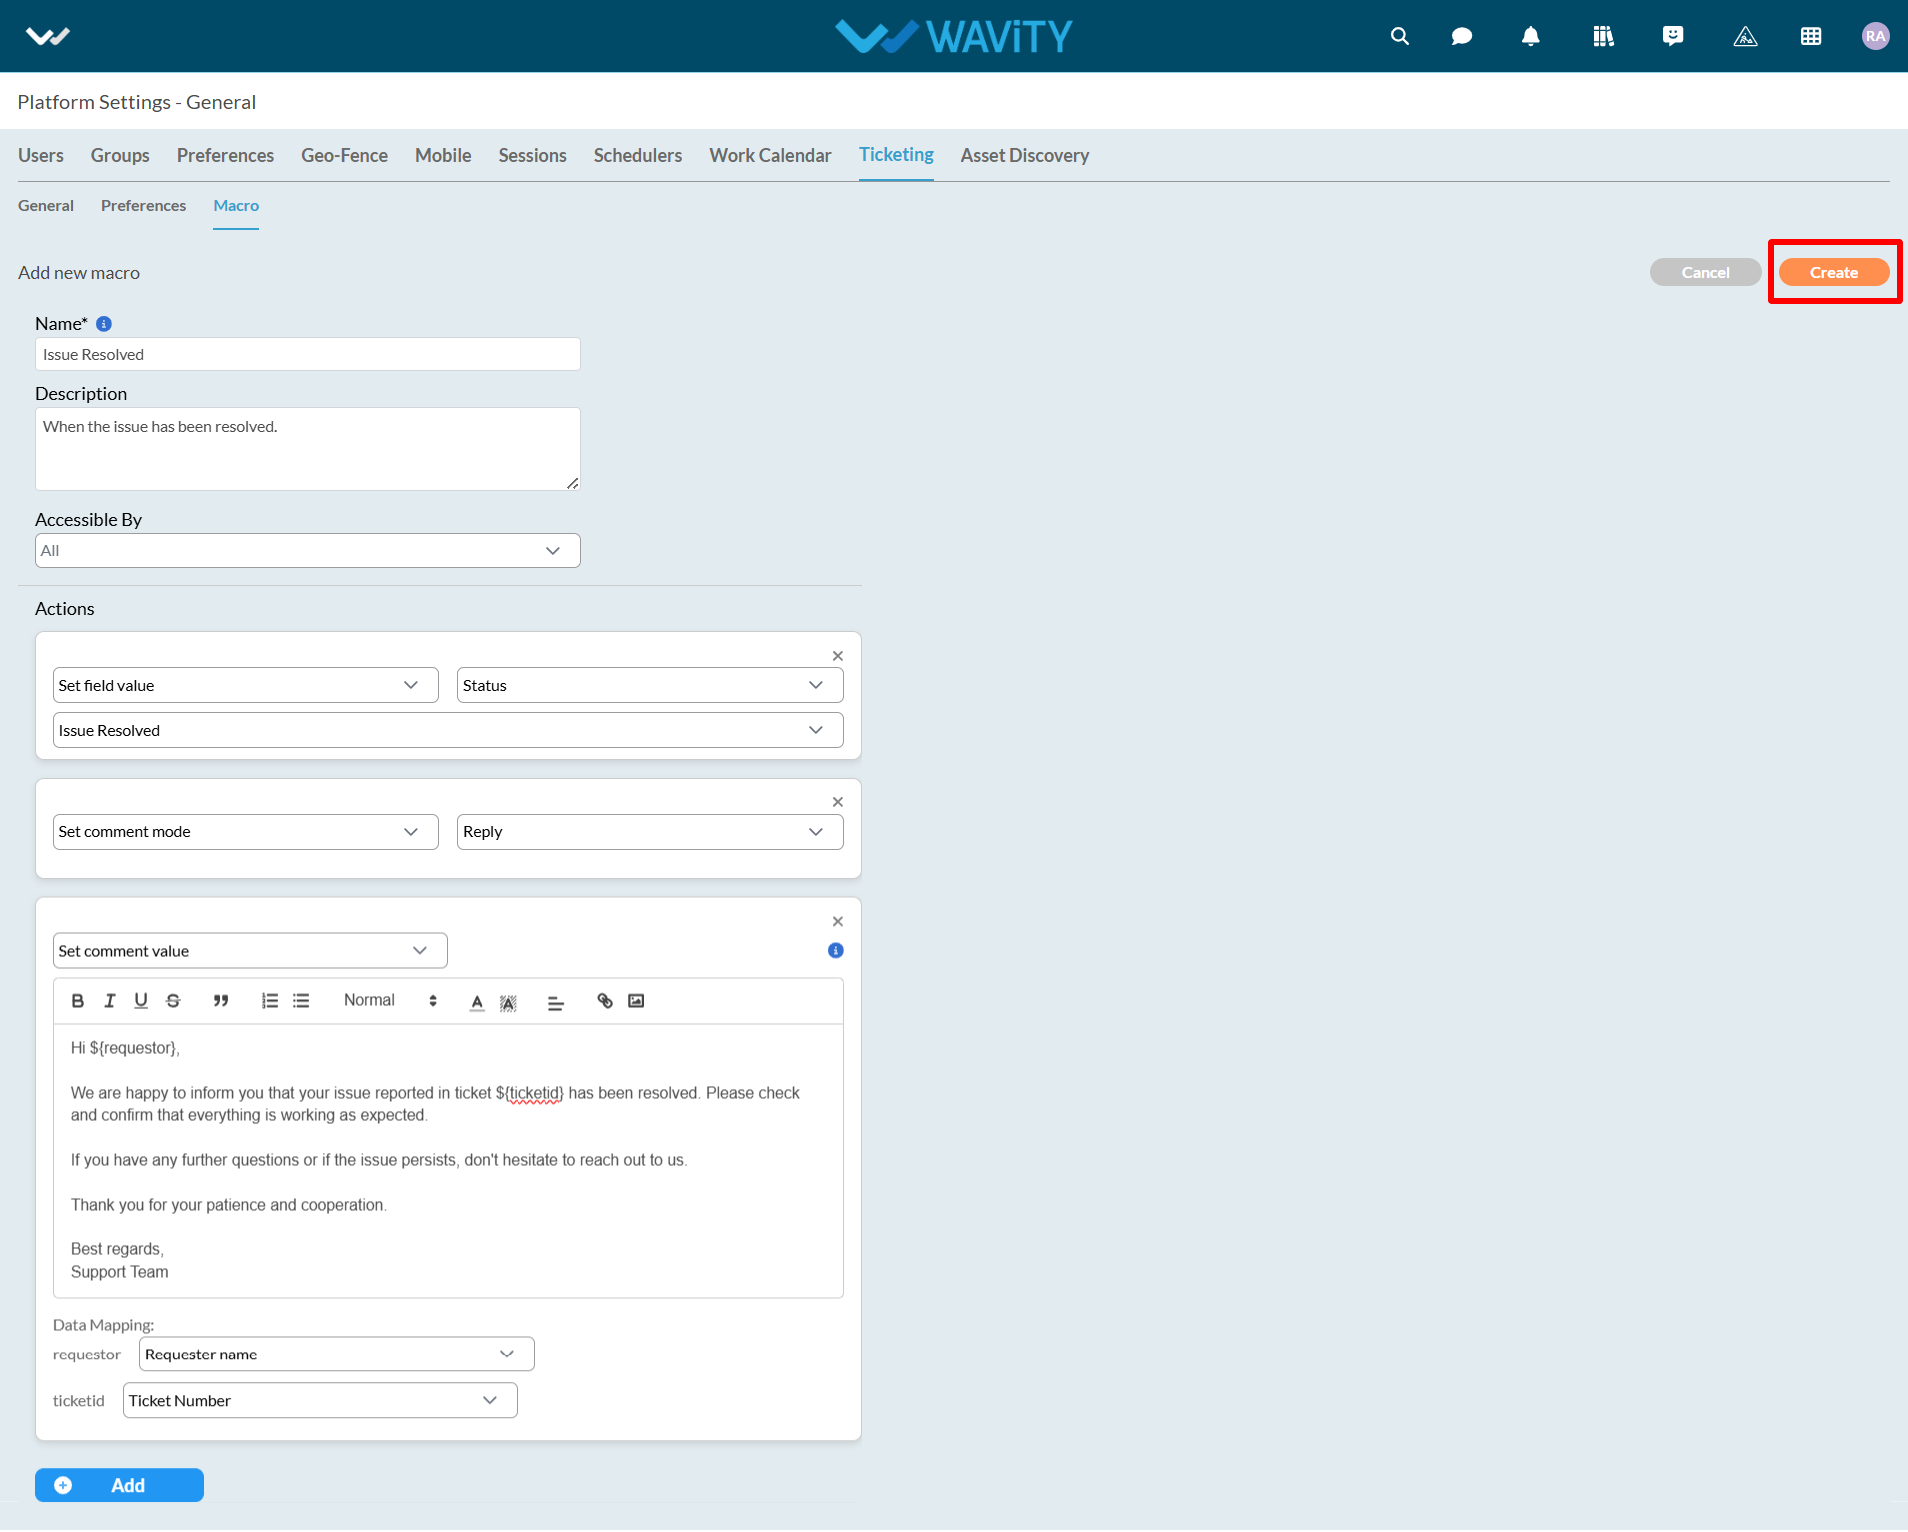
- After all actions are entered, click on the "Create" button to create and save to create a New Macro.
Editing an existing Macro:
- Below image displays the list of all existing Macros. Click on ‘Setting icon’ as shown in the image below.
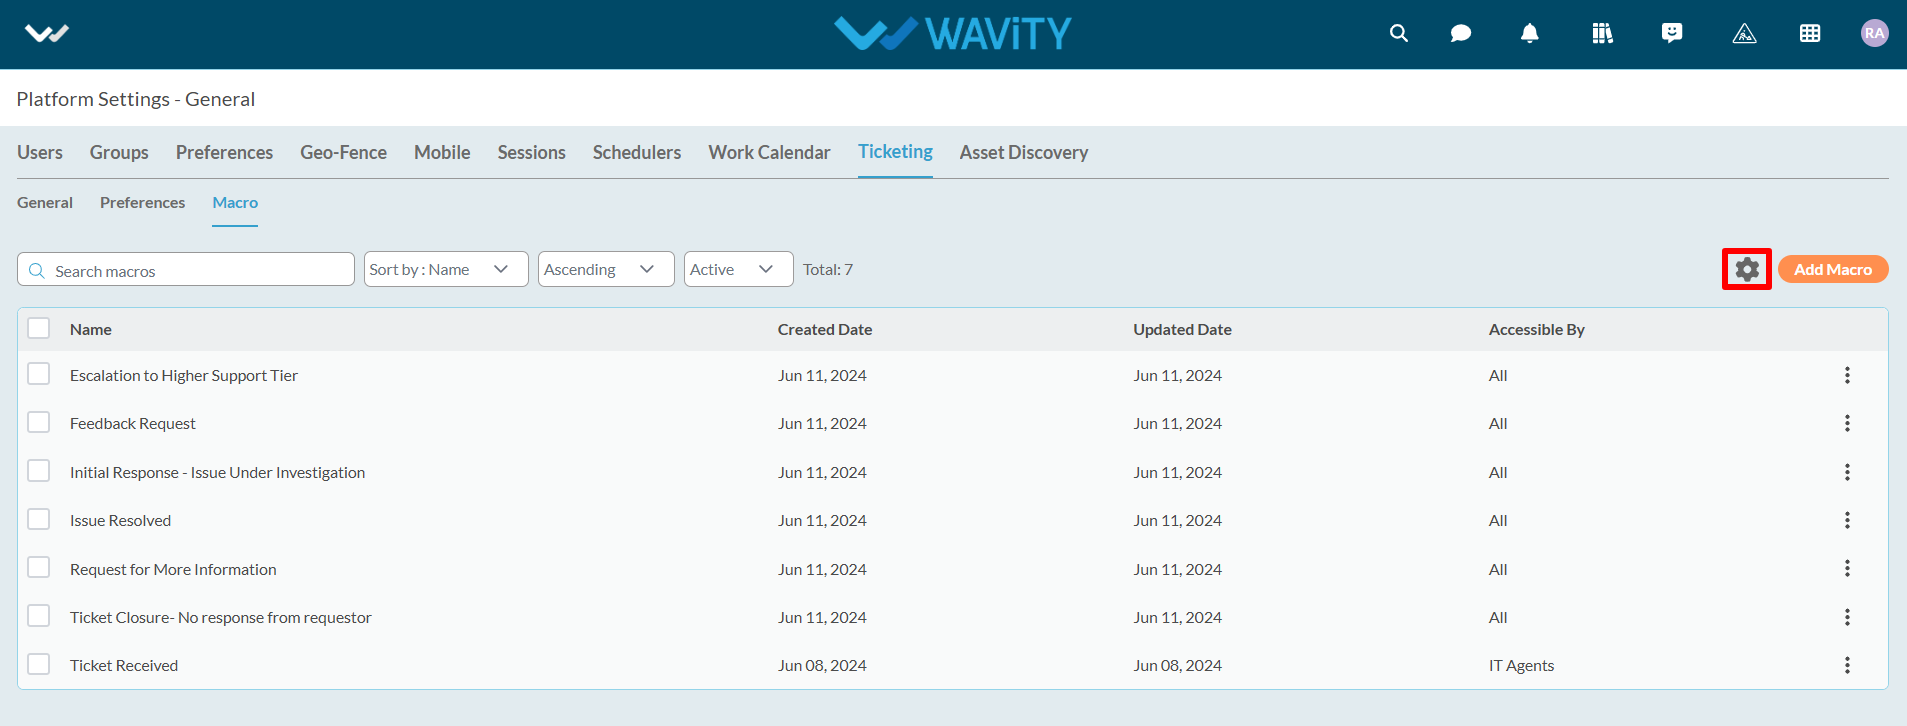
- Toggle Enable Macro as "Switched On". Click on 'Save' button.

- As shown in the following image, all macros in the current tenant are displayed in a list format. Macros can be sorted based on your needs and requirements.
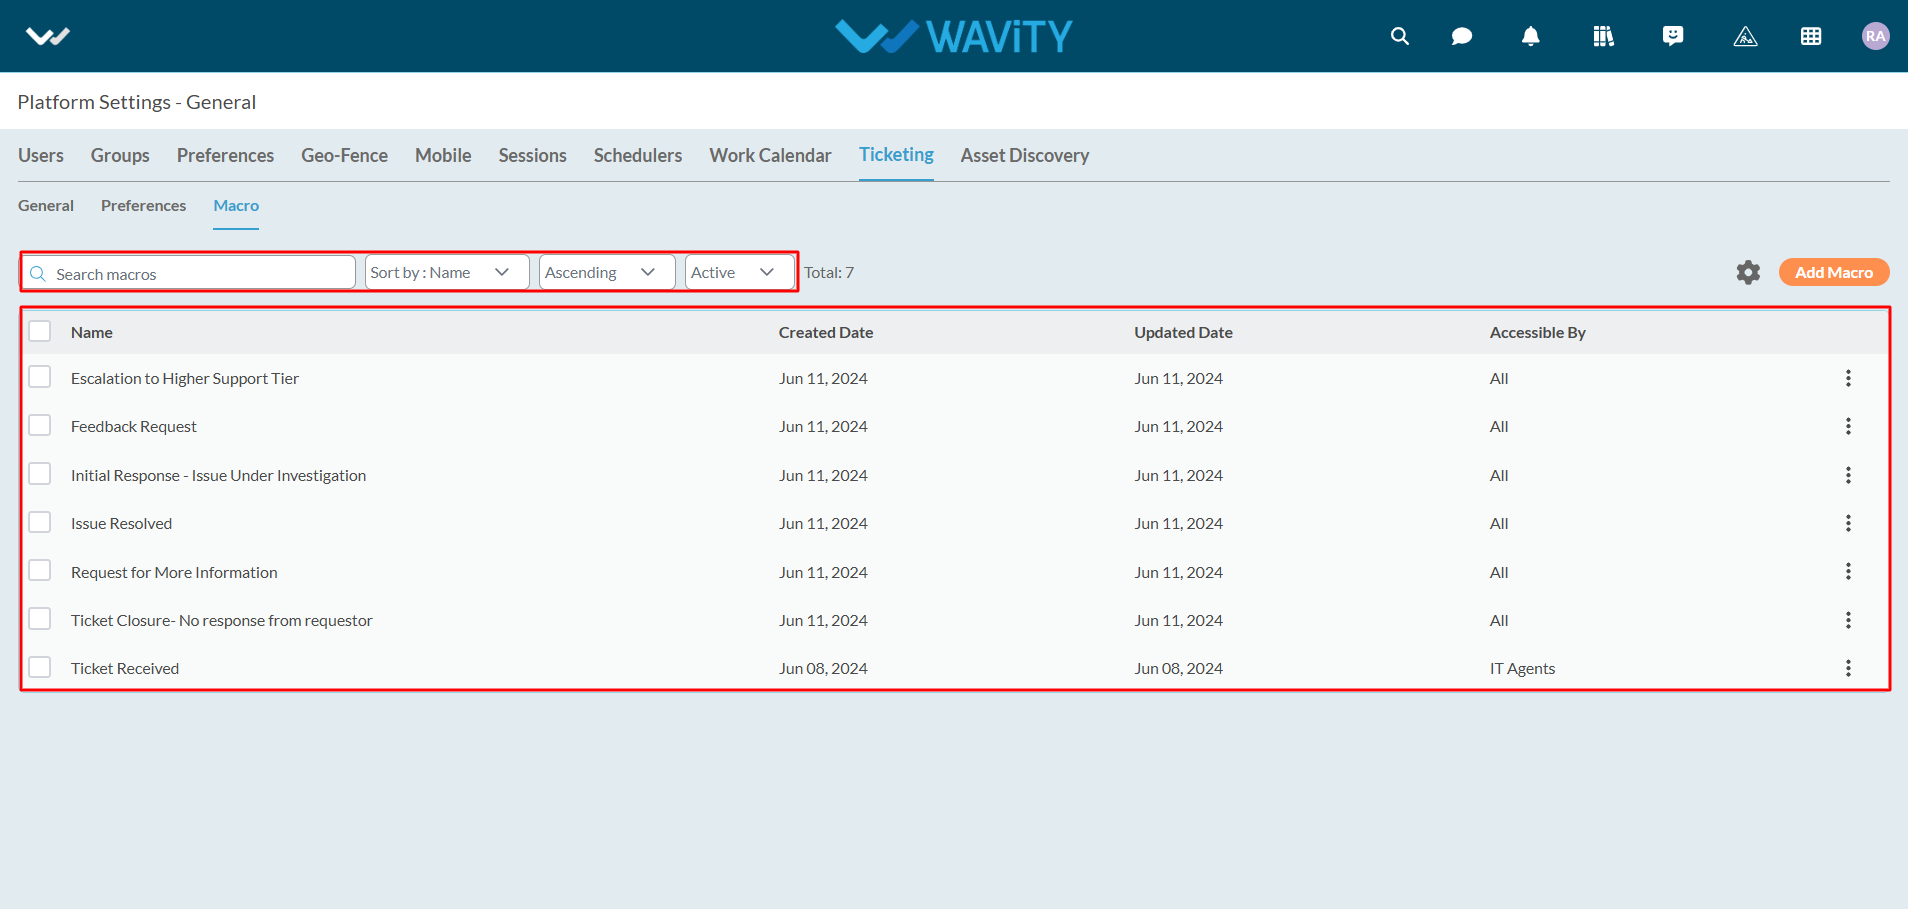
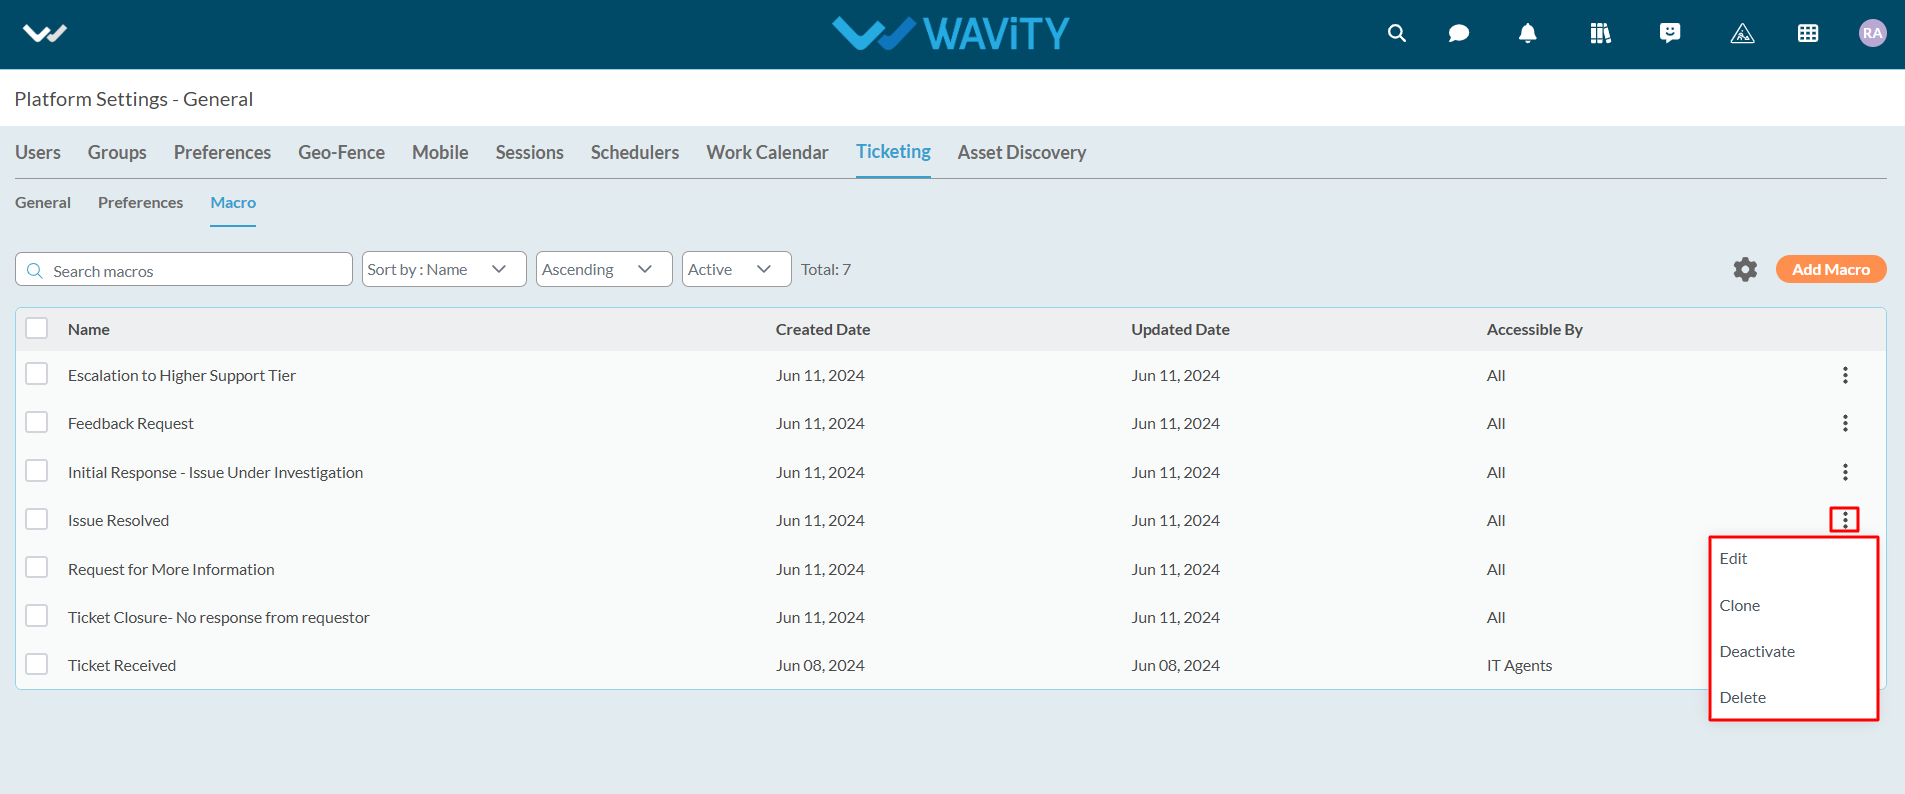
Click on the "3 dots" to display the following options:
- Edit: To edit the selected macro.
- Clone: To copy the selected macro and create a new macro.
- Deactivate: To deactivate the selected macro.
- Delete: To delete the selected macro.
