Login as a system admin.
To create ticket with email, first integrate with the email address to which users will be able to generate the tickets.
To enable the email integration in Wavity, click on Profile > Integrations > Email.
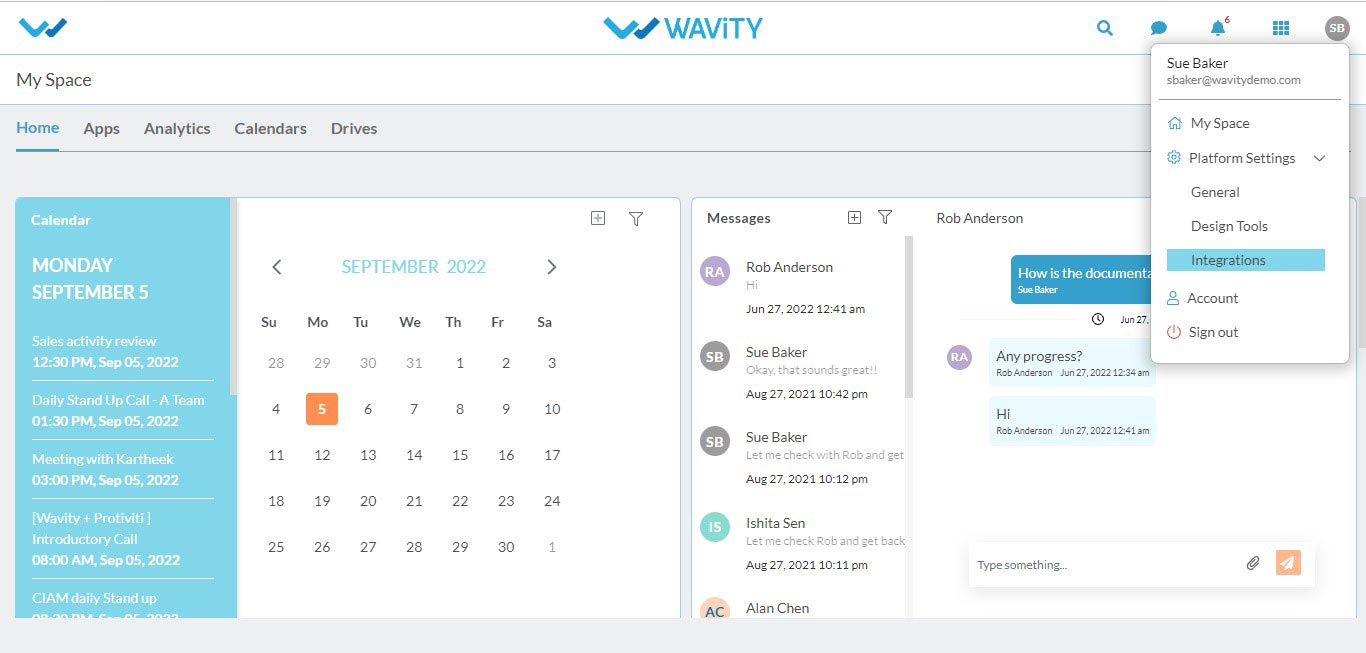
Click on the Email option and then click on create.

Enter name and description of the module to which the email integration is being done.

Enter the required details for email server configuration like SMTP server name,SMTP port number, MAP server name, IMAP port, Email address and password that is needed to be integrated.
Click on create after entering all the information.

The Email Address will be integrated with Wavity’ platform.
Go to the design tools, search for the tickets app.
Click on the three dots of the app and then click on wbots.
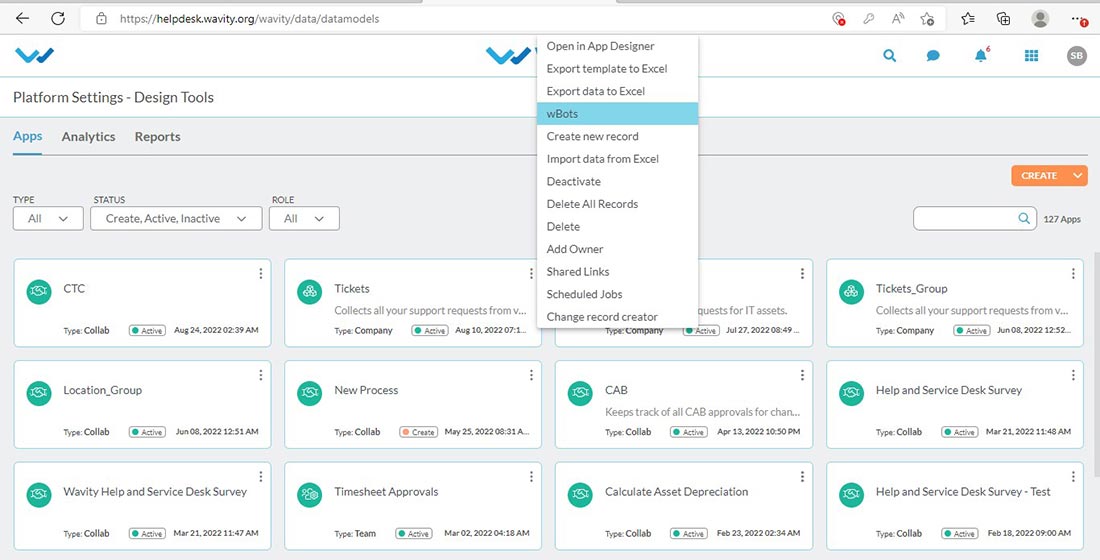
The wbots configuration will be displayed. click on create to create a new bot.
Add the title and description. Select e-mail option and mention the email integration caption that created earlier in the integrations.
Also add the email type whether the configuration is done for new or reply email.
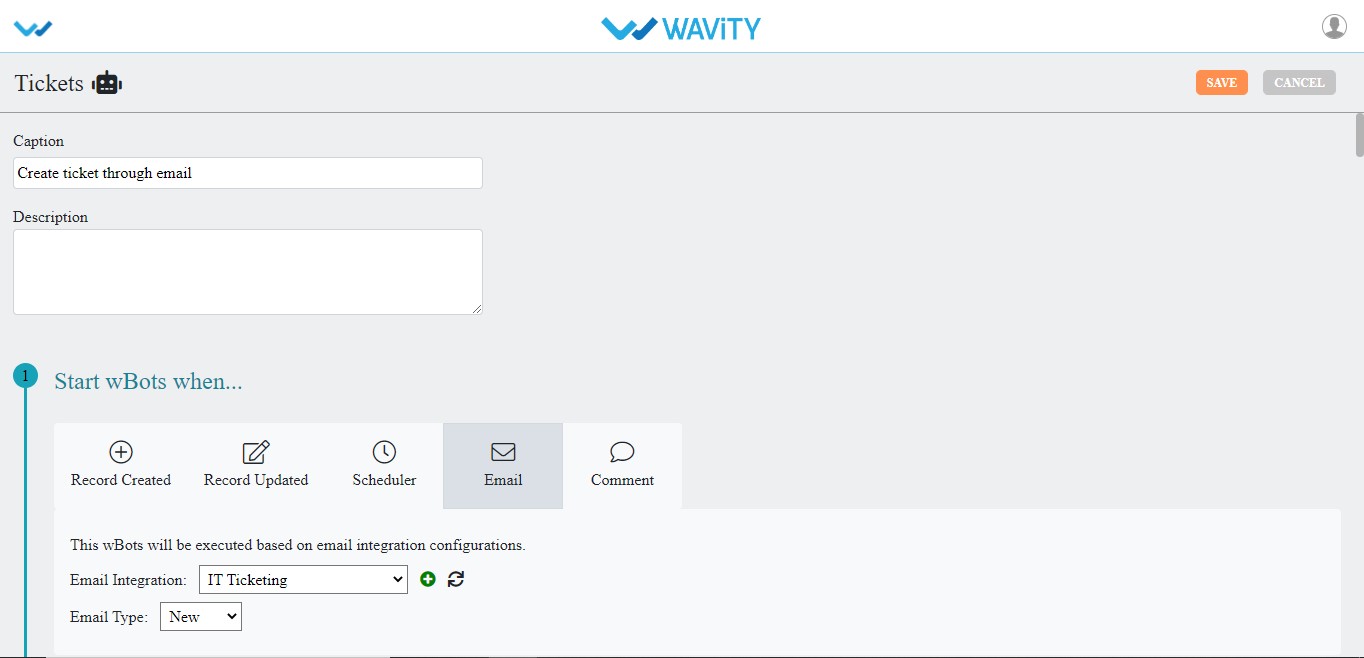
Then add the keywords for the email subject.
Note: Keywords are essential since the user should able to send ticket to email which contains these keywords.
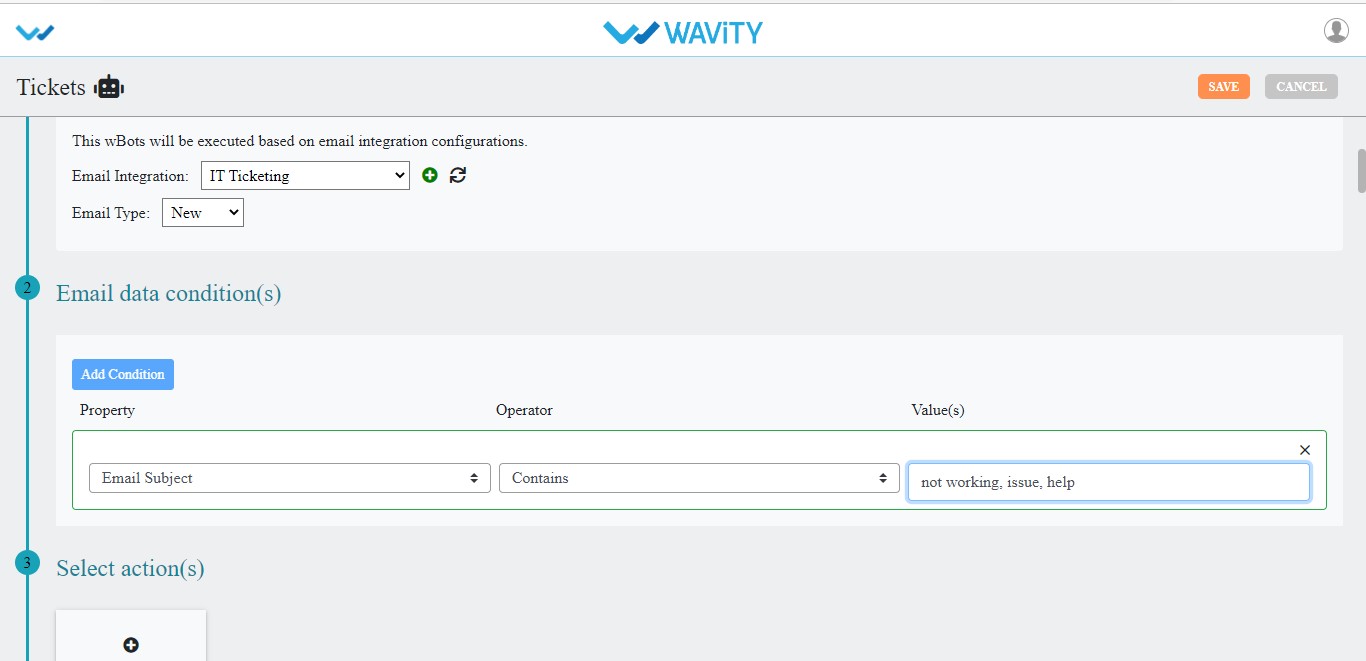
Then select the action to ‘create’ a ticket. Mention all the relevant data.
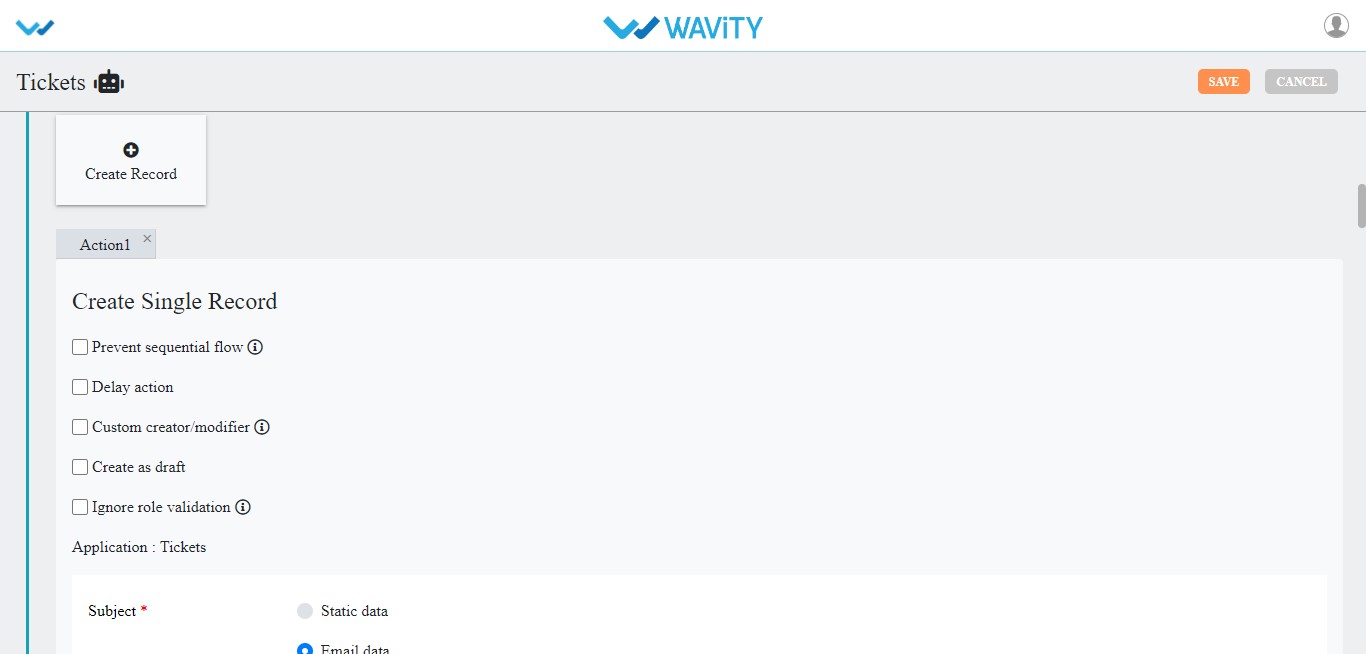
Click on save once the bot configuration is done.
Send the integrated email address across the employees.
Employees can generate a ticket by sending emails to the email address and the email will be created as a ticket in the Wavity’s platform.
