How to Enable AI Services in Wavity Platform?
- In Wavity Platform, You can enable AI Service. Enabling this function will allow the use of Artificial Intelligence tool to automate ticket resolution with AI automation and real time sentiment analysis.
- Only Admin has the access to enable AI Services in the platform.
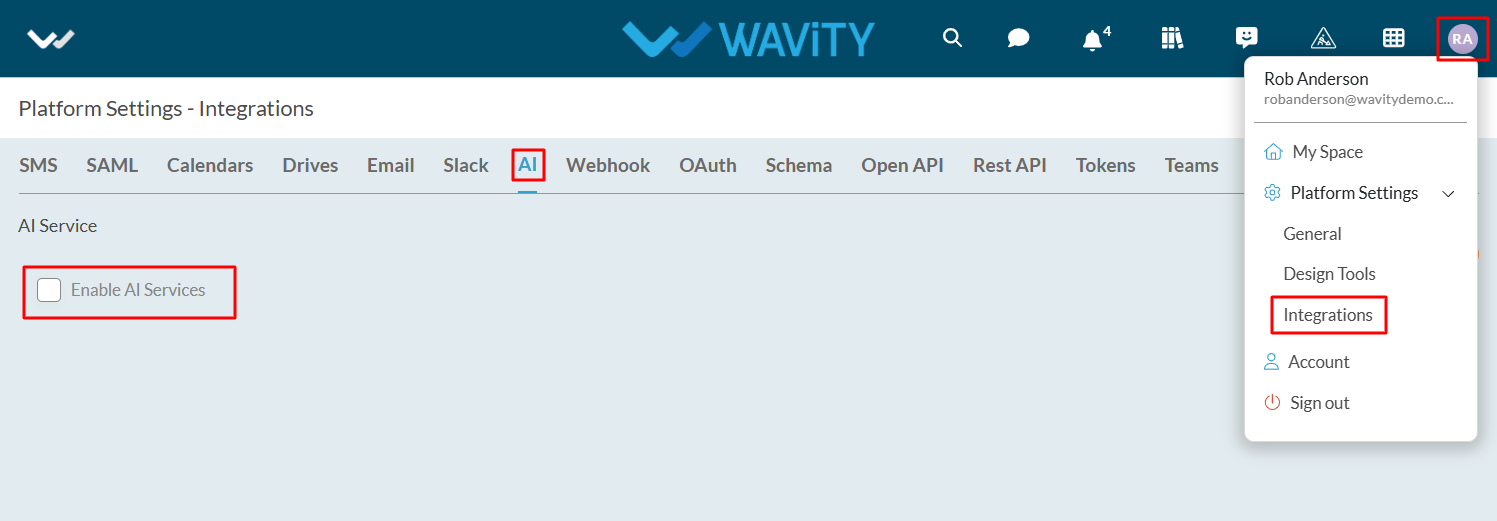
- To enable AI Services, click on Profile Icon > Platform Settings - Integrations > AI
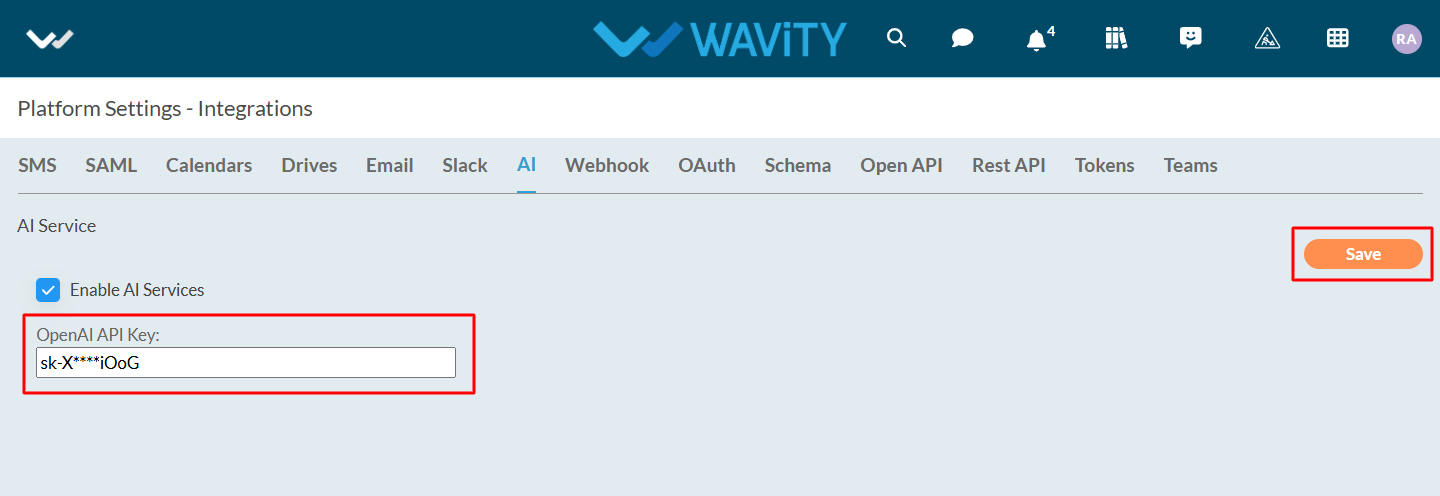
- Check the box next to the label ‘Enable AI Services’. Enter the OpenAI API Key and click on “Save” button update this function in the platform.
AI Services in Wavity:
- Automated Ticket Categorization & Routing
- AI Sentiment Analysis
- AI Chat Bot
Automated Ticket Categorization & Sentiment Analysis:
- Wavity's AI Assignment feature automatically categorizes tickets by analyzing the content of the email body or description of ticket, thereby streamlining the ticket management process and improving efficiency.
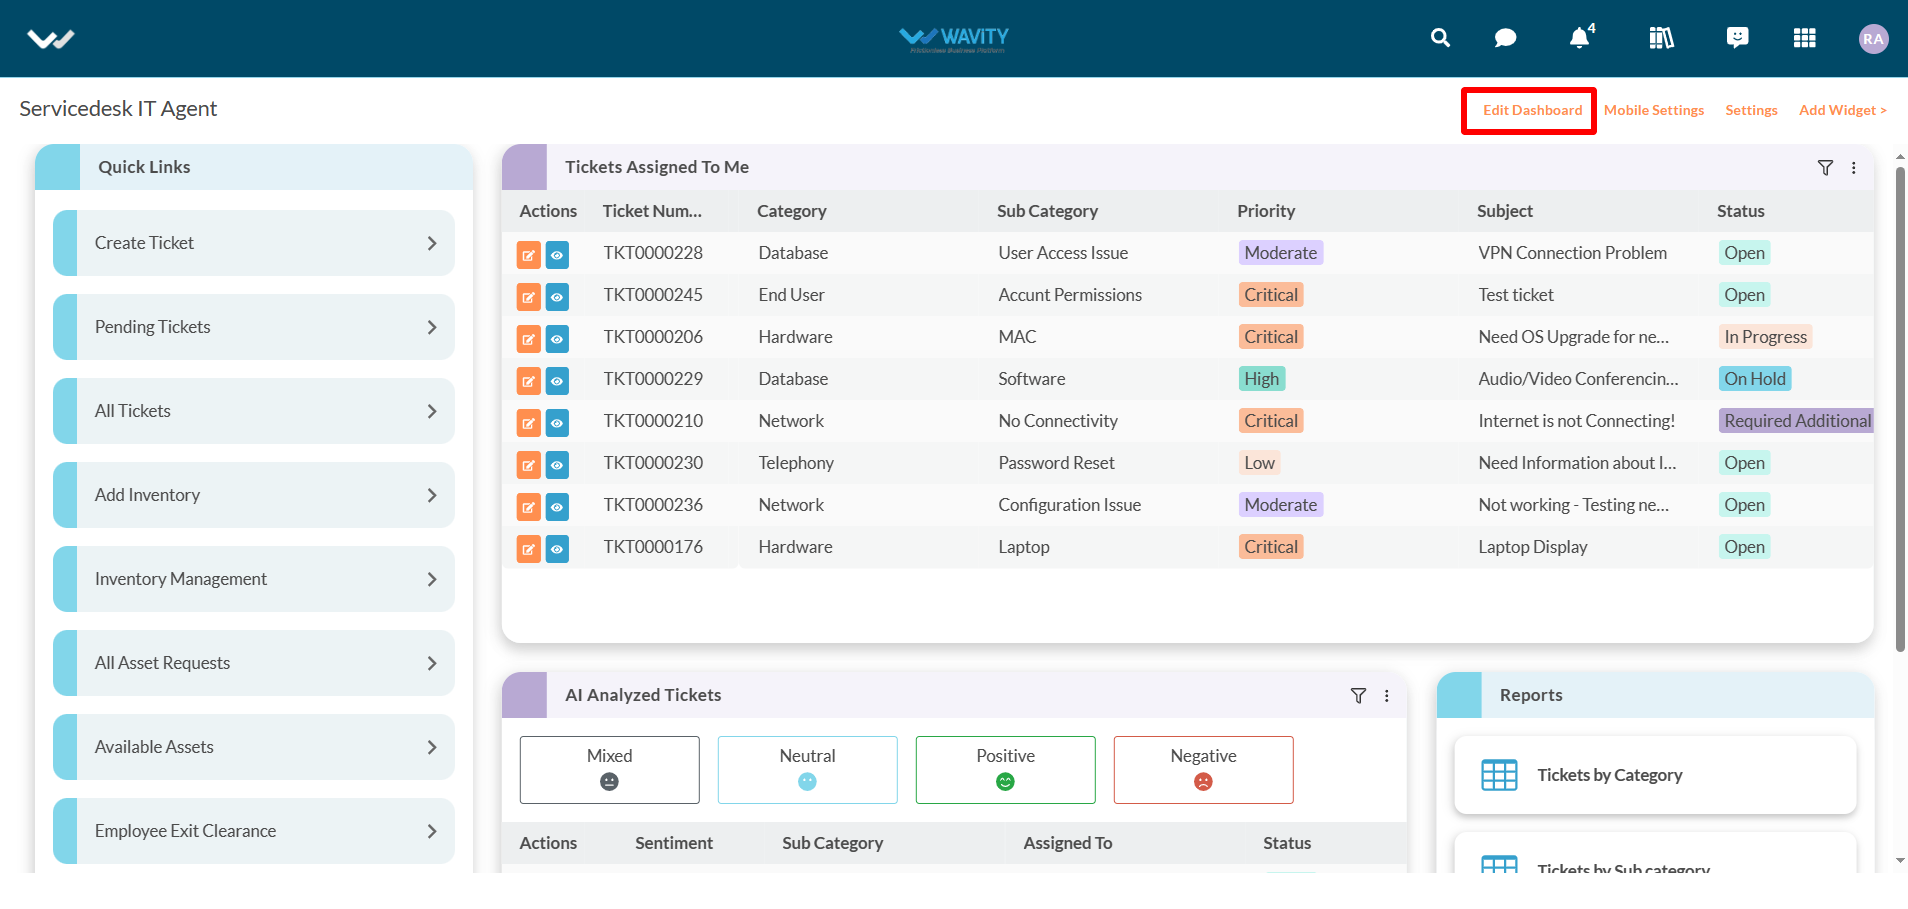
- As the first step, You can enable AI into the Interface by clicking on Edit dashboard option as shown below.
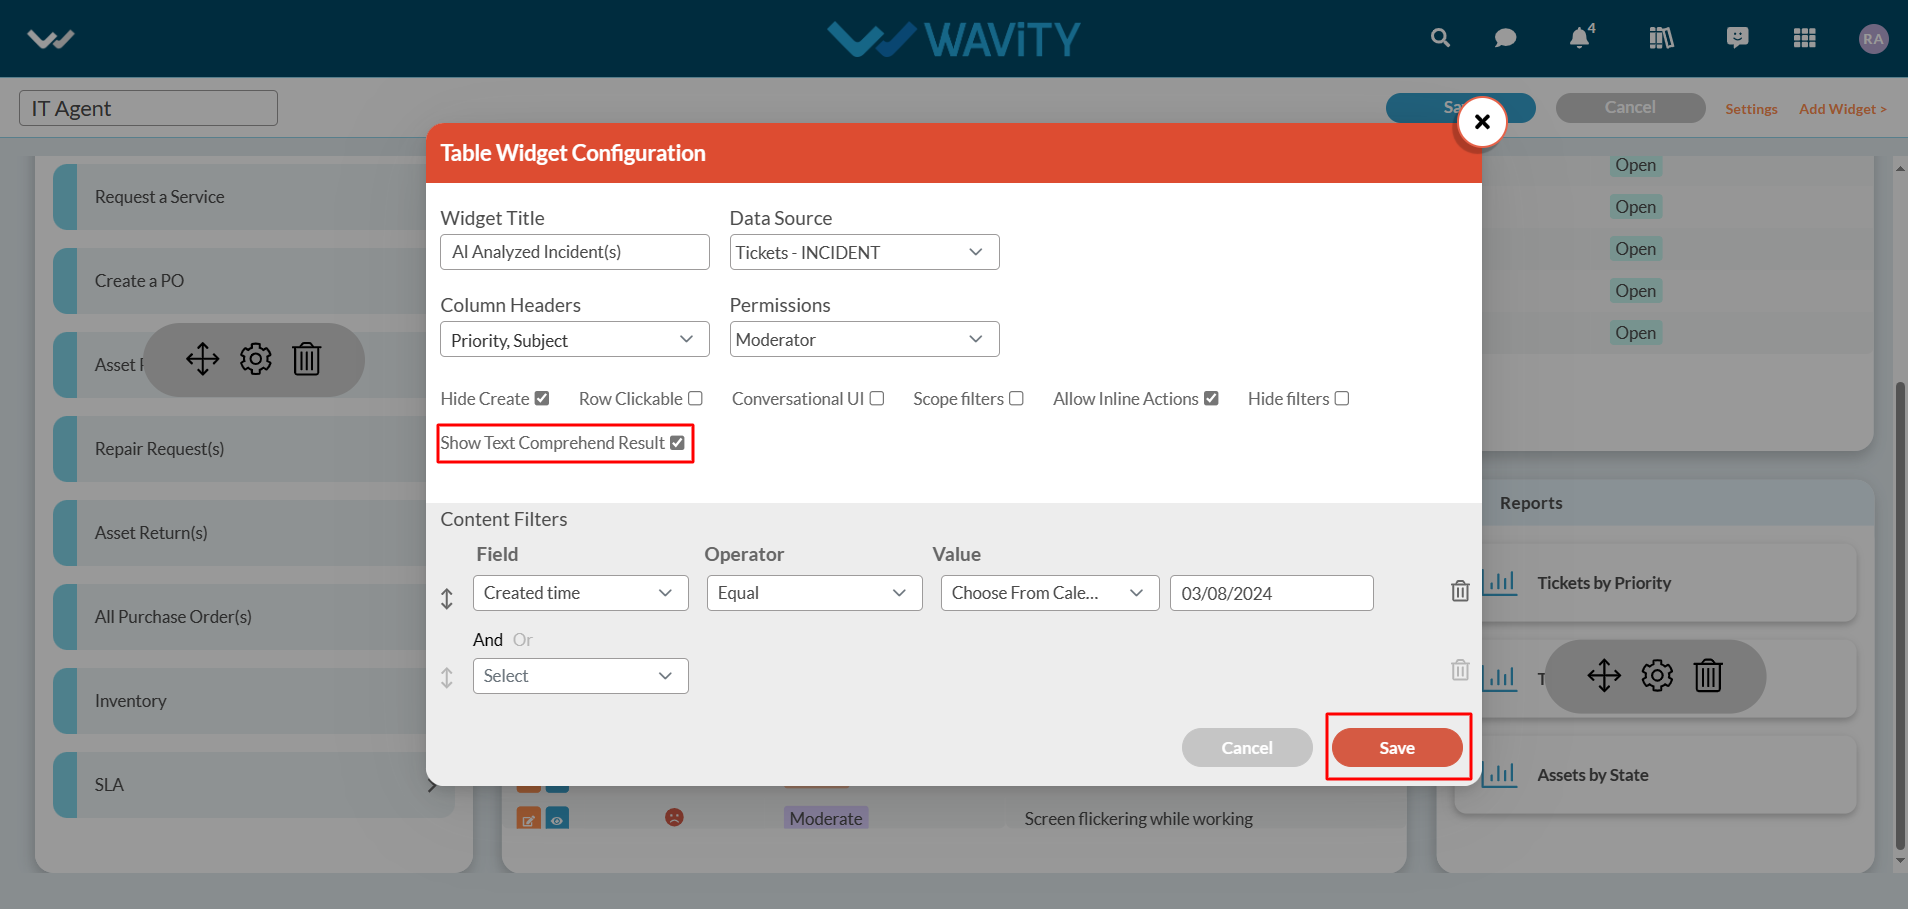
- Click on “Setting” Icon on the Widget as shown below.

- Select “Show Text Comprehend Result” and click “Save” button to enable AI Sentiment analysis with "emoji" icons in the interface.
- Additionally, you can view the details of AI Ticket Categorization for each ticket by clicking on the "blue" icon, as shown in the image below.
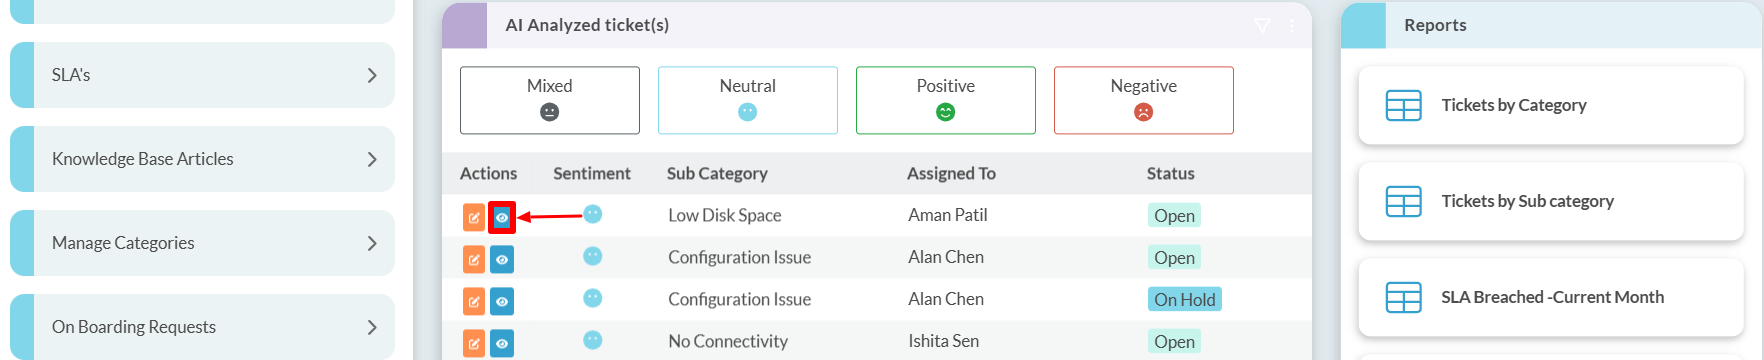
- Next, click on the "three dots" menu and select "Details," as shown in the image below.

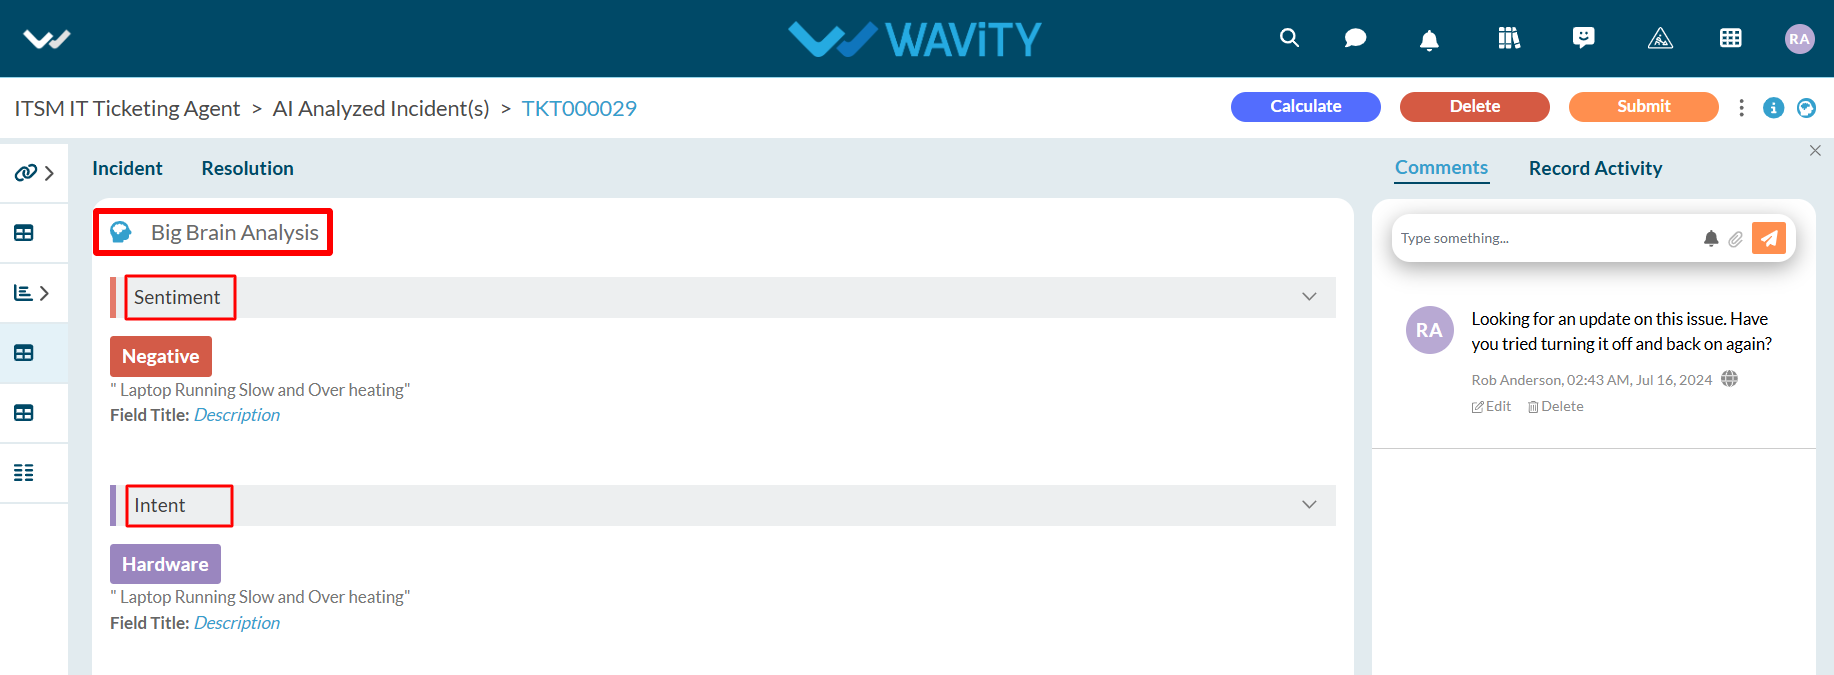
- Click on "Big Brain Analysis" icon.

- This section displays the sentiment of the user who created the ticket, along with the AI-generated ticket categorization under the Intent category. Based on the category identified in the Intent, AI can automatically assign the ticket to the appropriate agent.
- AI Chat bot: For more details, please click on the following link: How to use AI ChatBot in Wavity | Wavity