How to enable Slack Integration
- Only Admin of your organization can enable Slack integration by entering the appropriate configuration details in 'Integrations’ settings.
- Wavity platform supports Slack integration functionality, enabling notifications to be sent via Slack based on specified parameters and conditions.
- It's recommended to create a new workspace in Slack for linking with Wavity. Additionally, ensure you are logged into the Slack workspace.
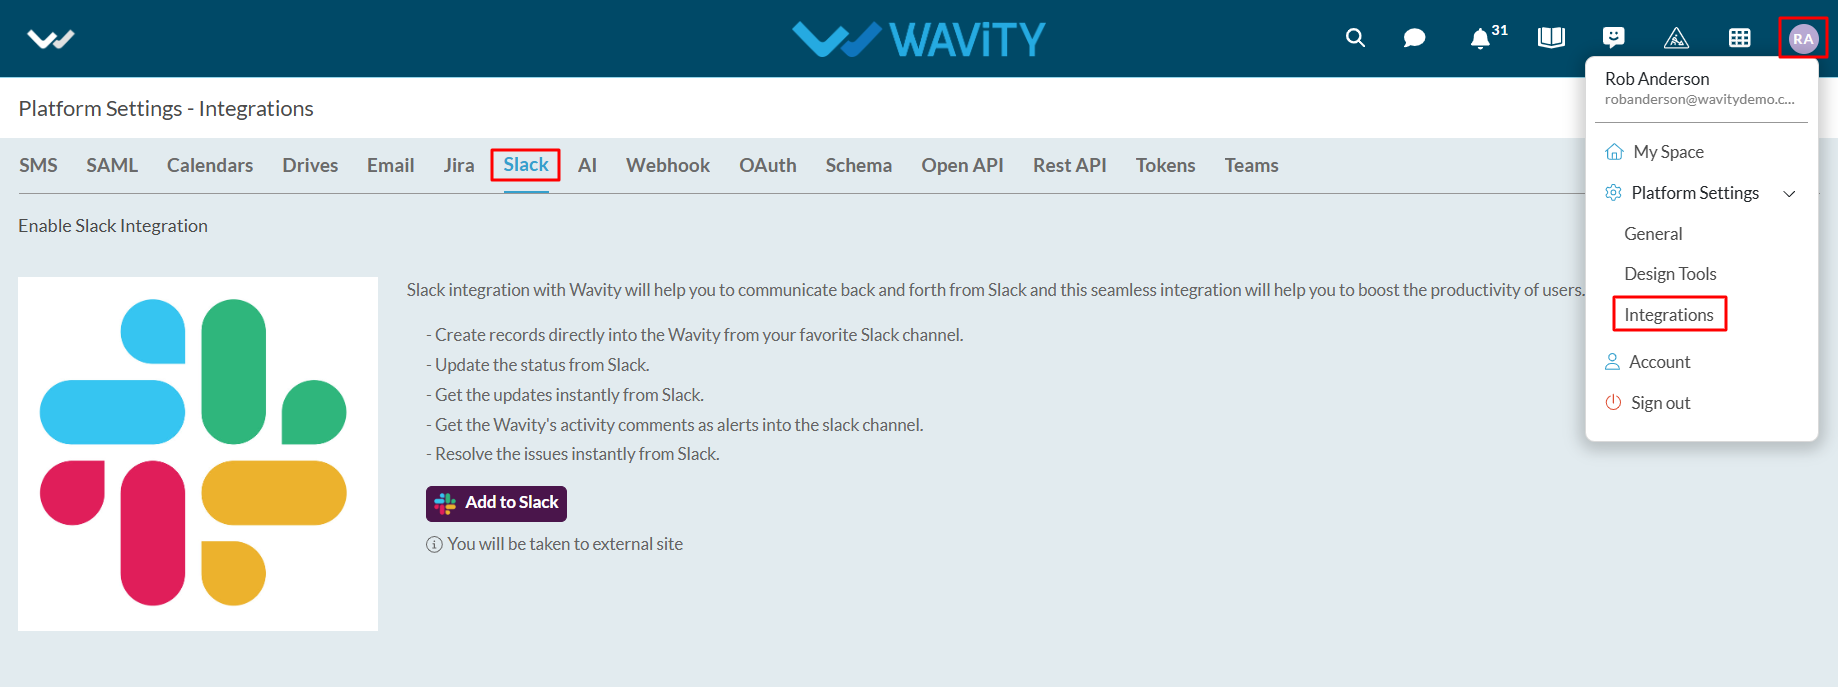
- Navigate to Slack Integration settings. Go to Platform settings> Integration > Slack
- Click on “Add to Slack”

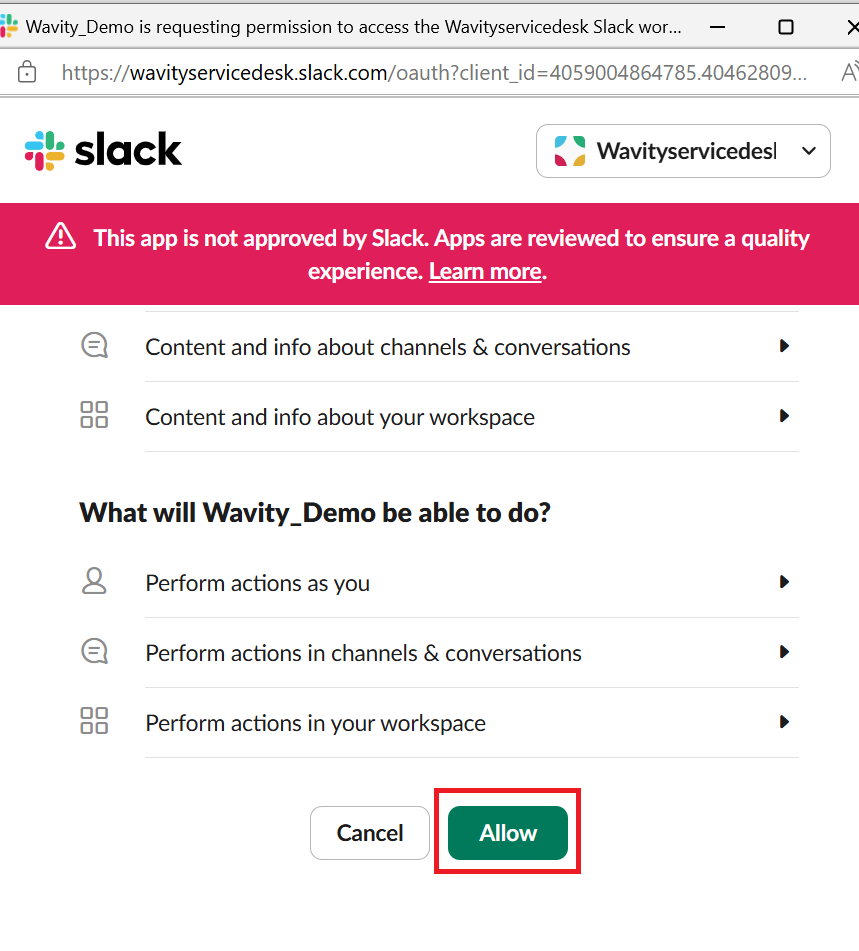
- A new window will appear. Click on “Allow” to complete the linking process.
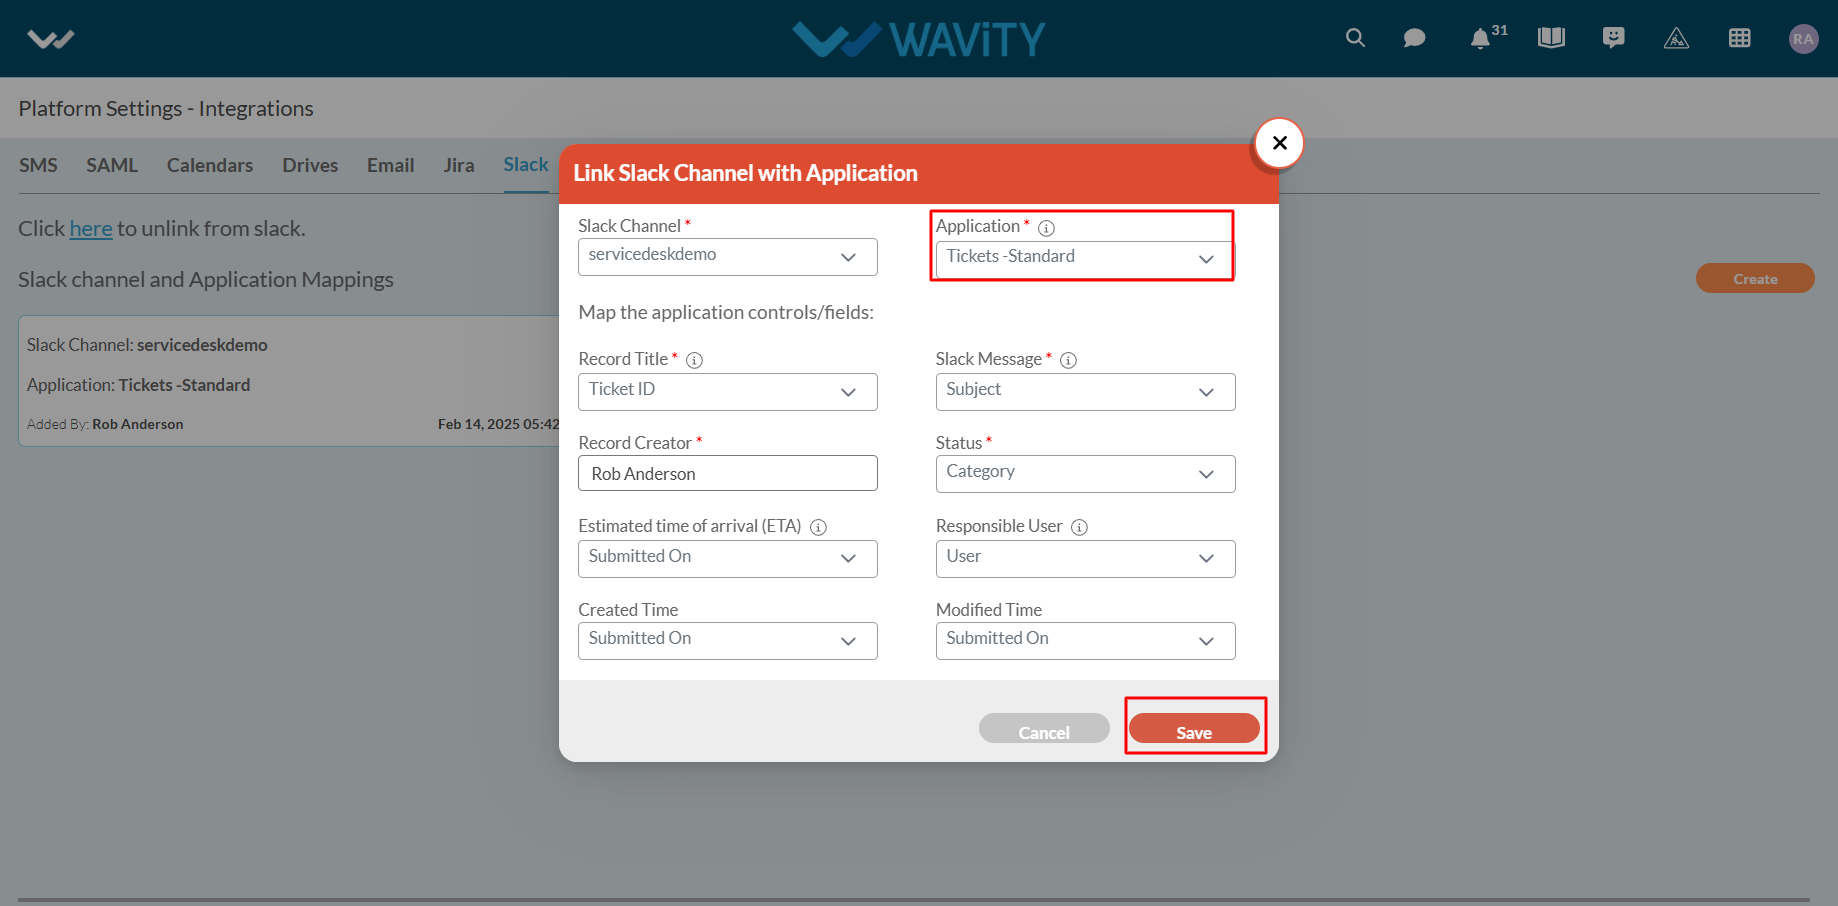
- Next, to map Wavity Applications to Slack, click on the ‘Create’ button.
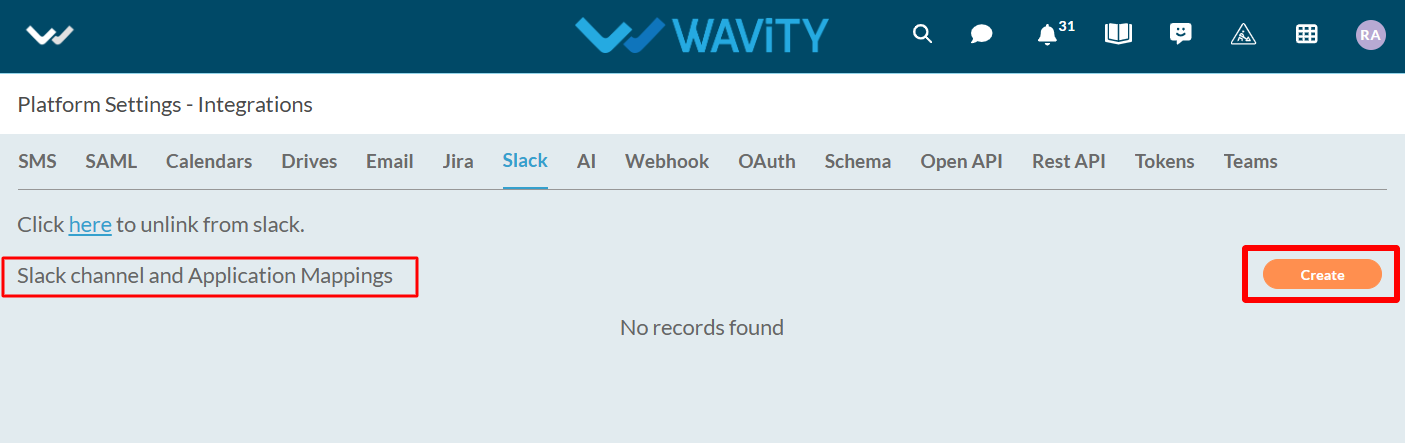
- Select the Slack channel from the workspace that is linked to Wavity.

- Choose the Wavity application you want to link with Slack and set the appropriate parameters according to your requirements. Click on the ‘Save’ button to finish the setup.
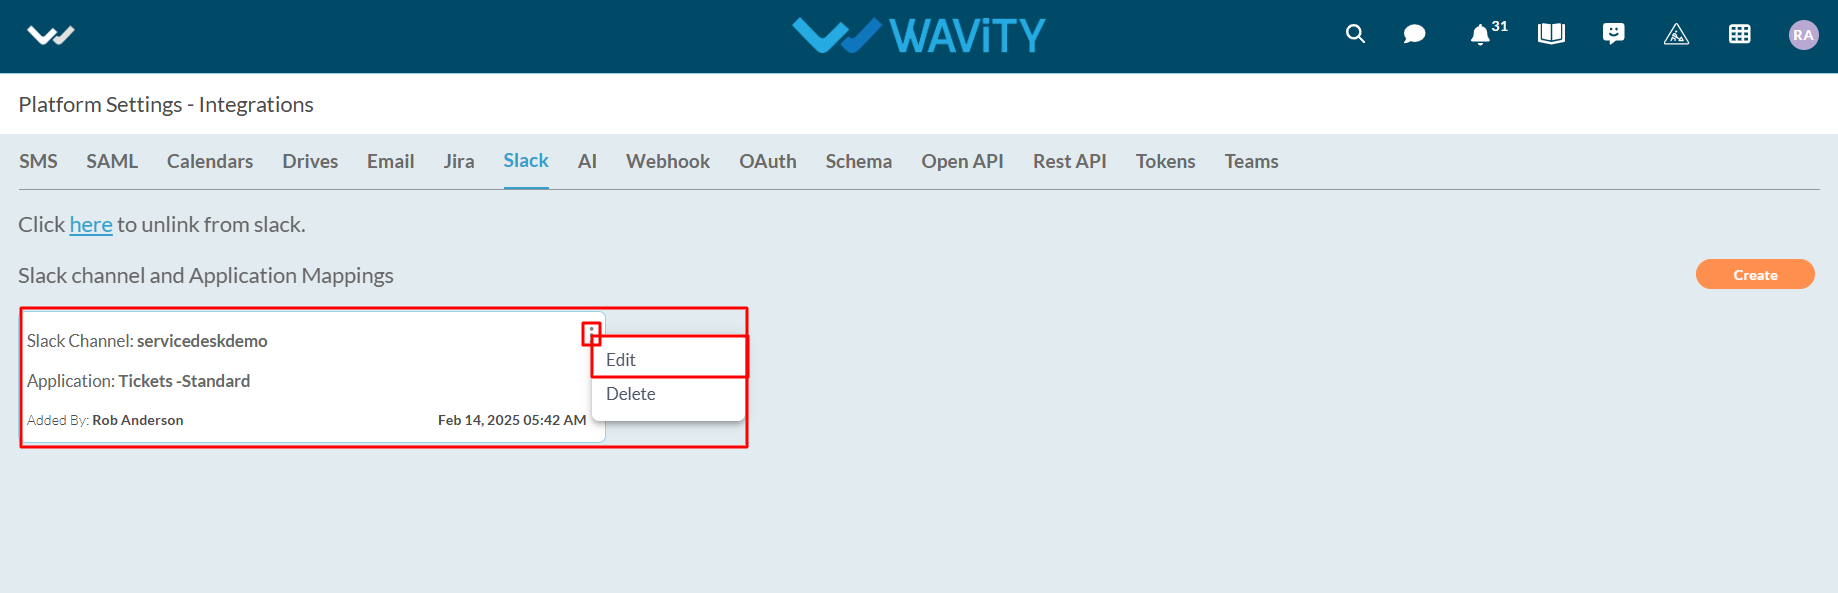
- Your Slack channel is now successfully linked to Wavity. You can edit or remove the channel if needed.
Managing Helpdesk Tickets via Slack Commands
- Available commands in Slack:
- /create: creates a helpdesk ticket.
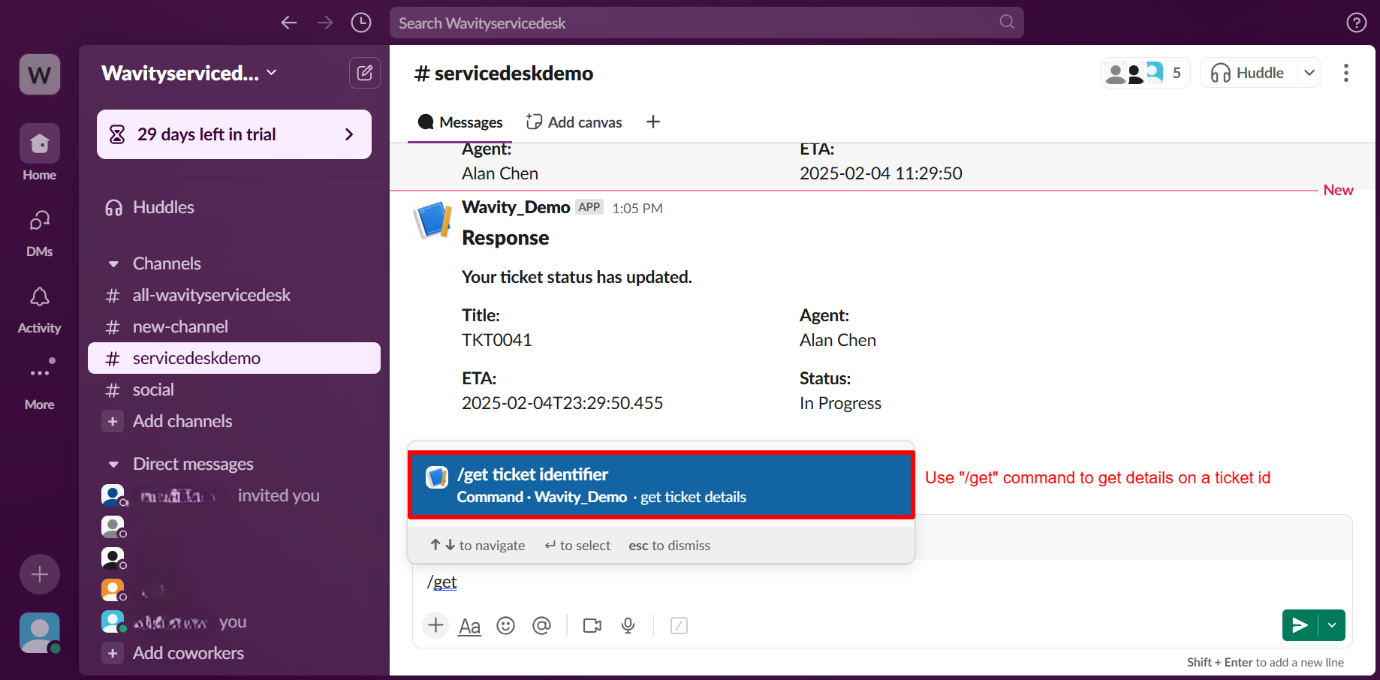
- /get: gets ticket details.
- /comment: adds a comment to your ticket.
- /complete: closes the ticket.
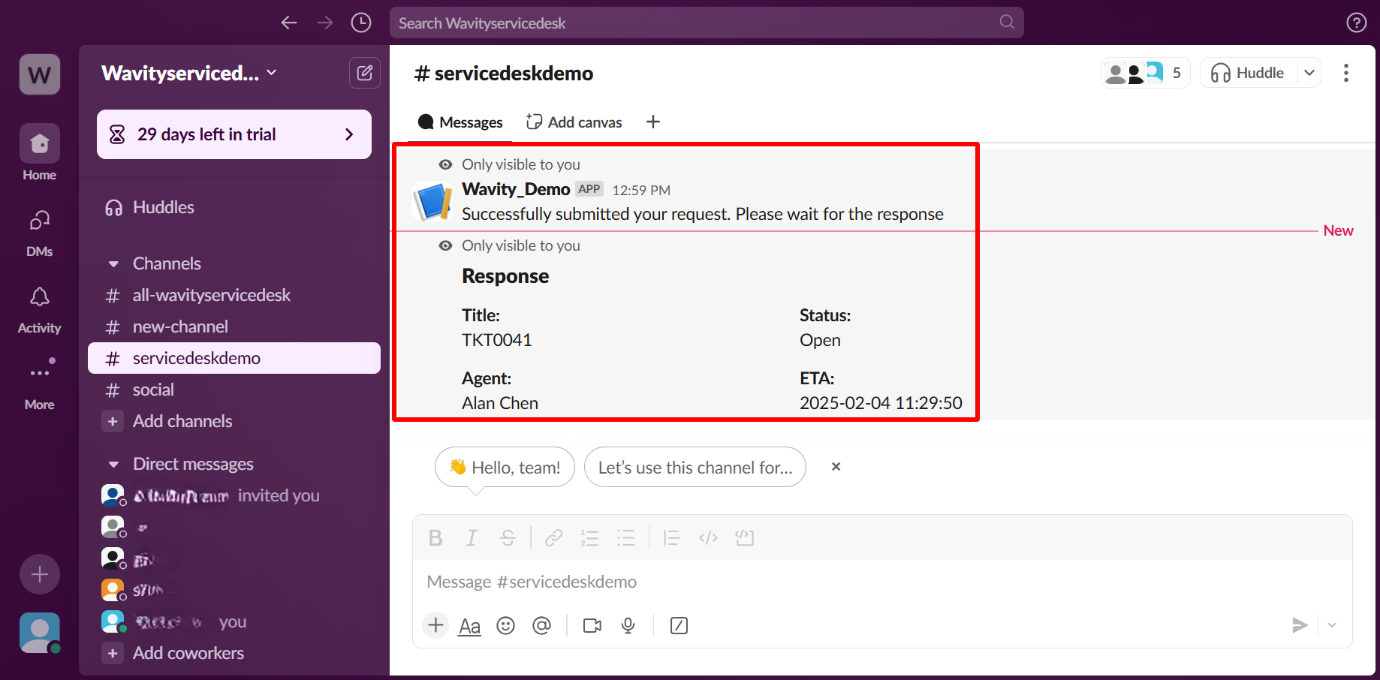
Create a New Ticket: In the message box, type “/cre” and select the /create command from the dropdown (as shown in the image below).

- Enter Ticket Subject: Type in the subject for your ticket and press Enter to create a new ticket.

- Ticket Created: A new ticket is created with the status set to “open.”
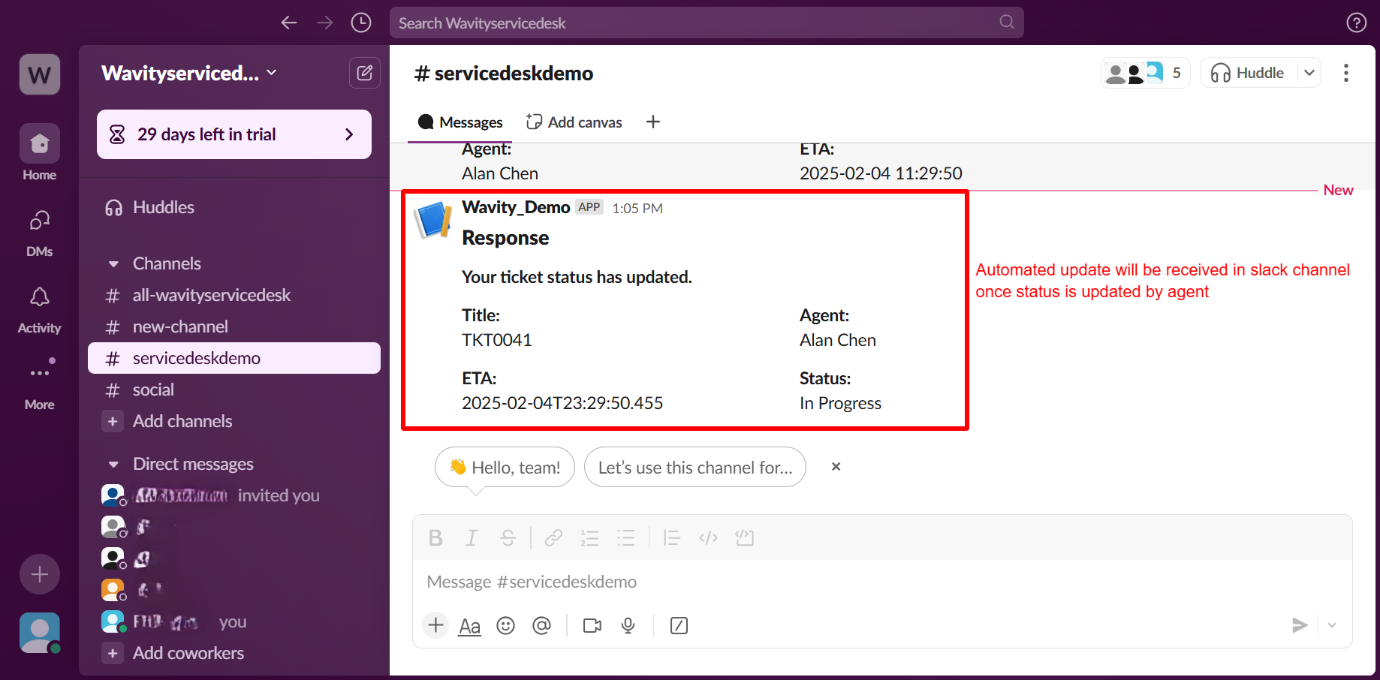
- Access Ticket in Wavity Platform: Open the newly created ticket in Wavity platform.

- Update Ticket Status: Change the status of the ticket to “In Progress” and click Save to update the record.

- Automated Slack Notification: A notification will automatically appear in Slack, showing the updated status of the ticket.
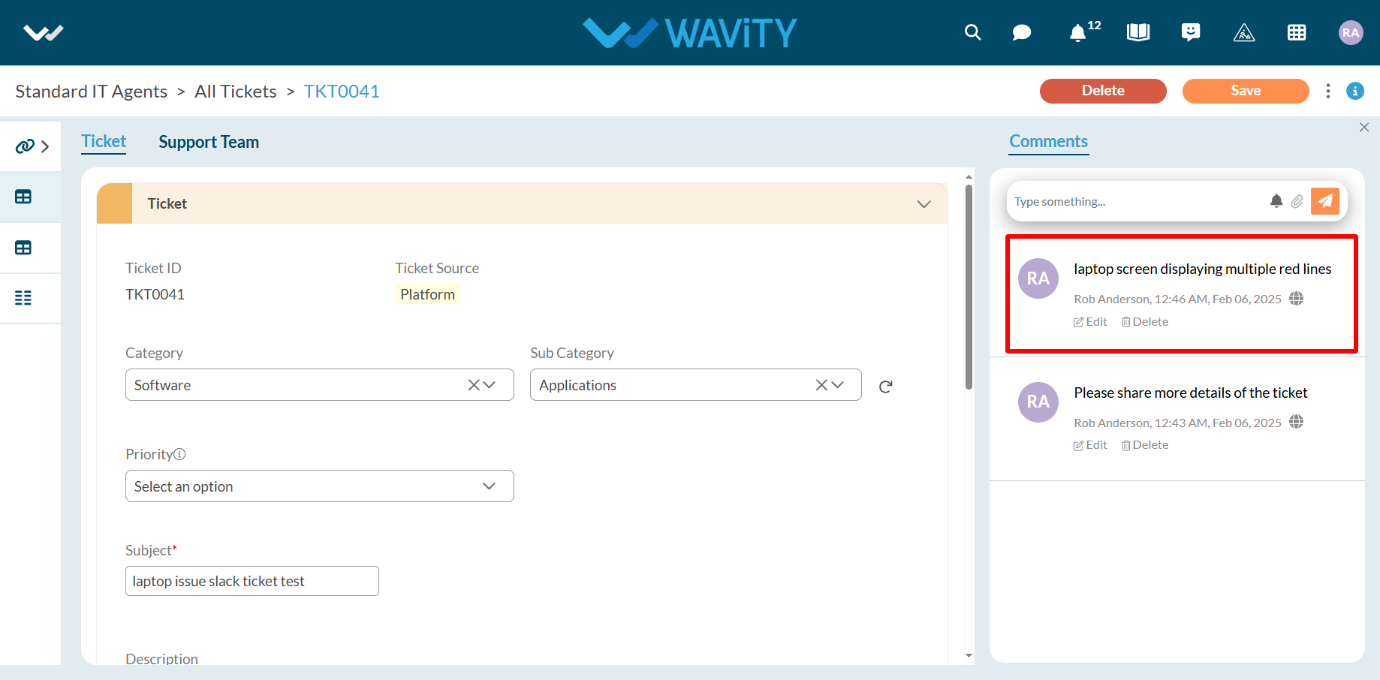
- Add a Comment to the Ticket: A comment will be added to the newly created ticket within the Wavity platform (see the image below for reference).

- Slack Notification for Comment: An automated Slack notification will display when a comment is added to the ticket.

- Add a Comment via Slack: In the Slack message box, type “/com” and select the /comment command. Enter the ticket ID, write the comment, and press Enter.
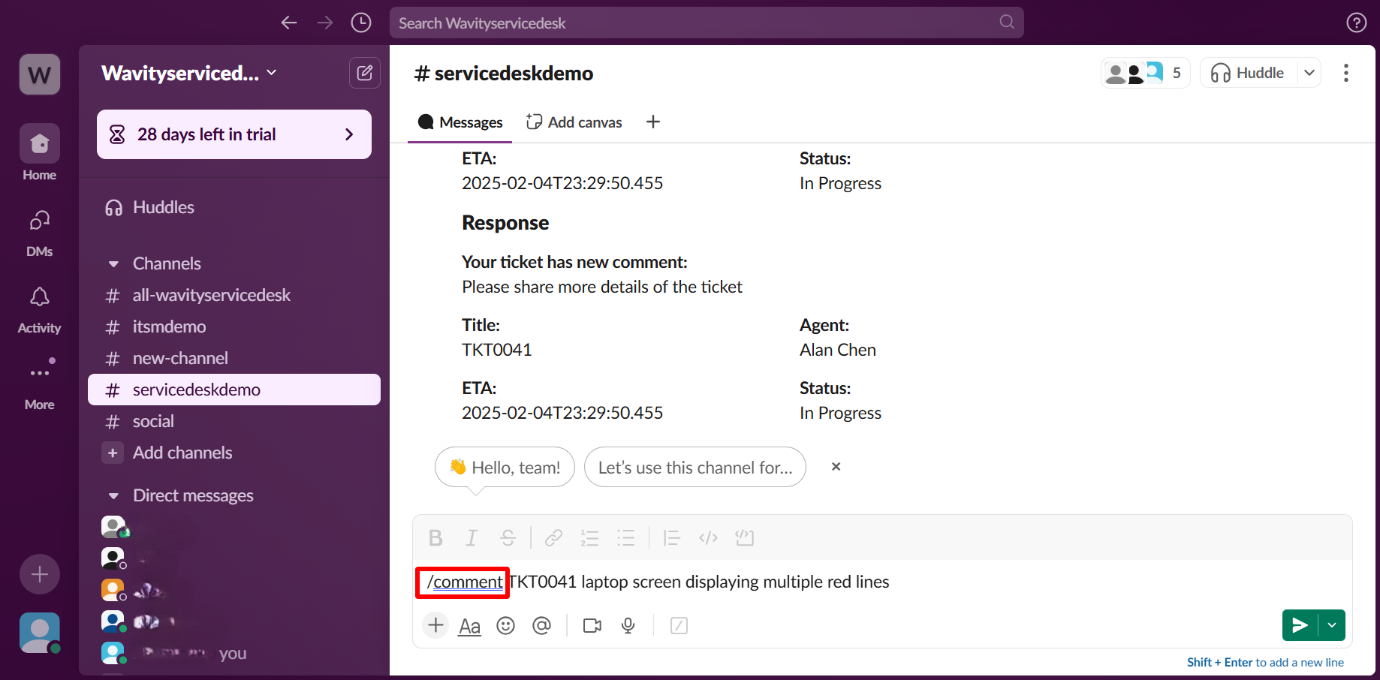
- Comment Reflected on Platform: The comment made in Slack will appear on the platform, as shown in the image below.
- Use Additional Slack Commands: You can also use the /get command to retrieve ticket details. In the Slack message box, type “/get” and select the /get command, then enter the ticket ID and press Enter.