How To Enable Work Calendar?
- Work Calendar are used in calculating working hours. Automated Email notifications will trigger only during working hours.
- Only Admin has the access to enable work calendar function in the platform.
- To enable mobile restriction, click on Profile Icon > Platform Settings – General > Work calendar.

- Check the box to enable work calendar.
- There are two types of work calendar available in Wavity platform which is “Region Work calendar” (Applies to all groups in your organization) and “Group Work calendar” (Applies to specific groups in your organization).
- To add region work calendar; Click on“ Add Region Work Calendar” to add new calendar year as shown in below image.

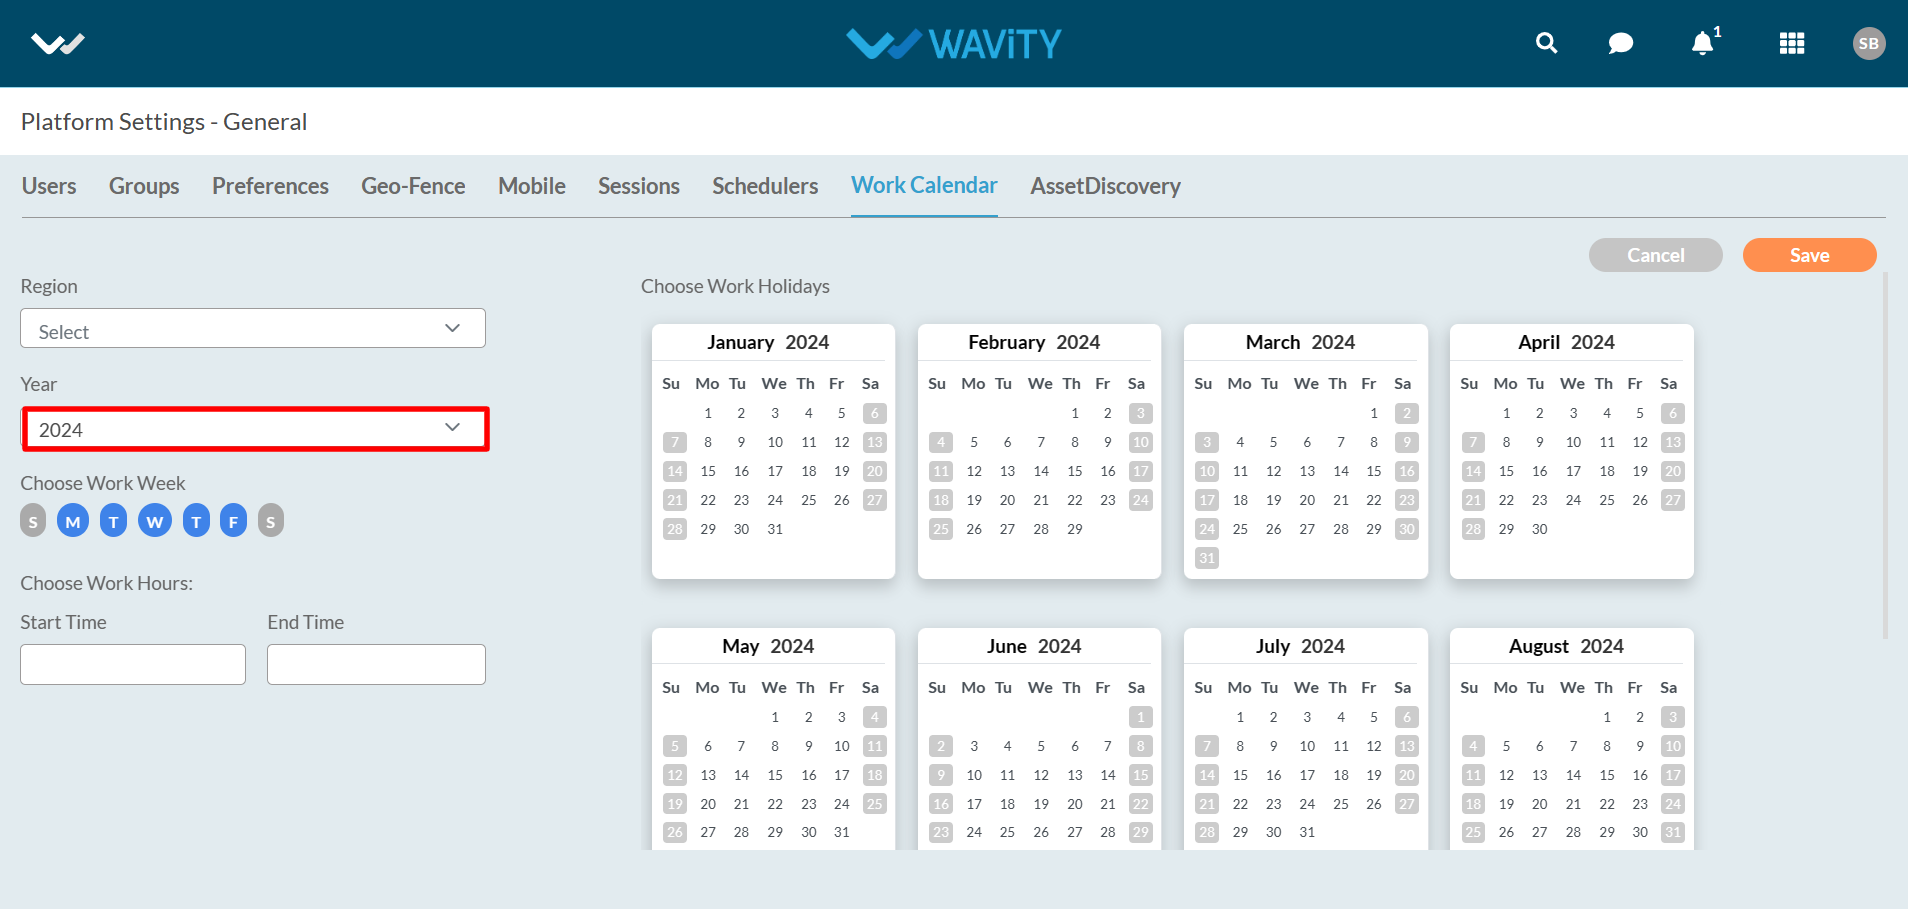
- Select “2024” to add a work calendar for the new year as shown below in the image.

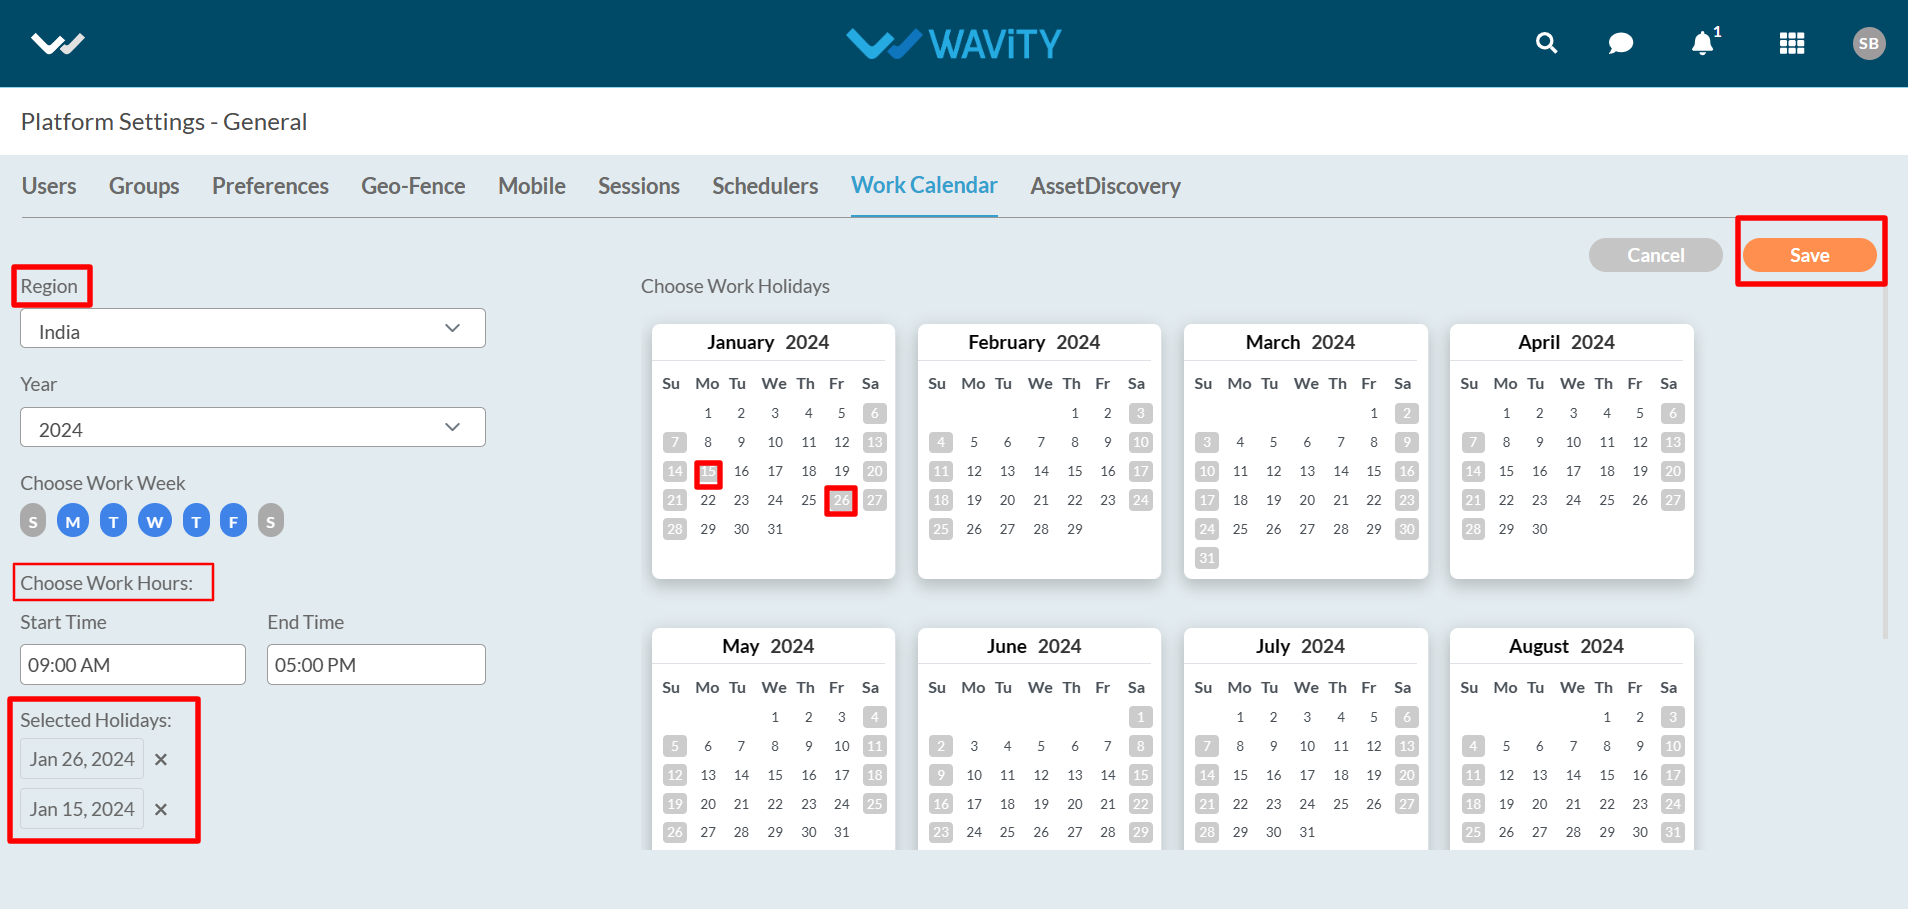
- Select region and chose the holidays from the calendar as shown in below. You can select the start time and end time as per your office working hours. Click on “Save” button to create a new region work calendar for the year 2024.

- To add group work calendar; Click on “Add Group Work Calendar” to add new calendar year as shown in below image.

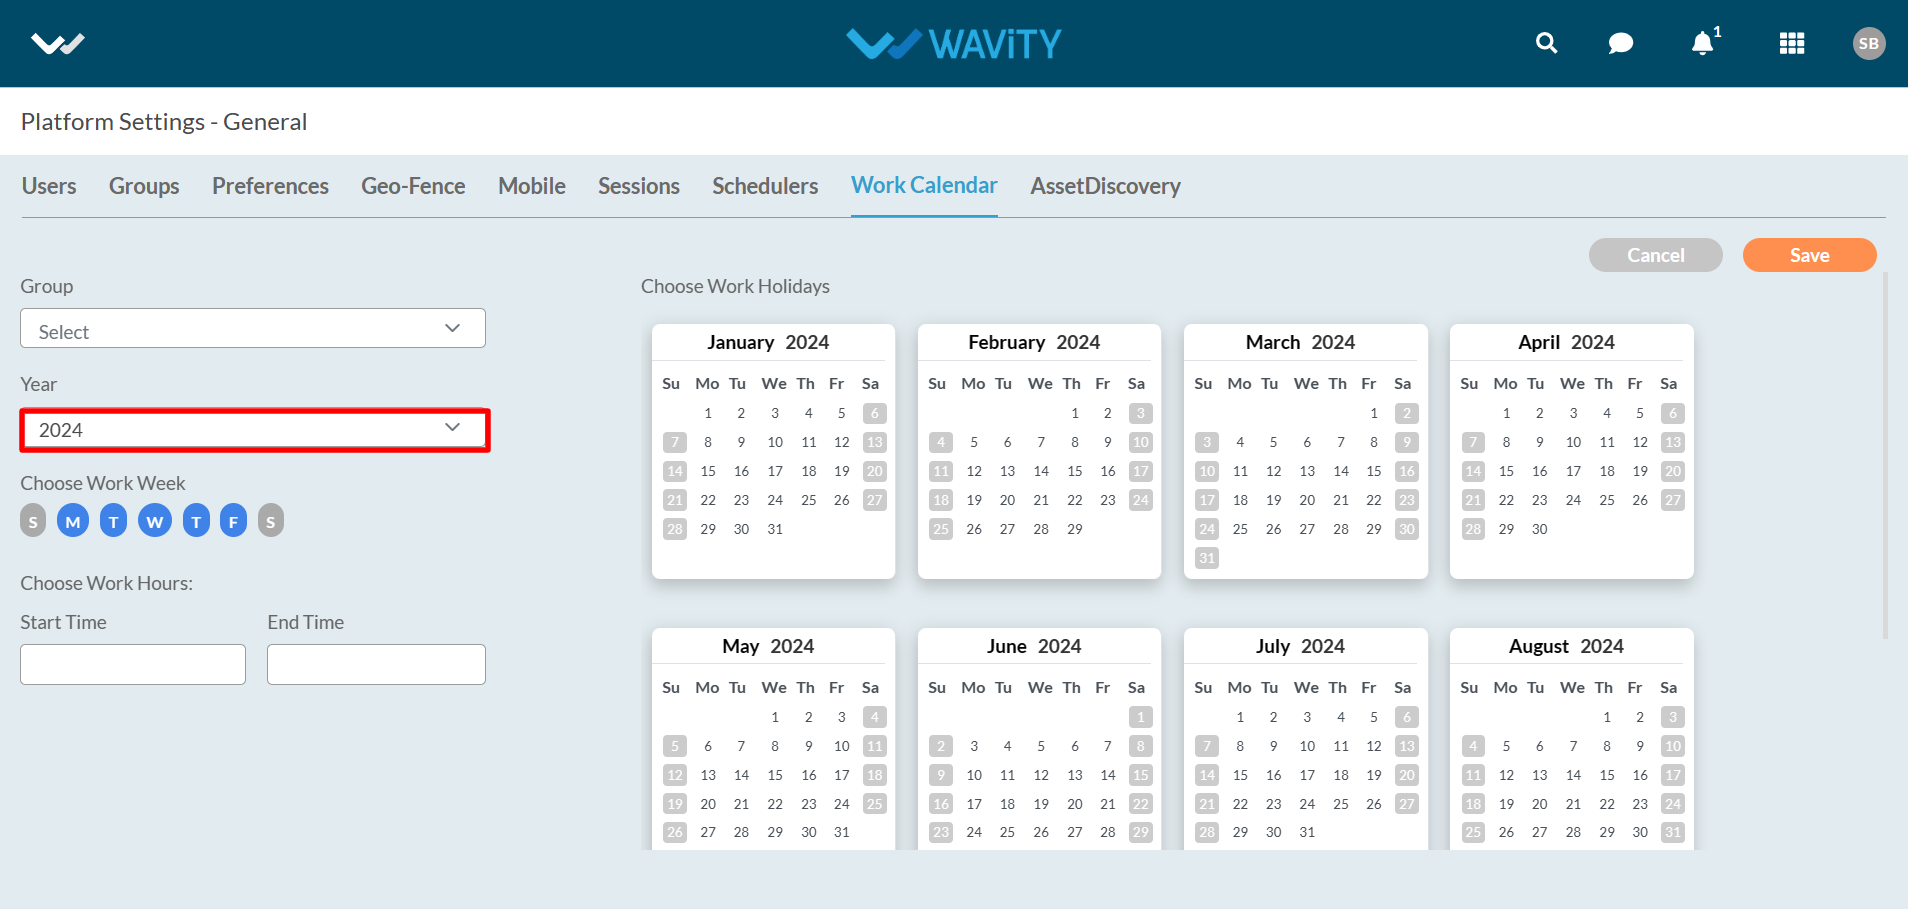
- Select “2024” to add a work calendar for the new year as shown below in the image.

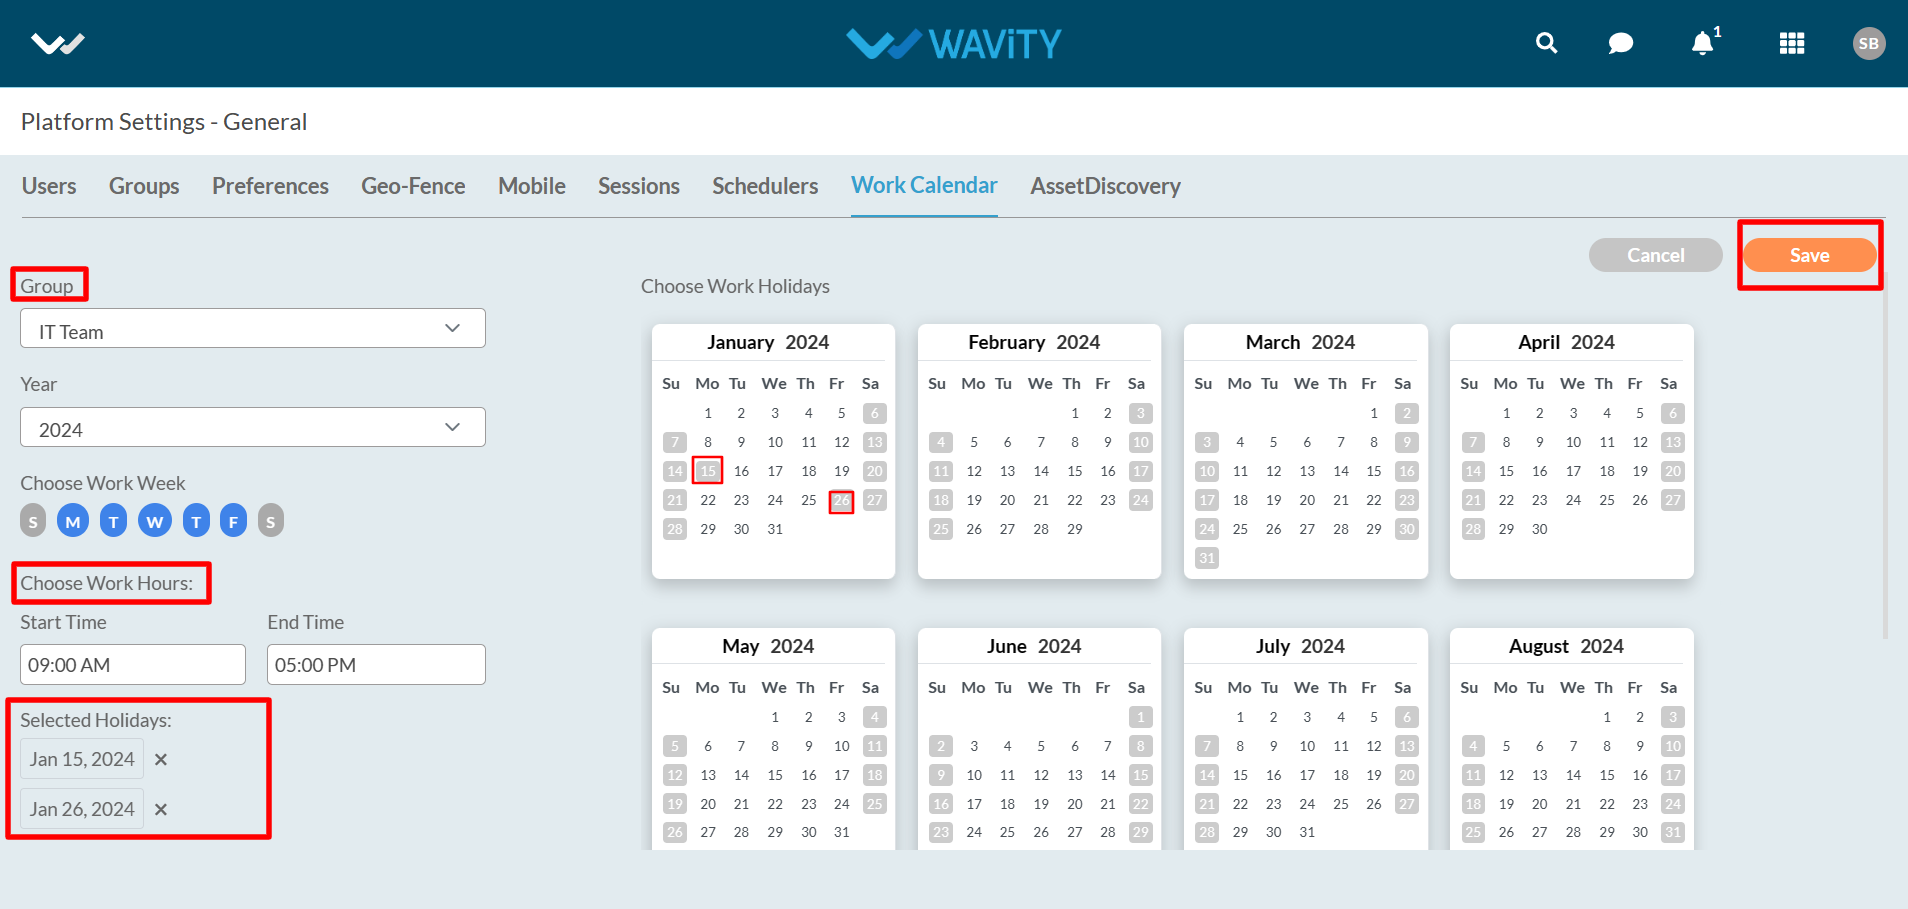
- Select “Group” from the dropdown and chose the holidays from the calendar as shown in below. You can select the start time and end time as per your office working hours. Click on “Save" button to create a new group work calendar for the year 2024.

