How to execute a new Macro?
- The Wavity platform provides Macros functionality which is a set of predefined sequences of actions or commands that can be executed automatically to perform repetitive tasks efficiently. They help streamline workflows, reduce manual effort, and ensure consistency in handling routine processes.
- Wavity Macros offer full customization, allowing you to tailor them to your specific needs and workflow. Whether it's inserting predefined responses, updating ticket statuses, or assigning tickets to the right team members, Wavity Macros can be customized to optimize your ITSM processes.
Executing Macro:
- To execute a macro, macros need to be enabled in the interface by the Admin/Solution Owner.
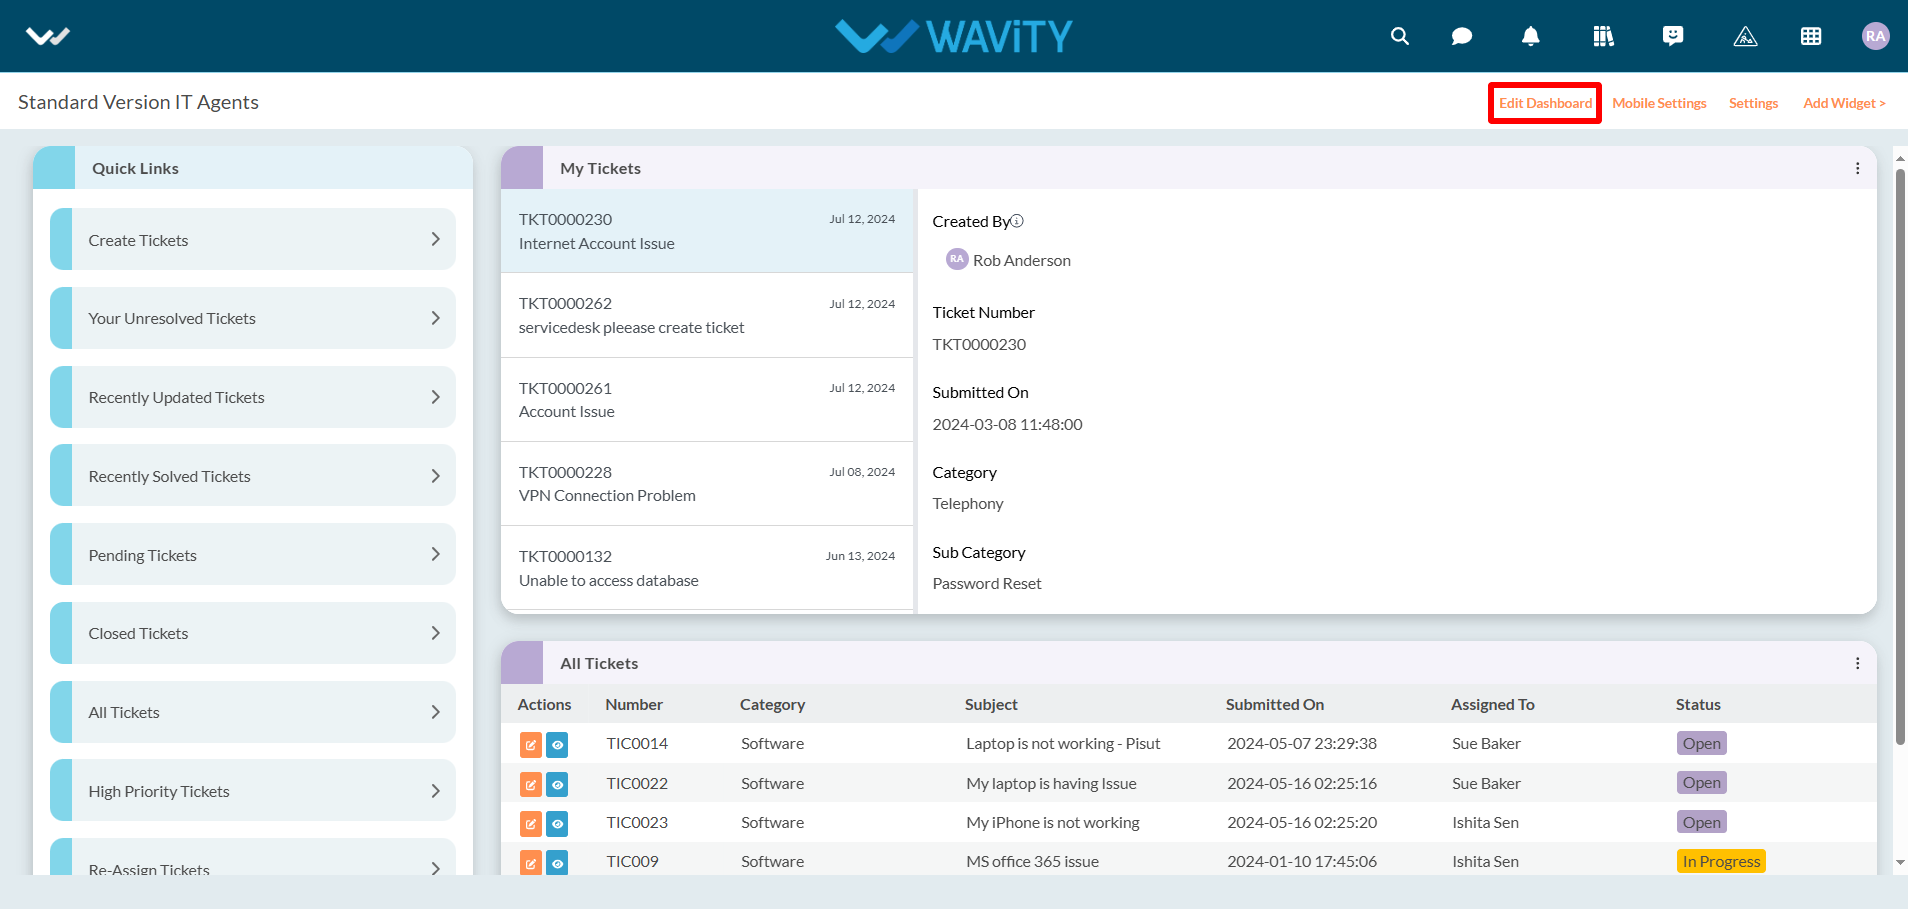
- Click on ‘Edit Dashboard’.
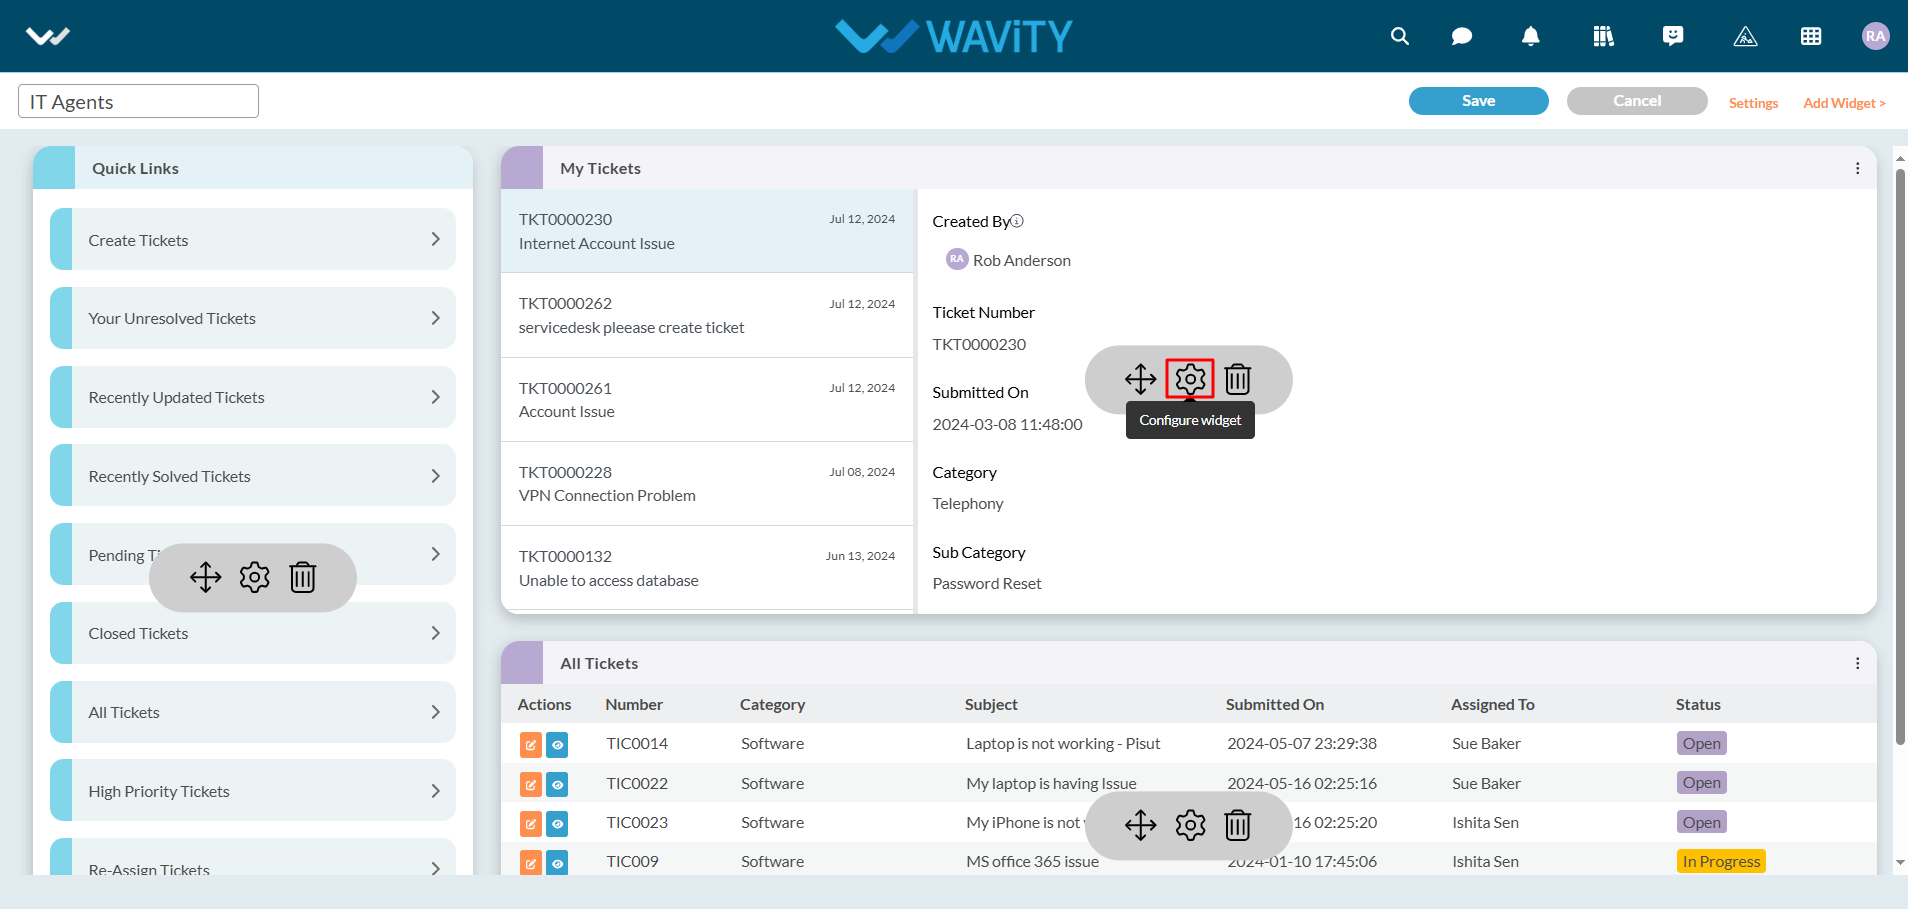
- Click on ‘Configure’ icon as shown in the image below.
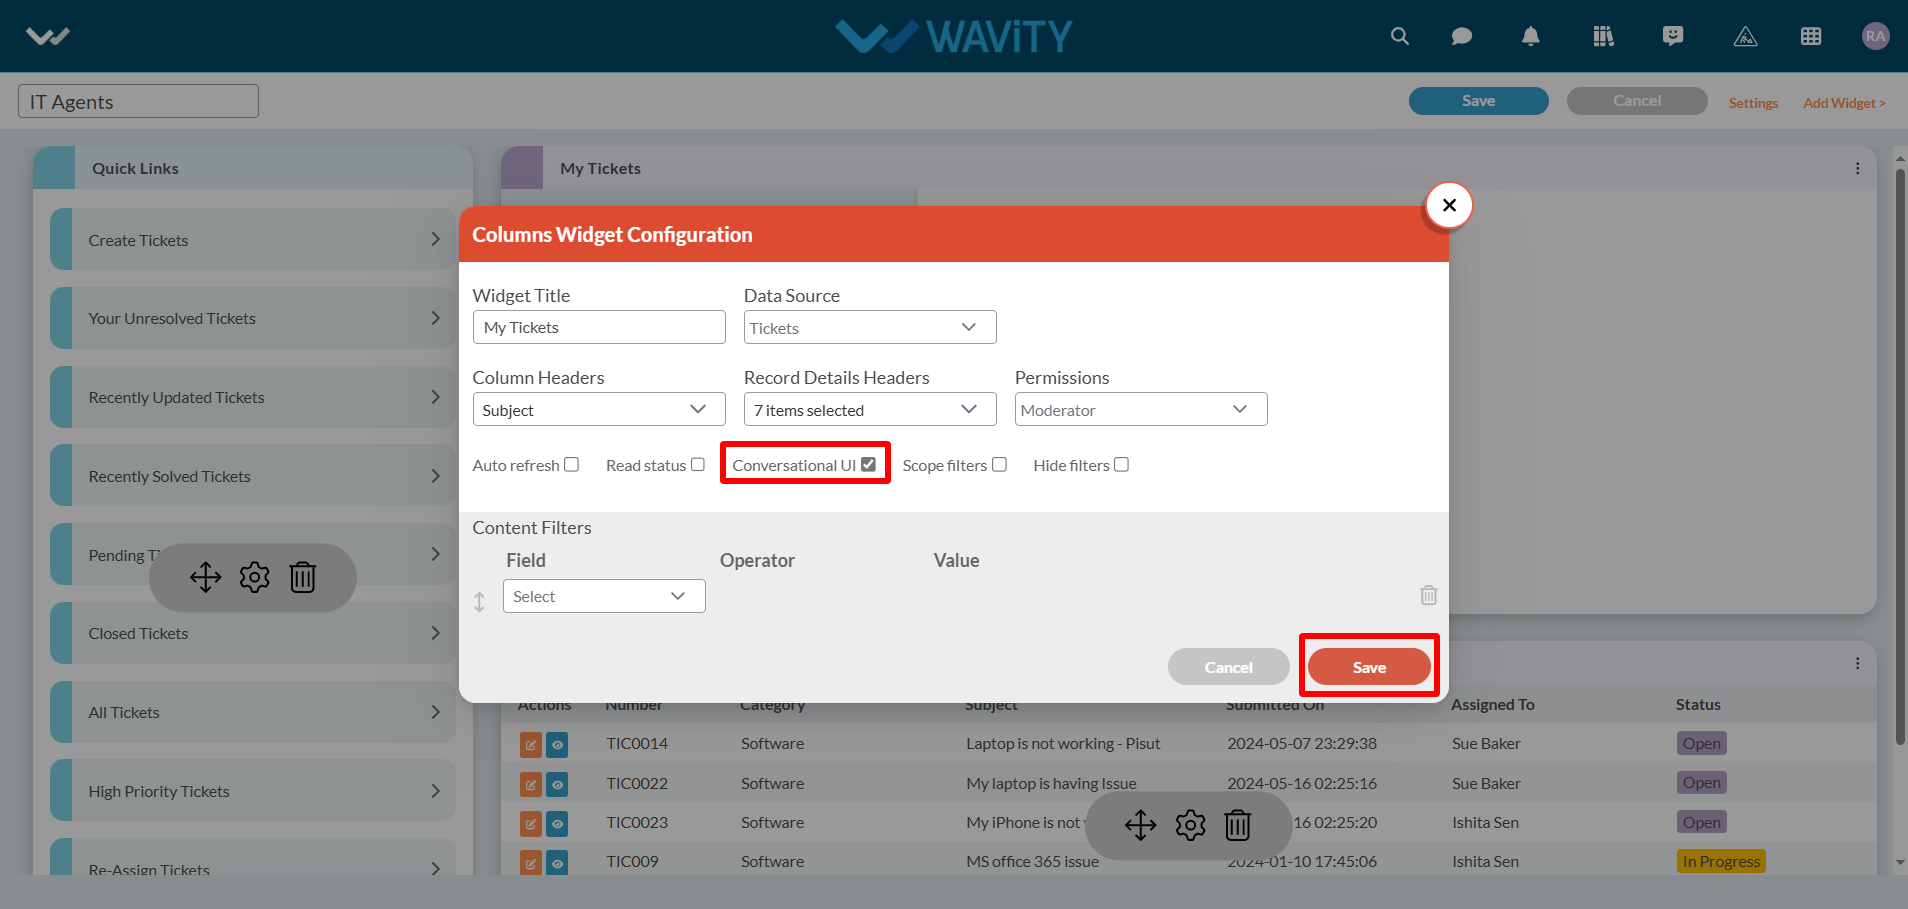
- Enable "Conversational UI" and click on the "Save" button. Now macros are enabled for use by users who have access.
- Click on title of the widget in the interface.

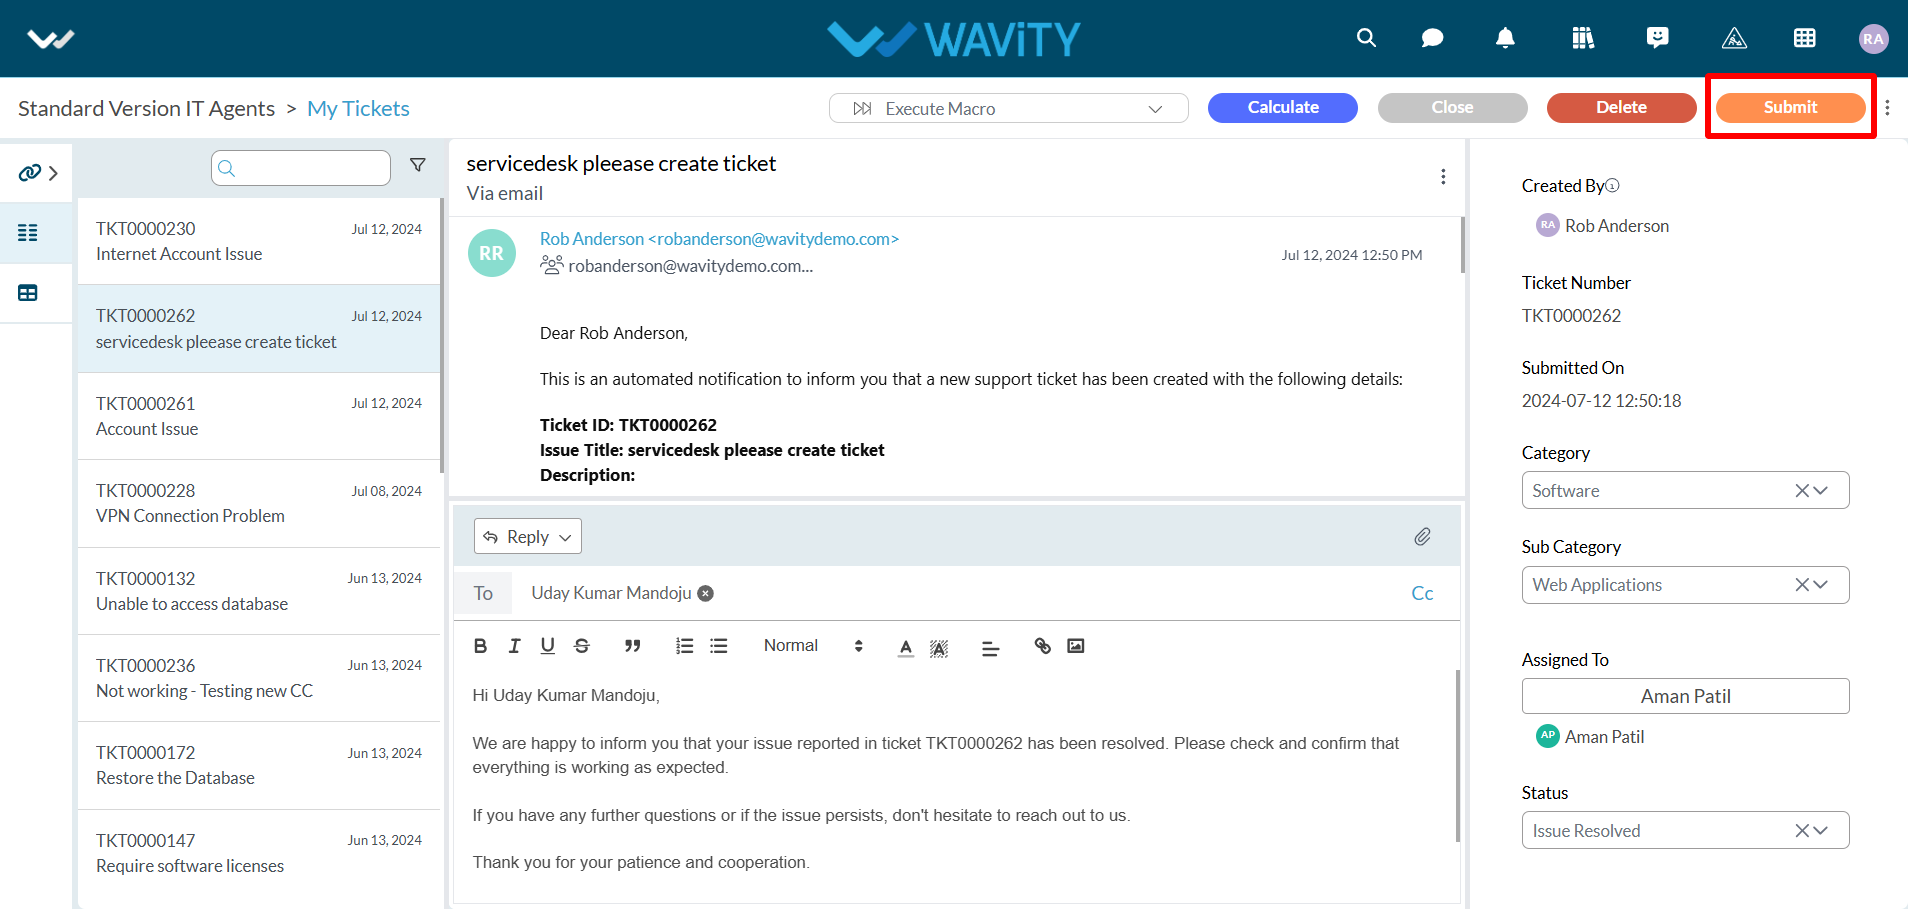
- Click on “Execute Macro” as shown in below image. All the Macro accessible by the current user will be displayed.
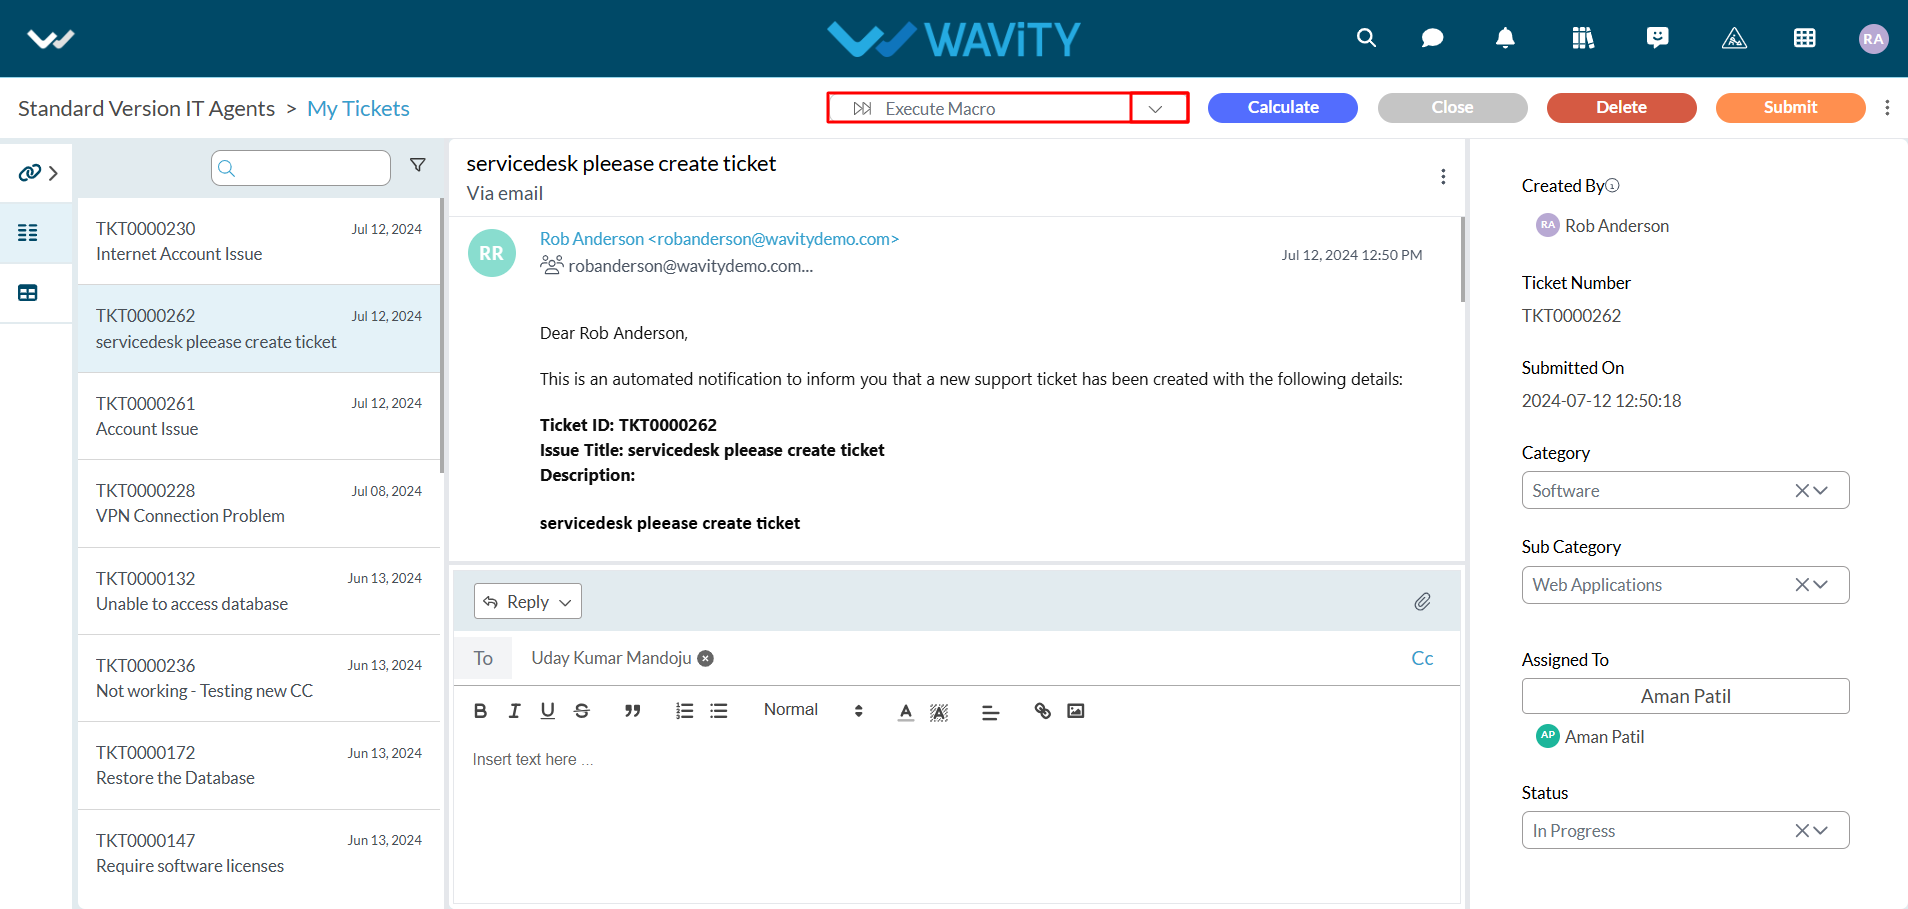
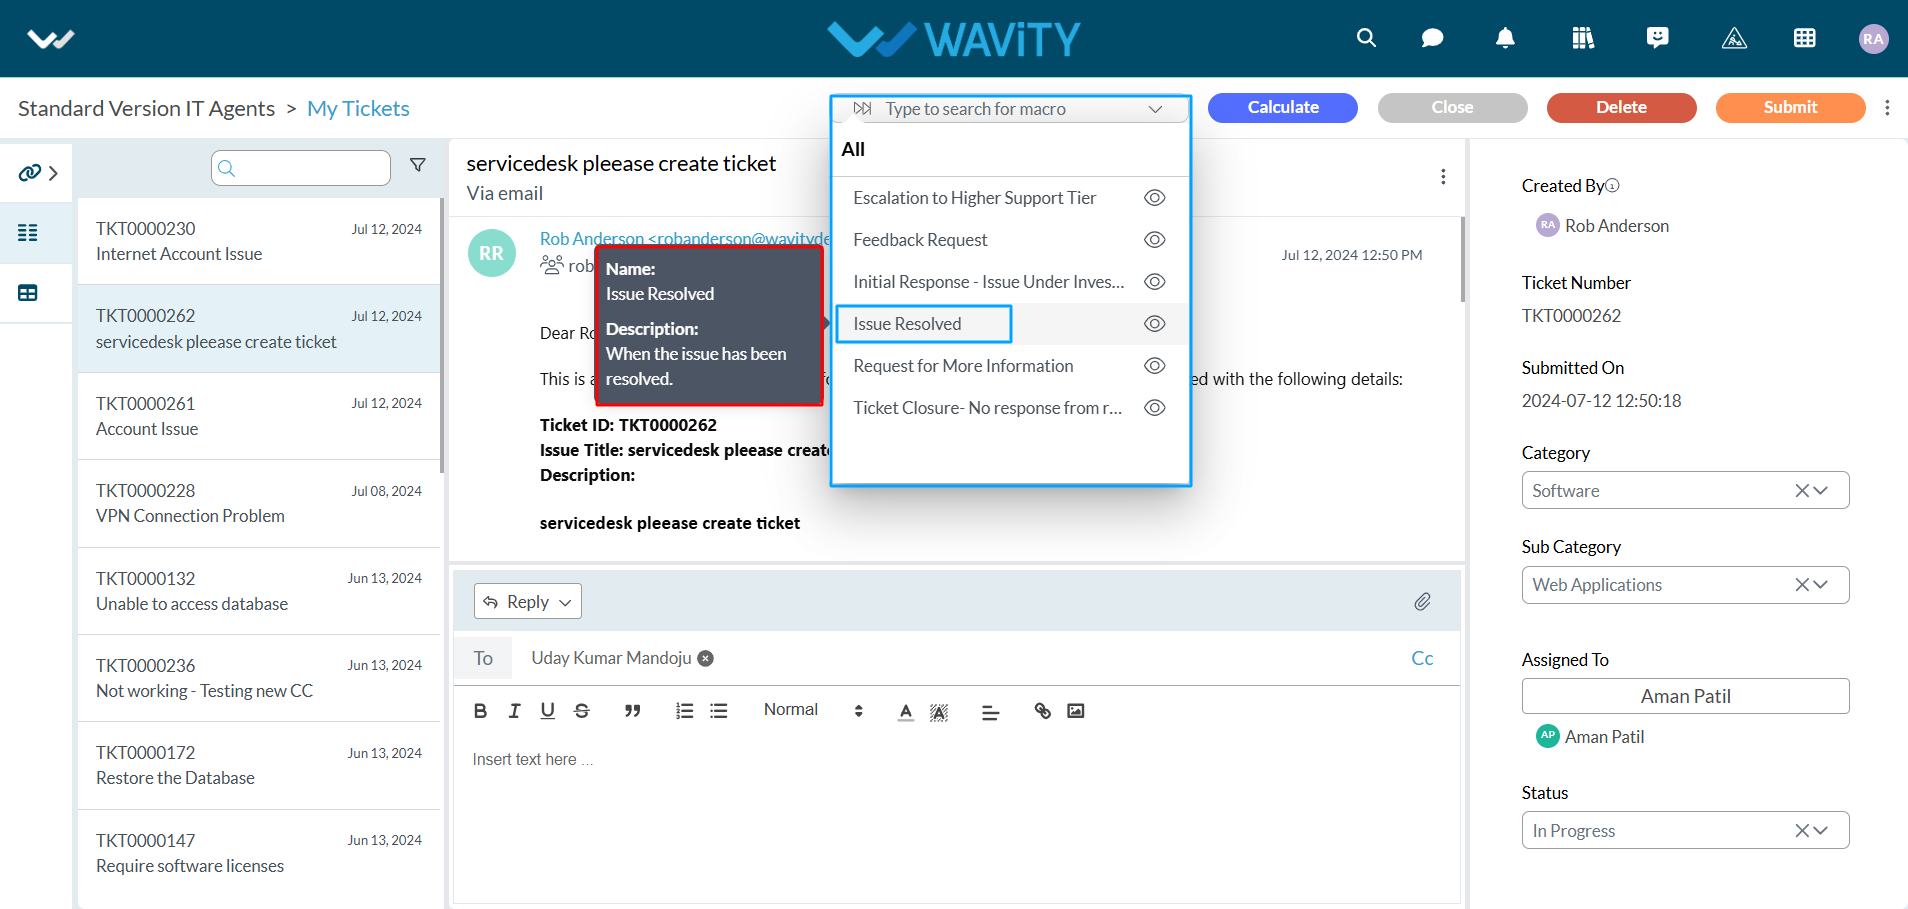
- Click on the Macro title you want to execute.
- Upon execution, all action items will be applied simultaneously. As in this example, the status value is changed, the Reply button is enabled, and the comment box is auto-populated. Please refer to the image below.
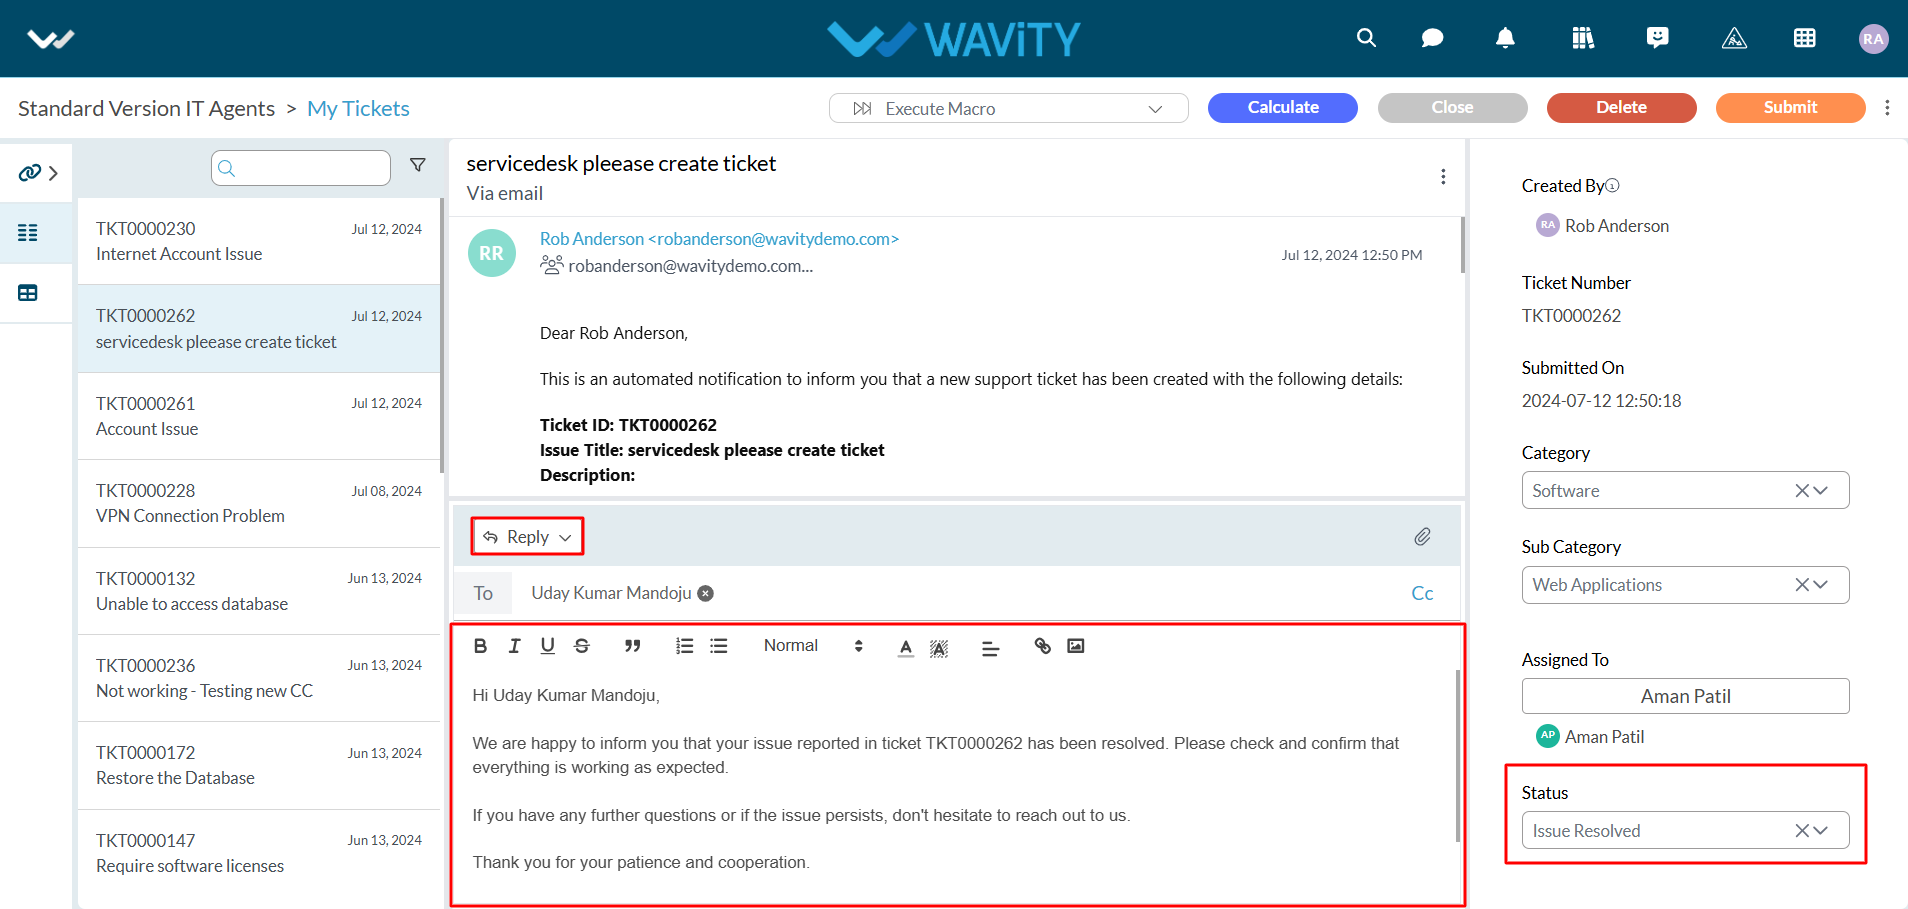
- Click on “Submit” button as the final Step.
