How to Set Up Notifications in Wavity Using Wbots
- WBots (Wavity Bots) allow you to automate workflows within hours, extending automation capabilities both within and beyond your organization. With WBots, you can seamlessly move data between applications based on the conditions you define.
- Use Triggers to automate recurring actions—such as automatically setting a new due date when a task’s status changes—streamlining your task management process.
- Create your own Custom Automations to save time and boost productivity. By reducing manual work, automation helps you focus on what truly matters.
- Only the Admin or Owner has the permissions to enable Workflow Automation or WBots within the Wavity Platform.
- Setting up notifications in the Wavity platform is a straightforward process.
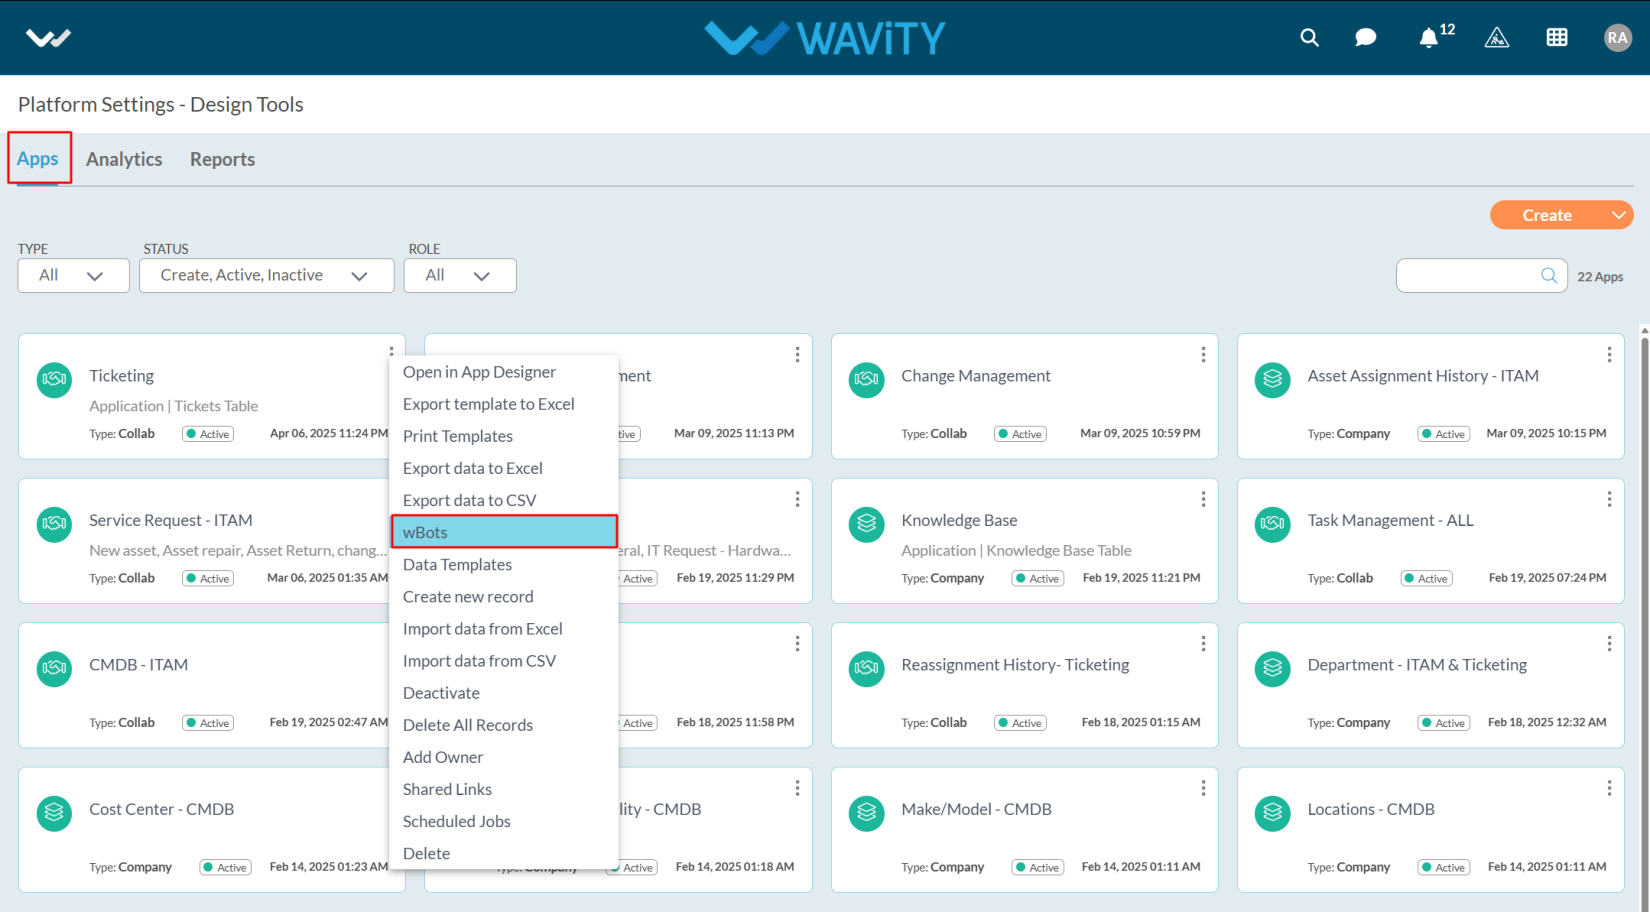
- Navigate to the Profile icon > Design Tool > App tab.
- Click the three-dot menu located at the top-right corner of the desired app.
- From the dropdown menu, select WBots.
- You can notify users when a record is created or updated.
- Notifications can also be sent through Scheduler, as well as Comments and Reply.
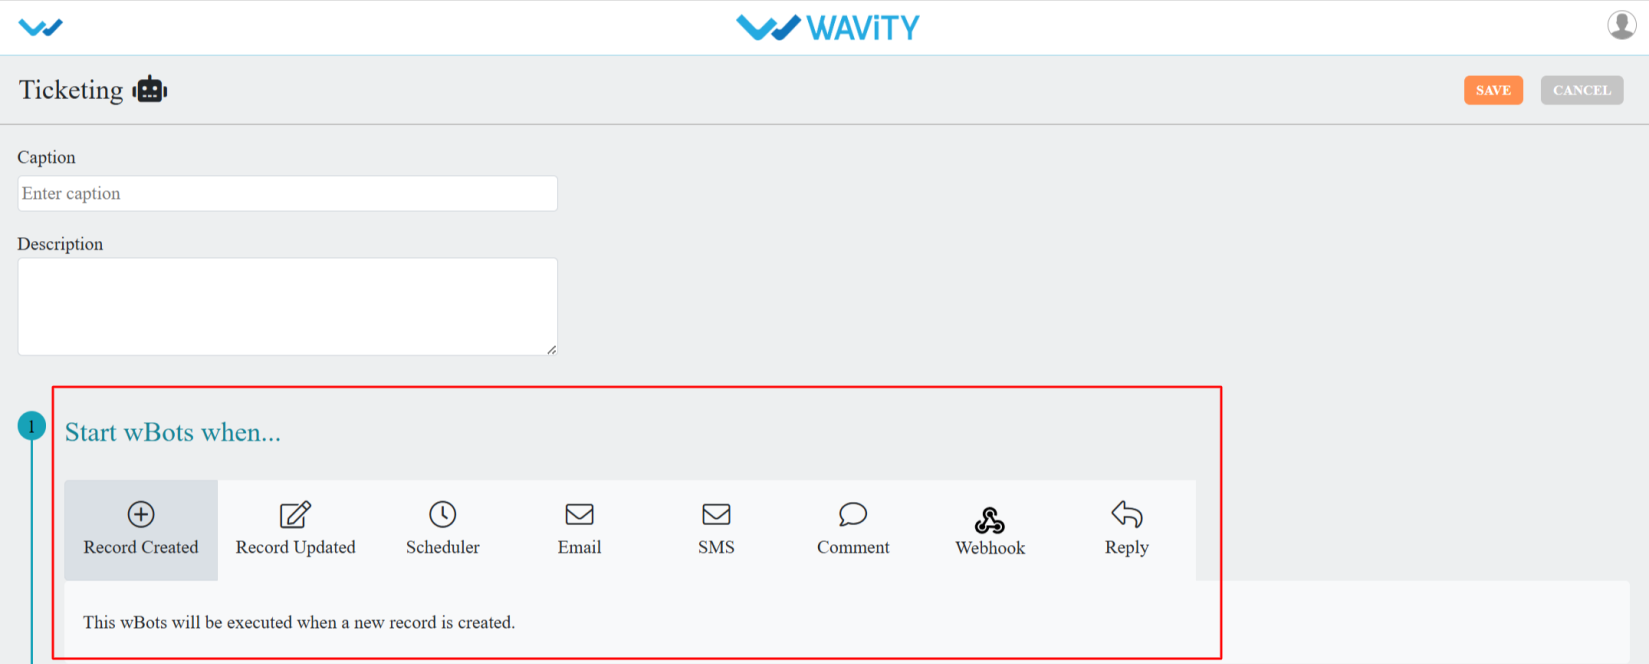
- You need to set the conditions, and based on those conditions, the bot will trigger and send a notification to the user.

- After setting the conditions , select the Notify action from Select action(s).
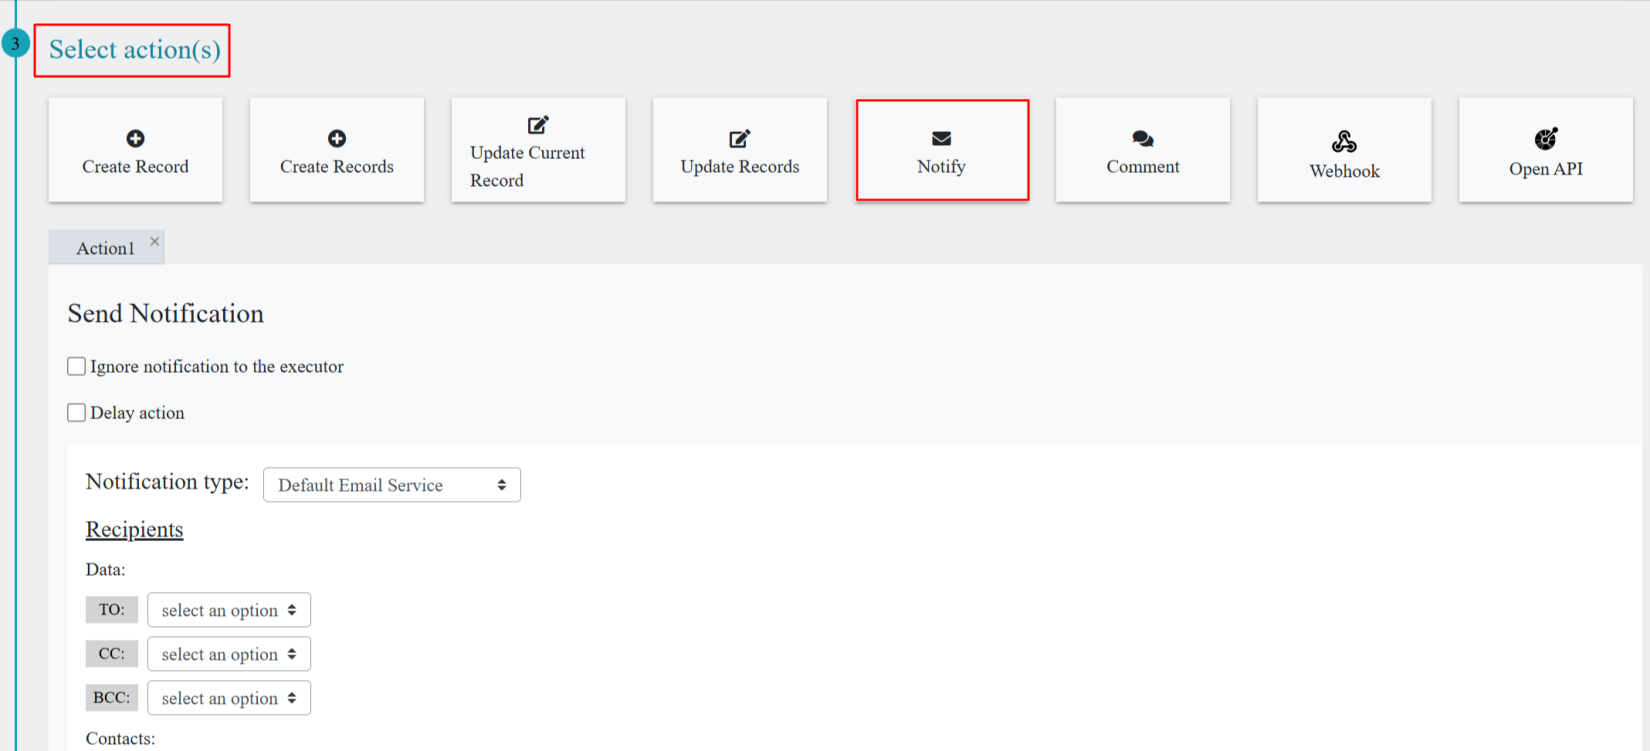
- Select the options based on your requirements.
- If you choose "Ignore notification to the executor", the executor of the action will not receive the notification.
- Enabling the Delay Action will postpone the notification based on the condition you specify.
- Choose the appropriate Notification Type: For detailed information on Notification type; Please refer the following link: Guide to Notification Types and Configuration | Wavity
- Default Email Service
- Workflow Email Integration
- Tenant Email Service
- Specific Email Integration
- Push Notification
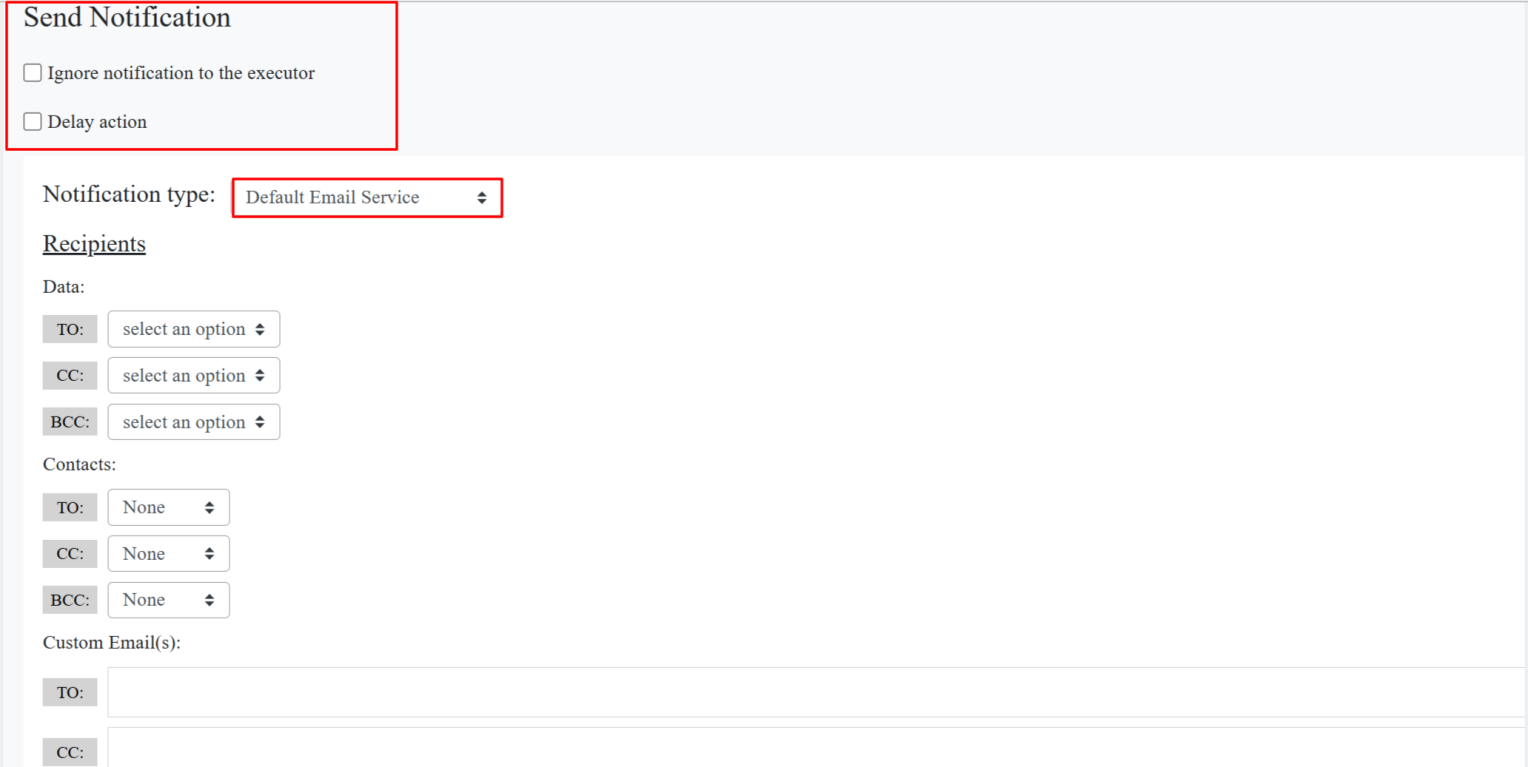
- For specific email integration, select the email integration that is linked with the Wavity platform.
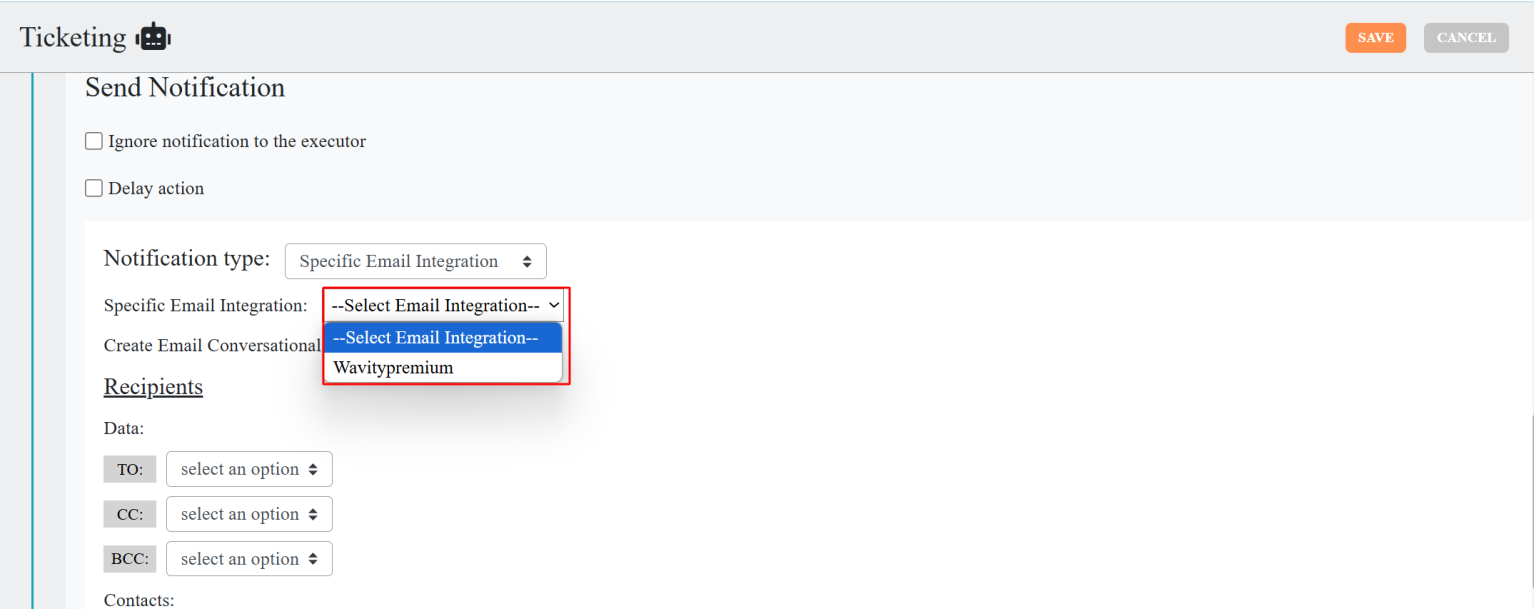
- In the Recipients section, under the “Data” tab, use the “To” dropdown to select the data control for the person you want to notify. You can also choose CC and BCC from the app’s data forms.
- Under the “Contacts” tab, you can select individual users or groups for To, CC, and BCC, if they are part of the Wavity platform.
- To notify users outside of the Wavity platform, you can enter their email addresses in the Custom Email(s) section.

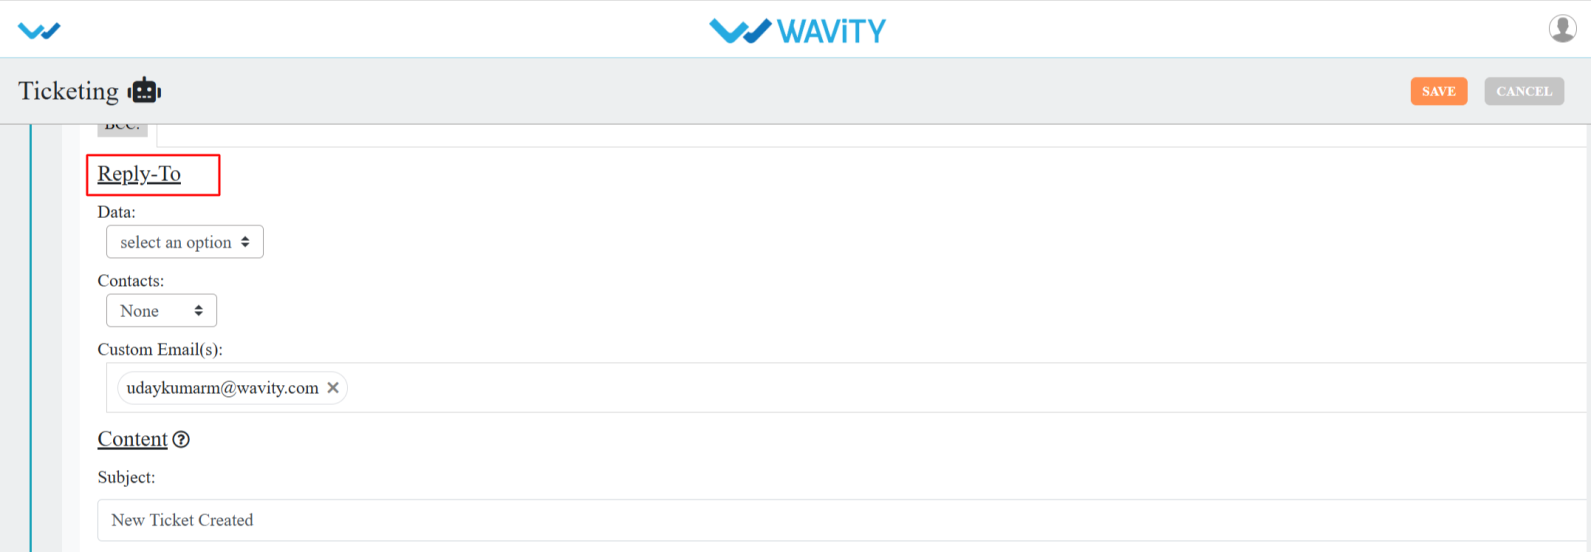
- For Reply-To, when notifying the user, you can enable direct replies by selecting the appropriate data controls under the “Data” section.
- In the “Contacts” section, you can choose individual contacts or groups.
- To notify someone who is not part of the Wavity platform, you can enter a custom email address.
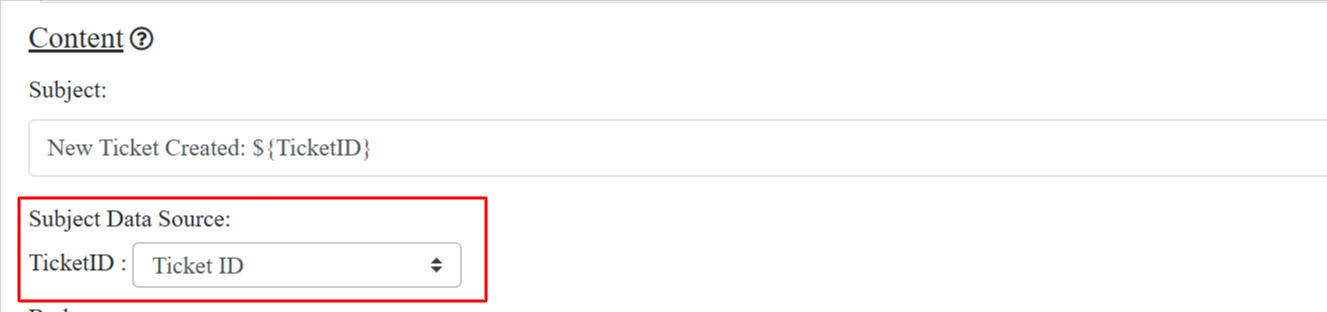
- Enter the subject for Email Notification.
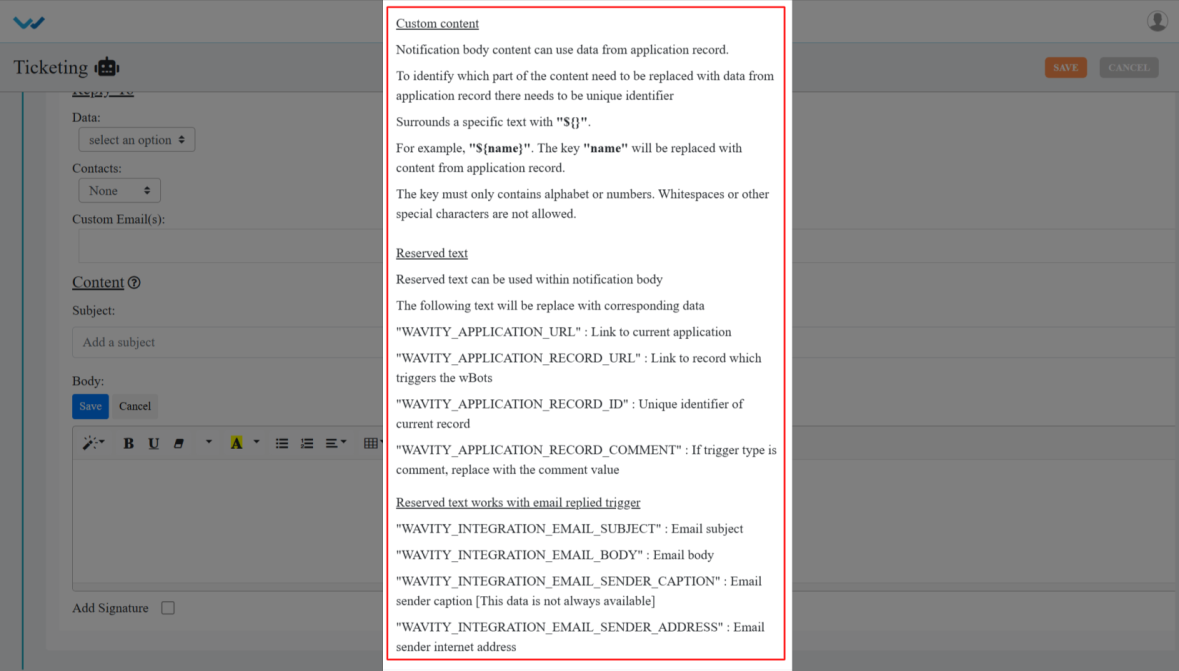
- Subject content can use data field from application record. For the data field you need to give a unique identifier.
- Surrounds a specific text with “${}”, in curly brackets enter the data value as you required. For Ex: “${TicketID}”
- The key "TicketID" will be replaced with content from application record.
- After Entering the value we need select the Subject Data Source from the options after entering the subject as shown in the below images.
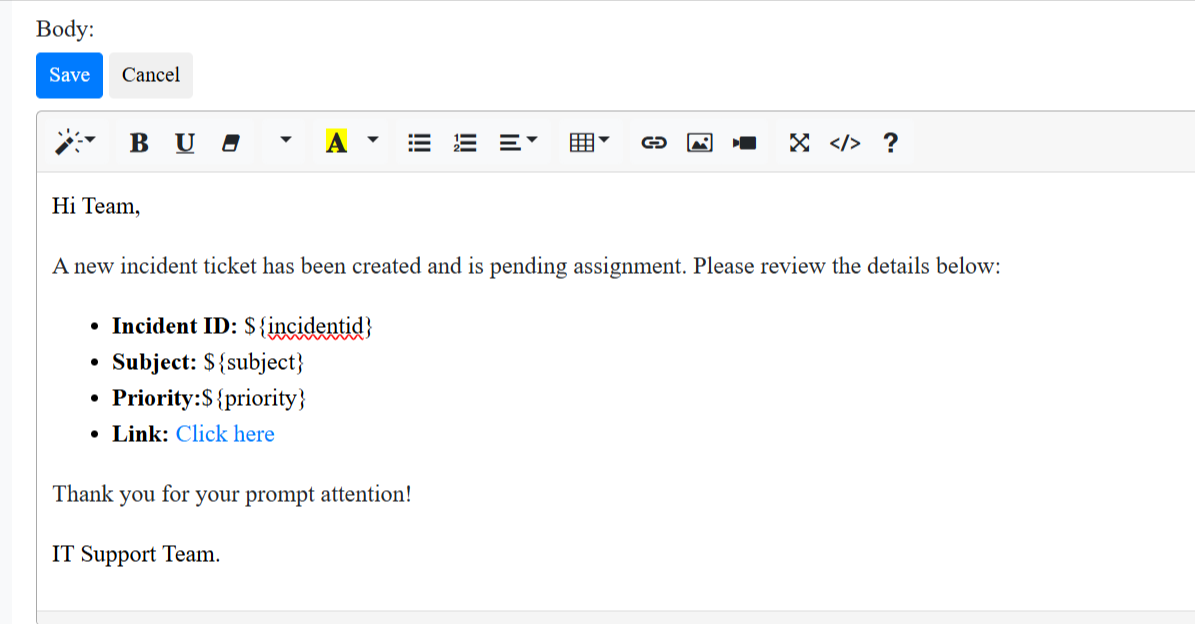
- After entering the Subject details, proceed to enter the Body description.
- Click on the “Edit” button to make changes.

- Now you can see the all Text options.
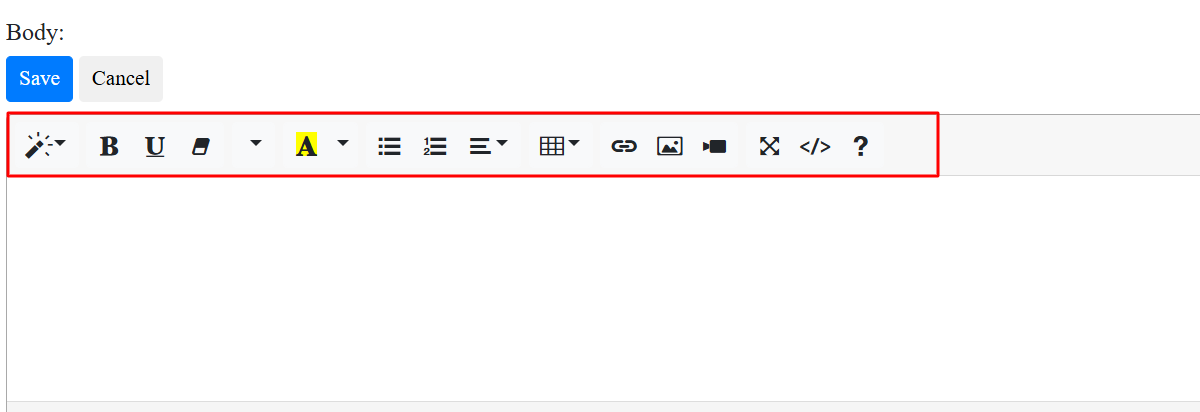
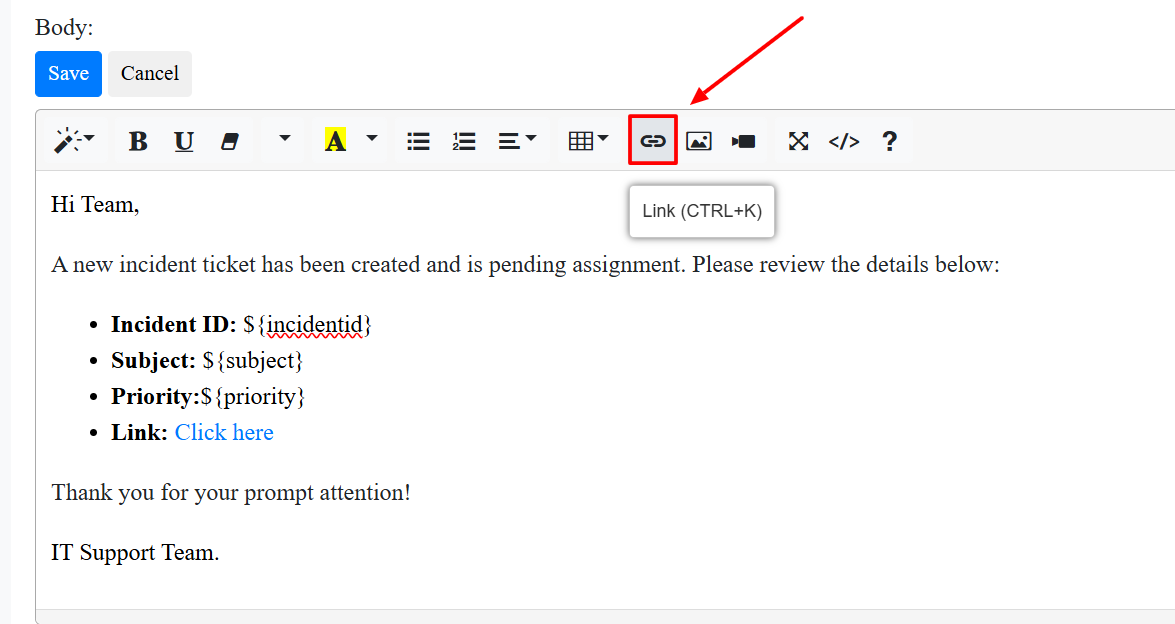
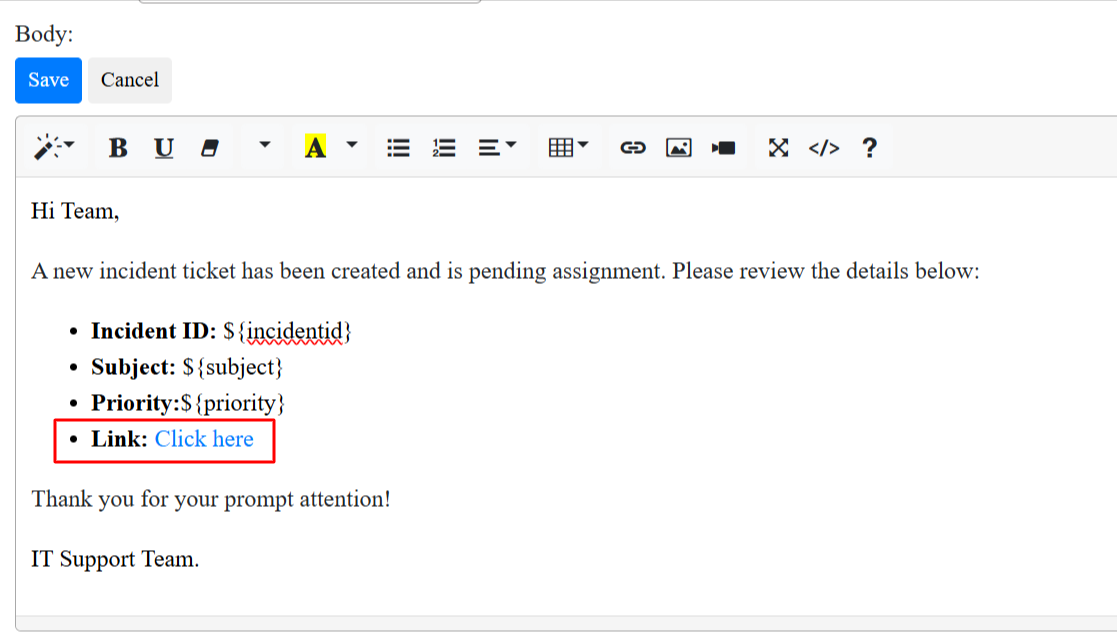
- Enter the body for the notification that needs to be sent to the user.
- In body you can include data field from the application record giving a specific text with “${}”, in curly brackets enter the data field name as you required.
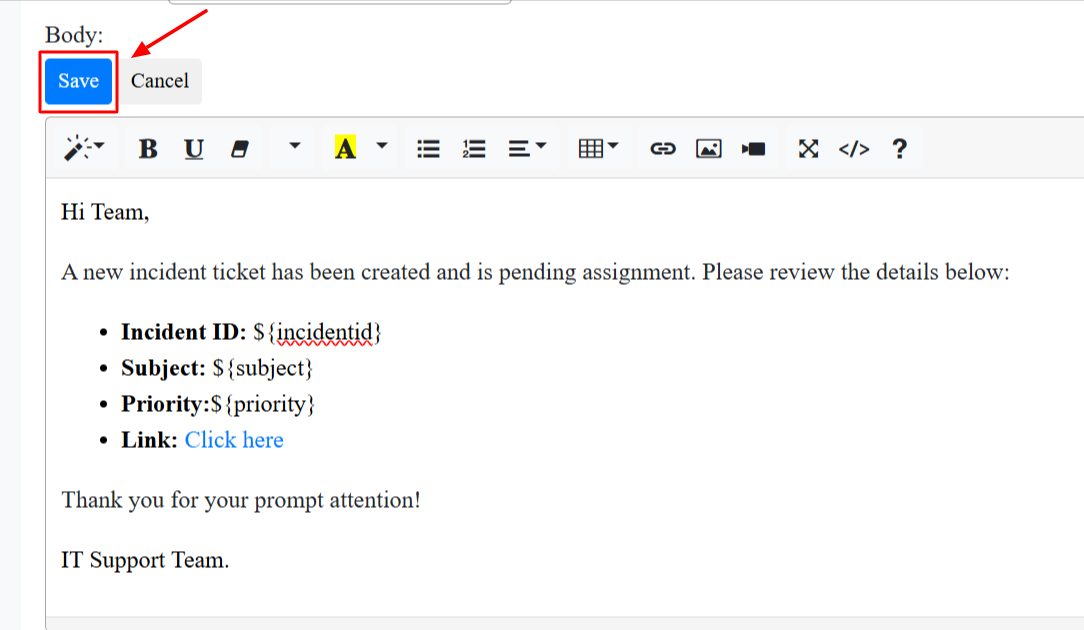
- After entering the necessary details in the body, click on the Save button.
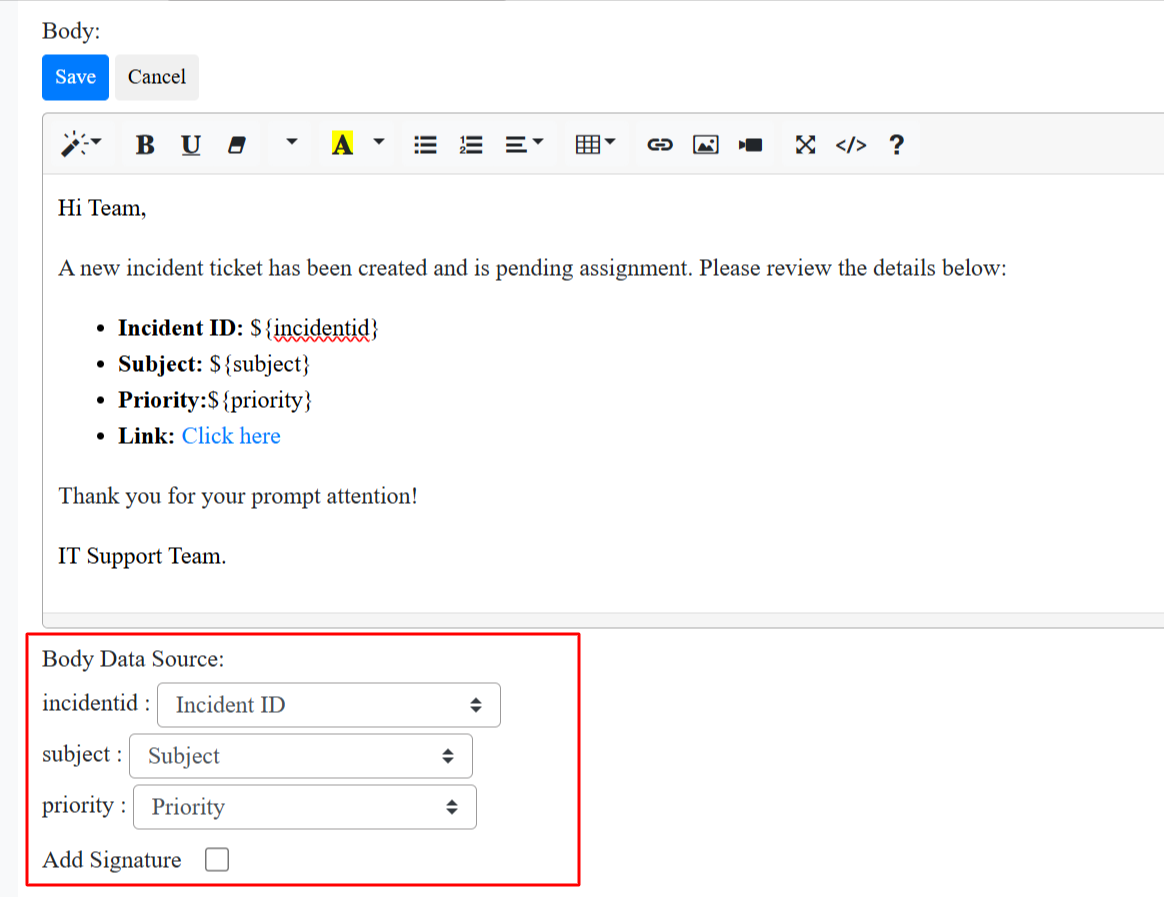
- After saving the Body content, data controls will appear at the bottom. Make sure to select the appropriate options for mapping the data, as shown in the image below.
- If you'd like to attach any links, such as the current record link, click the question mark icon next to the “Content” label above the subject.
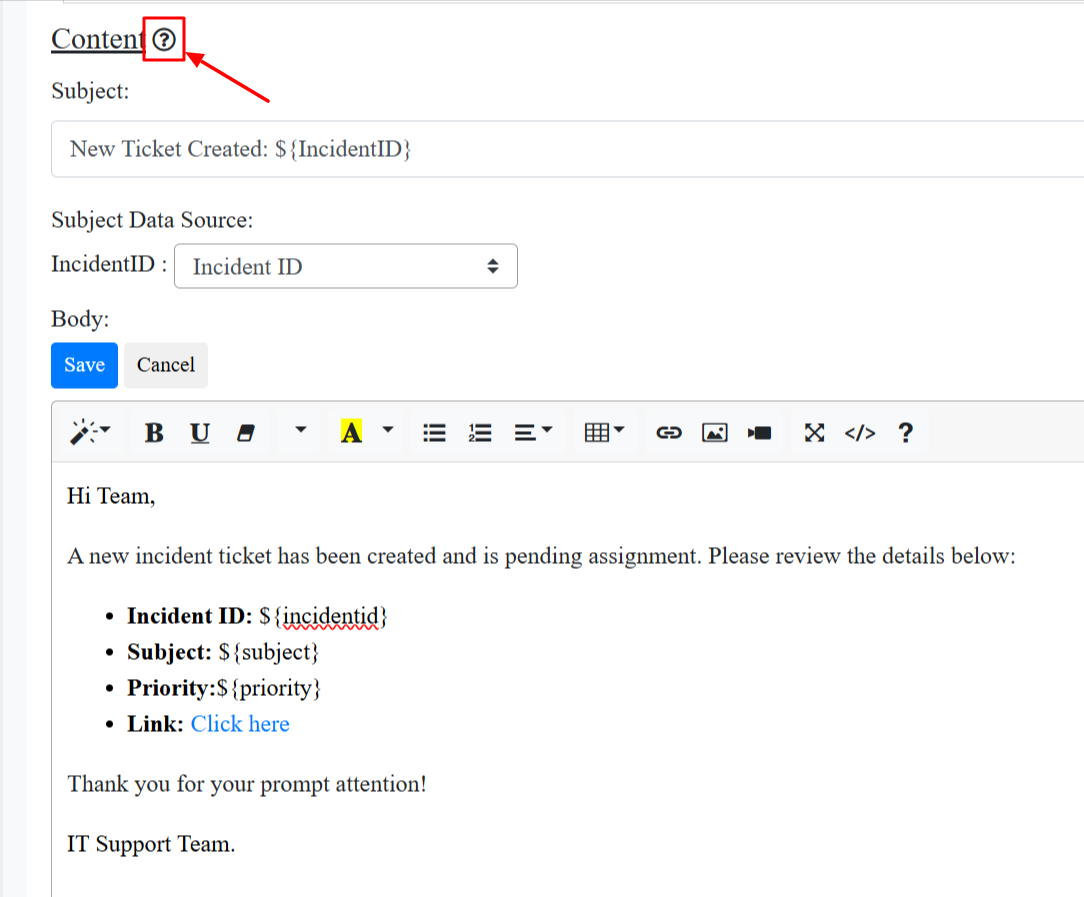
- After clicking the icon, you’ll see all the available links that can be used.
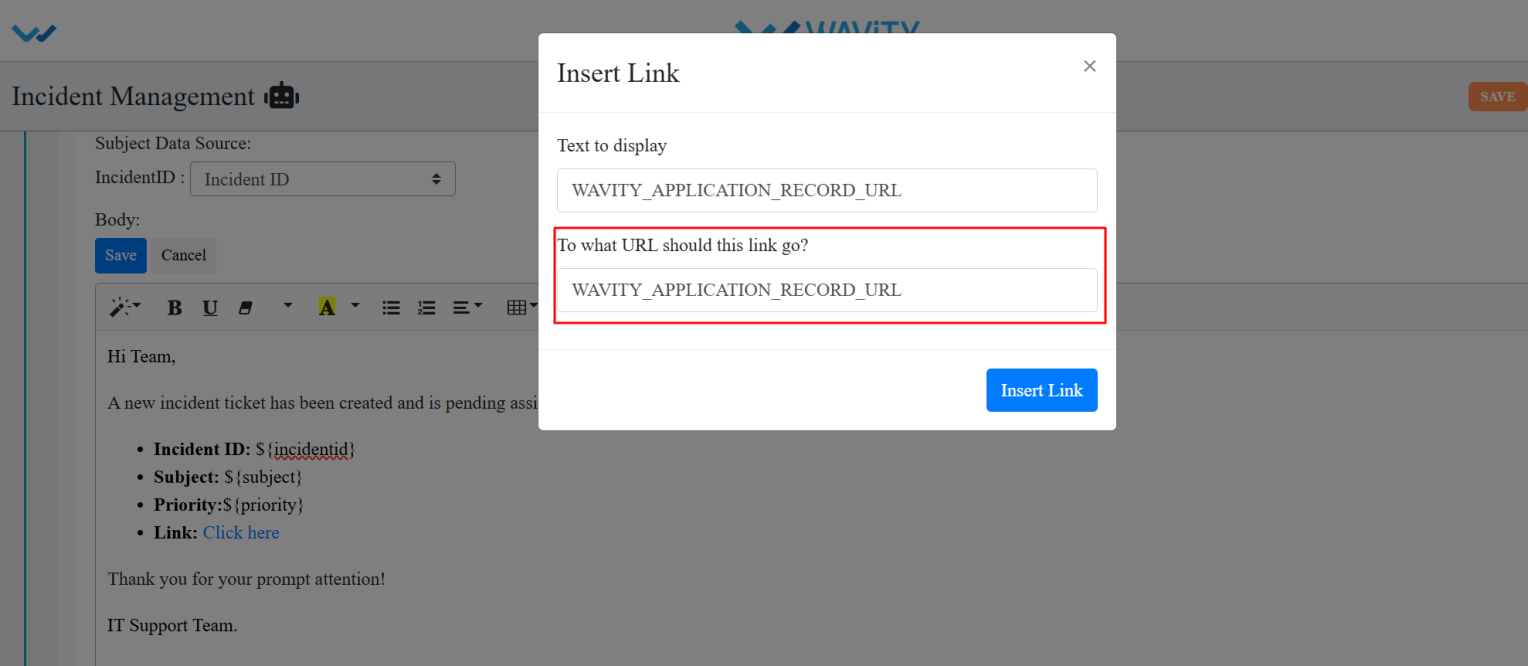
- Copy the desired text, then in the body section, click on the link icon as shown in the image below.
- After clicking the link icon, paste the text into the second option as shown in the image below.
- You can enter the text name to display in the notification body and click the button Insert link.
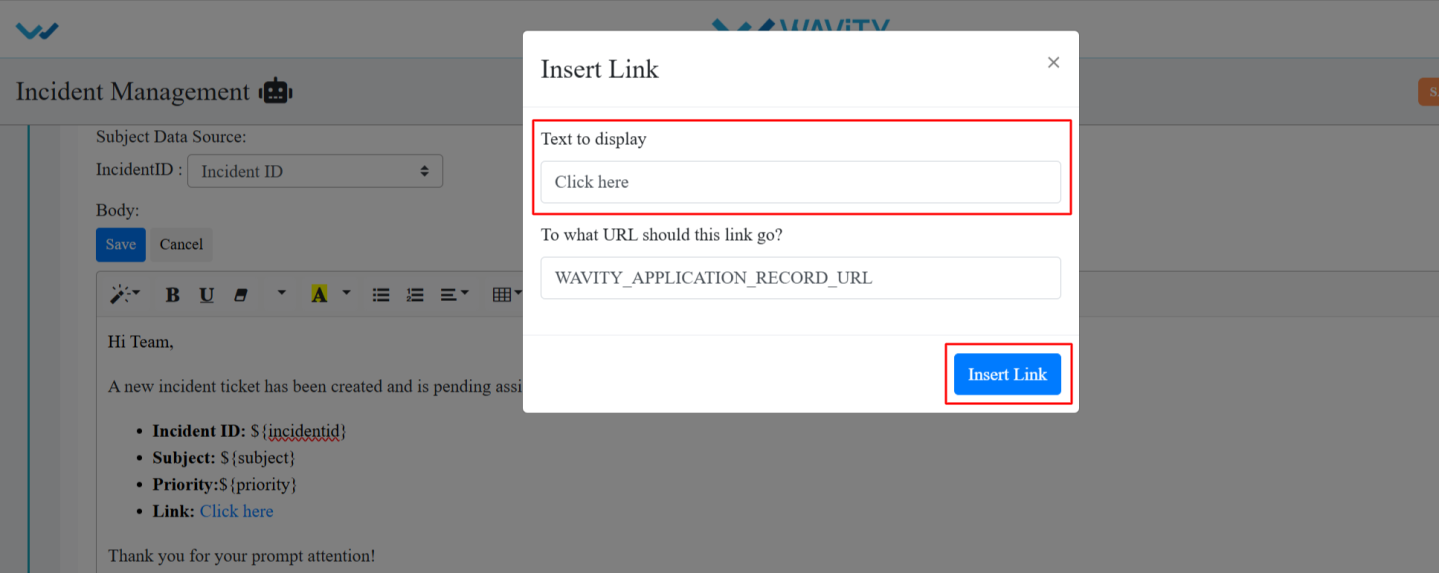
- After clicking on Insert Link, it will appear as shown in the image. Then, click Save.
- Now, you can save the Bot.

- The bot will be in active state.
