How to Sync Azure AD Users and Groups with Wavity via SCIM
How to Sync Azure AD Users and Groups with Wavity via SCIM
Wavity supports integration with Microsoft Azure Active Directory (Azure AD) to enable seamless synchronization of user and group attributes through SCIM (System for Cross-domain Identity Management). Follow the steps below to configure the synchronization process.
Only an Admin user in your organization can set up and configure Azure AD SCIM integration in Wavity.
You’ll need access to both the Wavity platform and the Azure portal using administrator credentials.
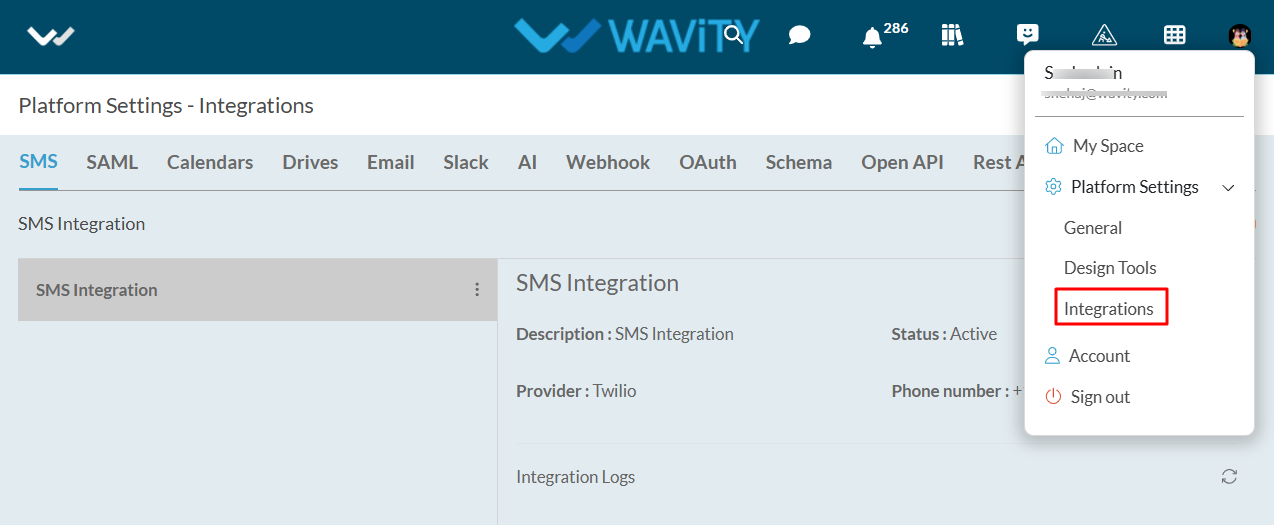
Login with admin credentials and navigate to integrations page as shown in below image.
Before setting up SCIM synchronization, Single Sign-On (SSO) must be enabled using Microsoft Azure. Click on the following link for detailed guide on enabling SSO with Azure in Wavity: Enable SSO Using Azure | Wavity
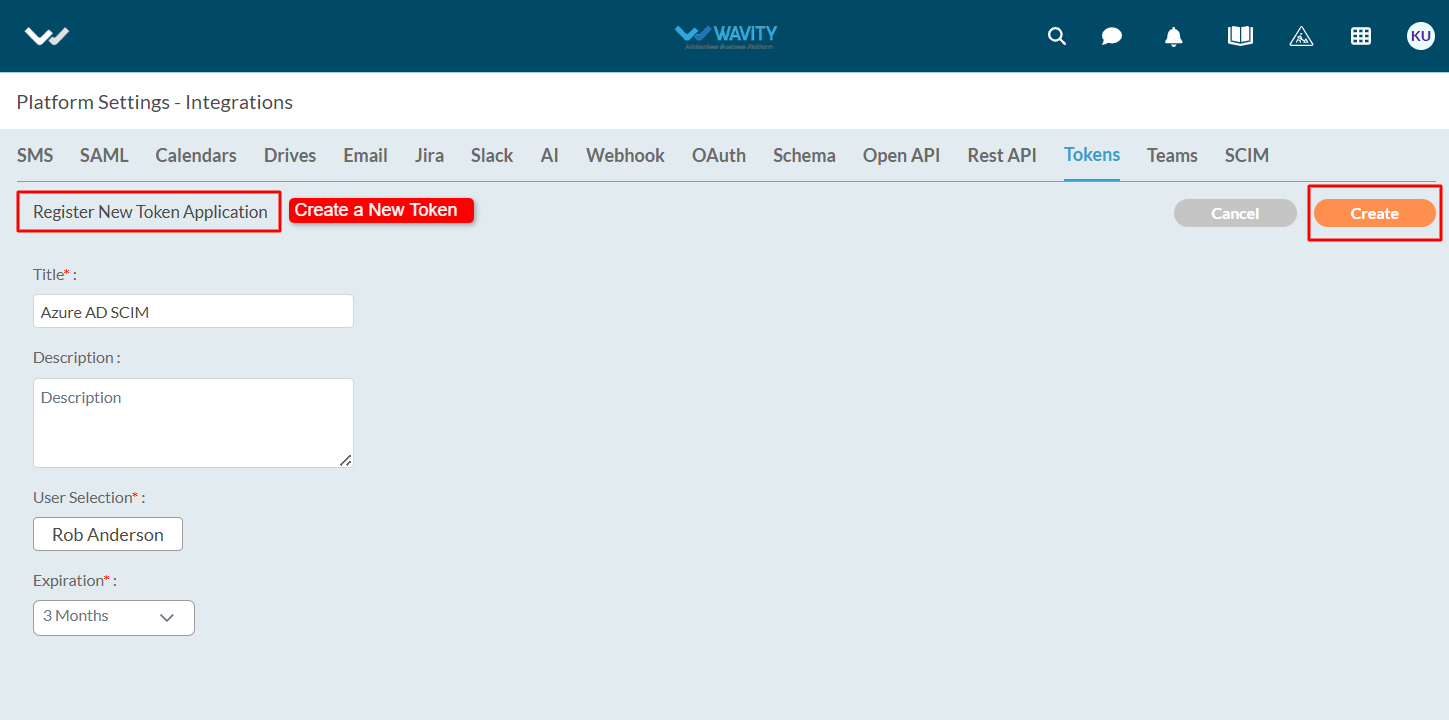
Generate a Token in Wavity: Navigate to Tokens page, and click on ‘Create’ button.
Fill in the token details:
Title and Description
User (preferably the Admin user)
Expiration Period
Click ‘Create’ as shown in below image.
Copy the generated token – you’ll need it during the Azure configuration.
Configure SCIM Provisioning in Azure AD
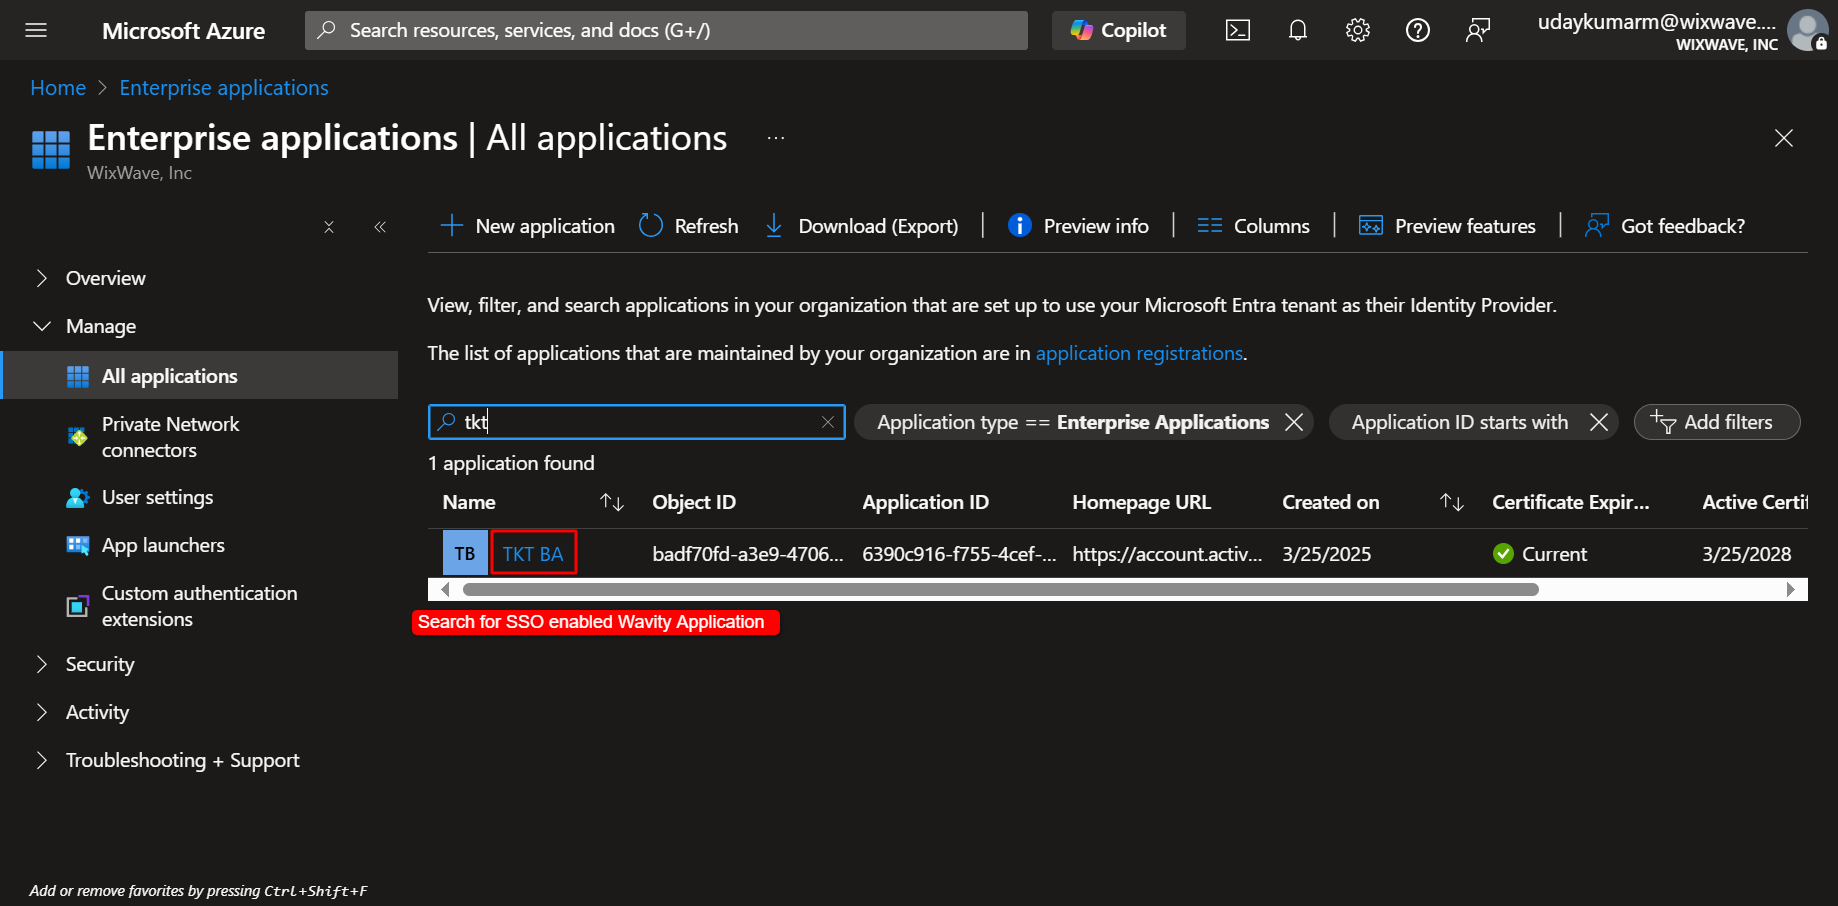
Log in to the Azure Portal with admin credentials. Navigate to Azure Active Directory → Enterprise Applications.
Search for and select your SSO-enabled Wavity application.
Click on ‘Provision User Accounts’.
On the Get Started page, click ‘Connect your application’.
Provide SCIM Endpoint and Token: Enter your wavity tenant URL with the following format: https://<yourtenentURL>/scim/v2
Paste the token which you had generated earlier in Wavity platform.
Click on ‘Test Connection’
A confirmation popup should appear indicating that the provisioning test connection was successful.
Now, click on ‘Create’
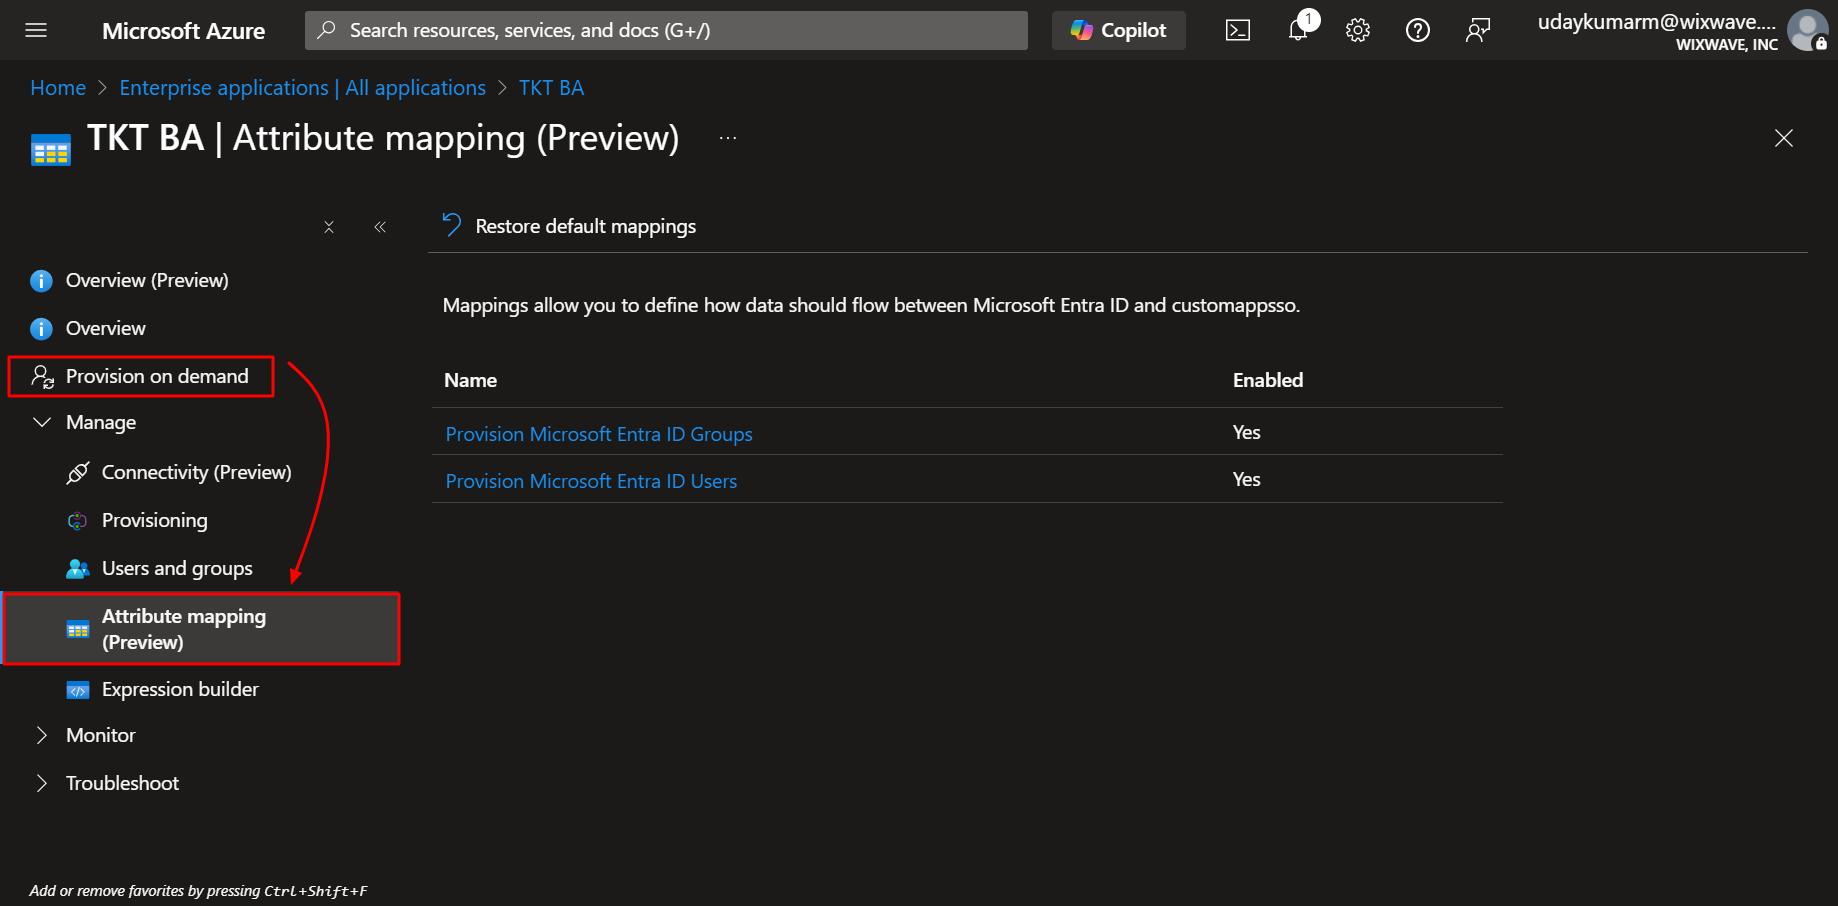
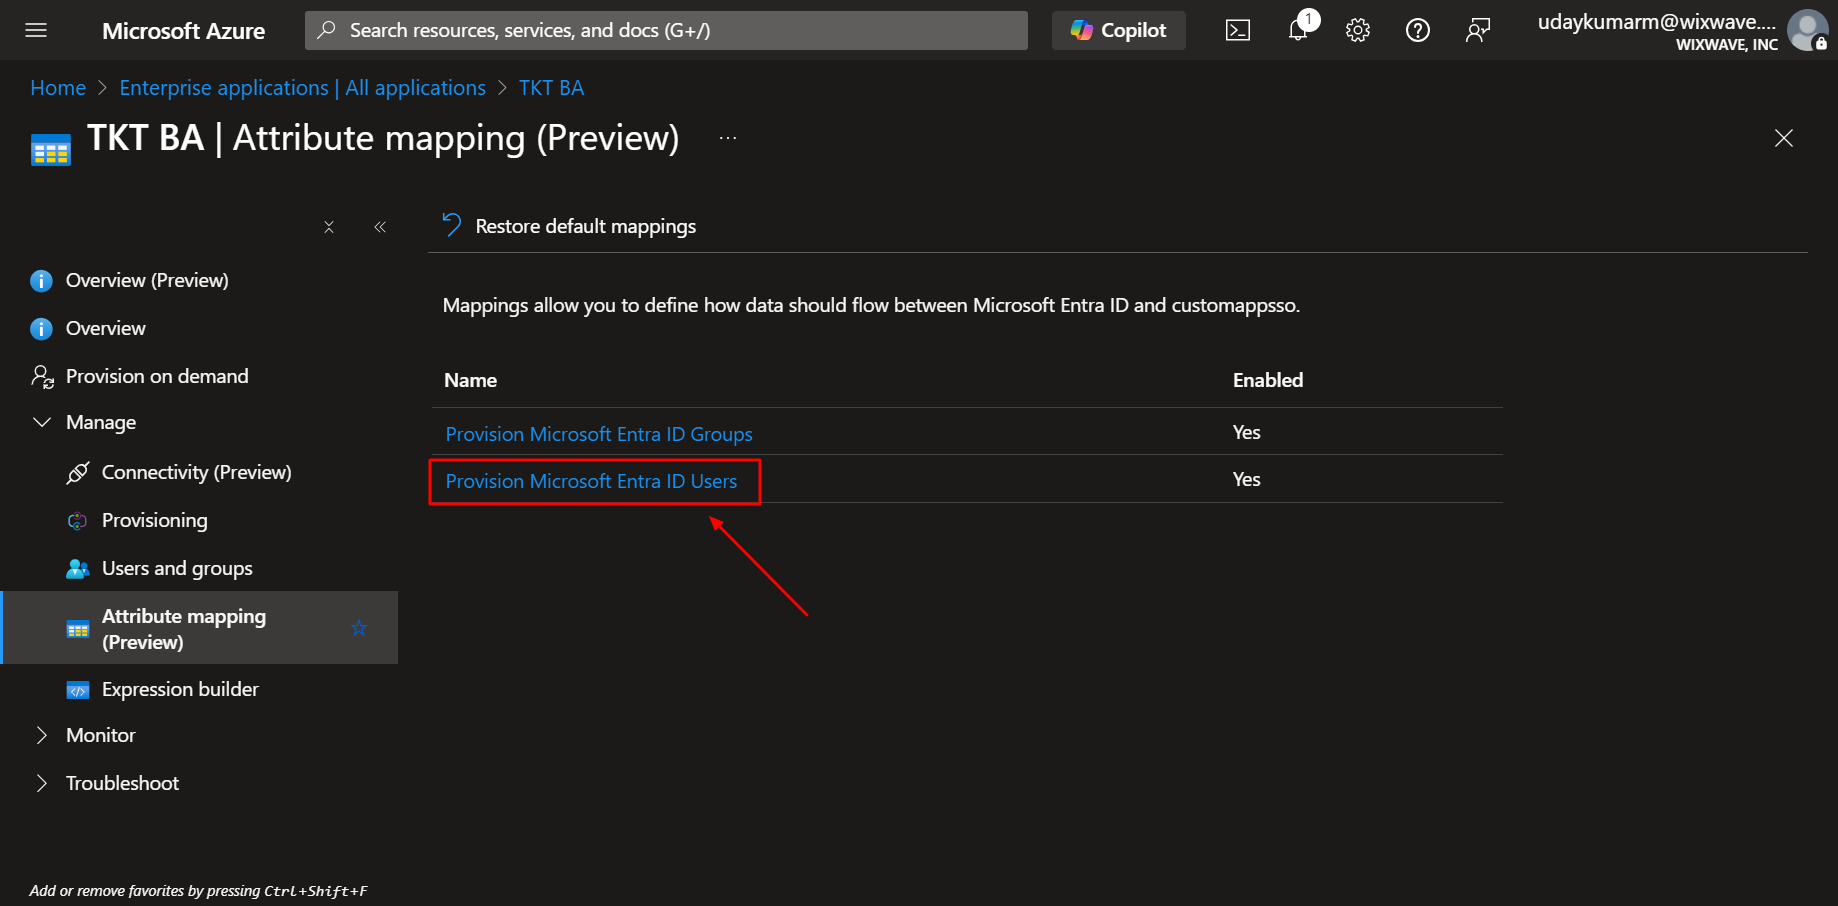
To Map User Attributes: Go to the Attribute Mapping (Preview) section on the ‘Provision on demand’ page.
Click ‘Provision Microsoft Entra ID Users’.
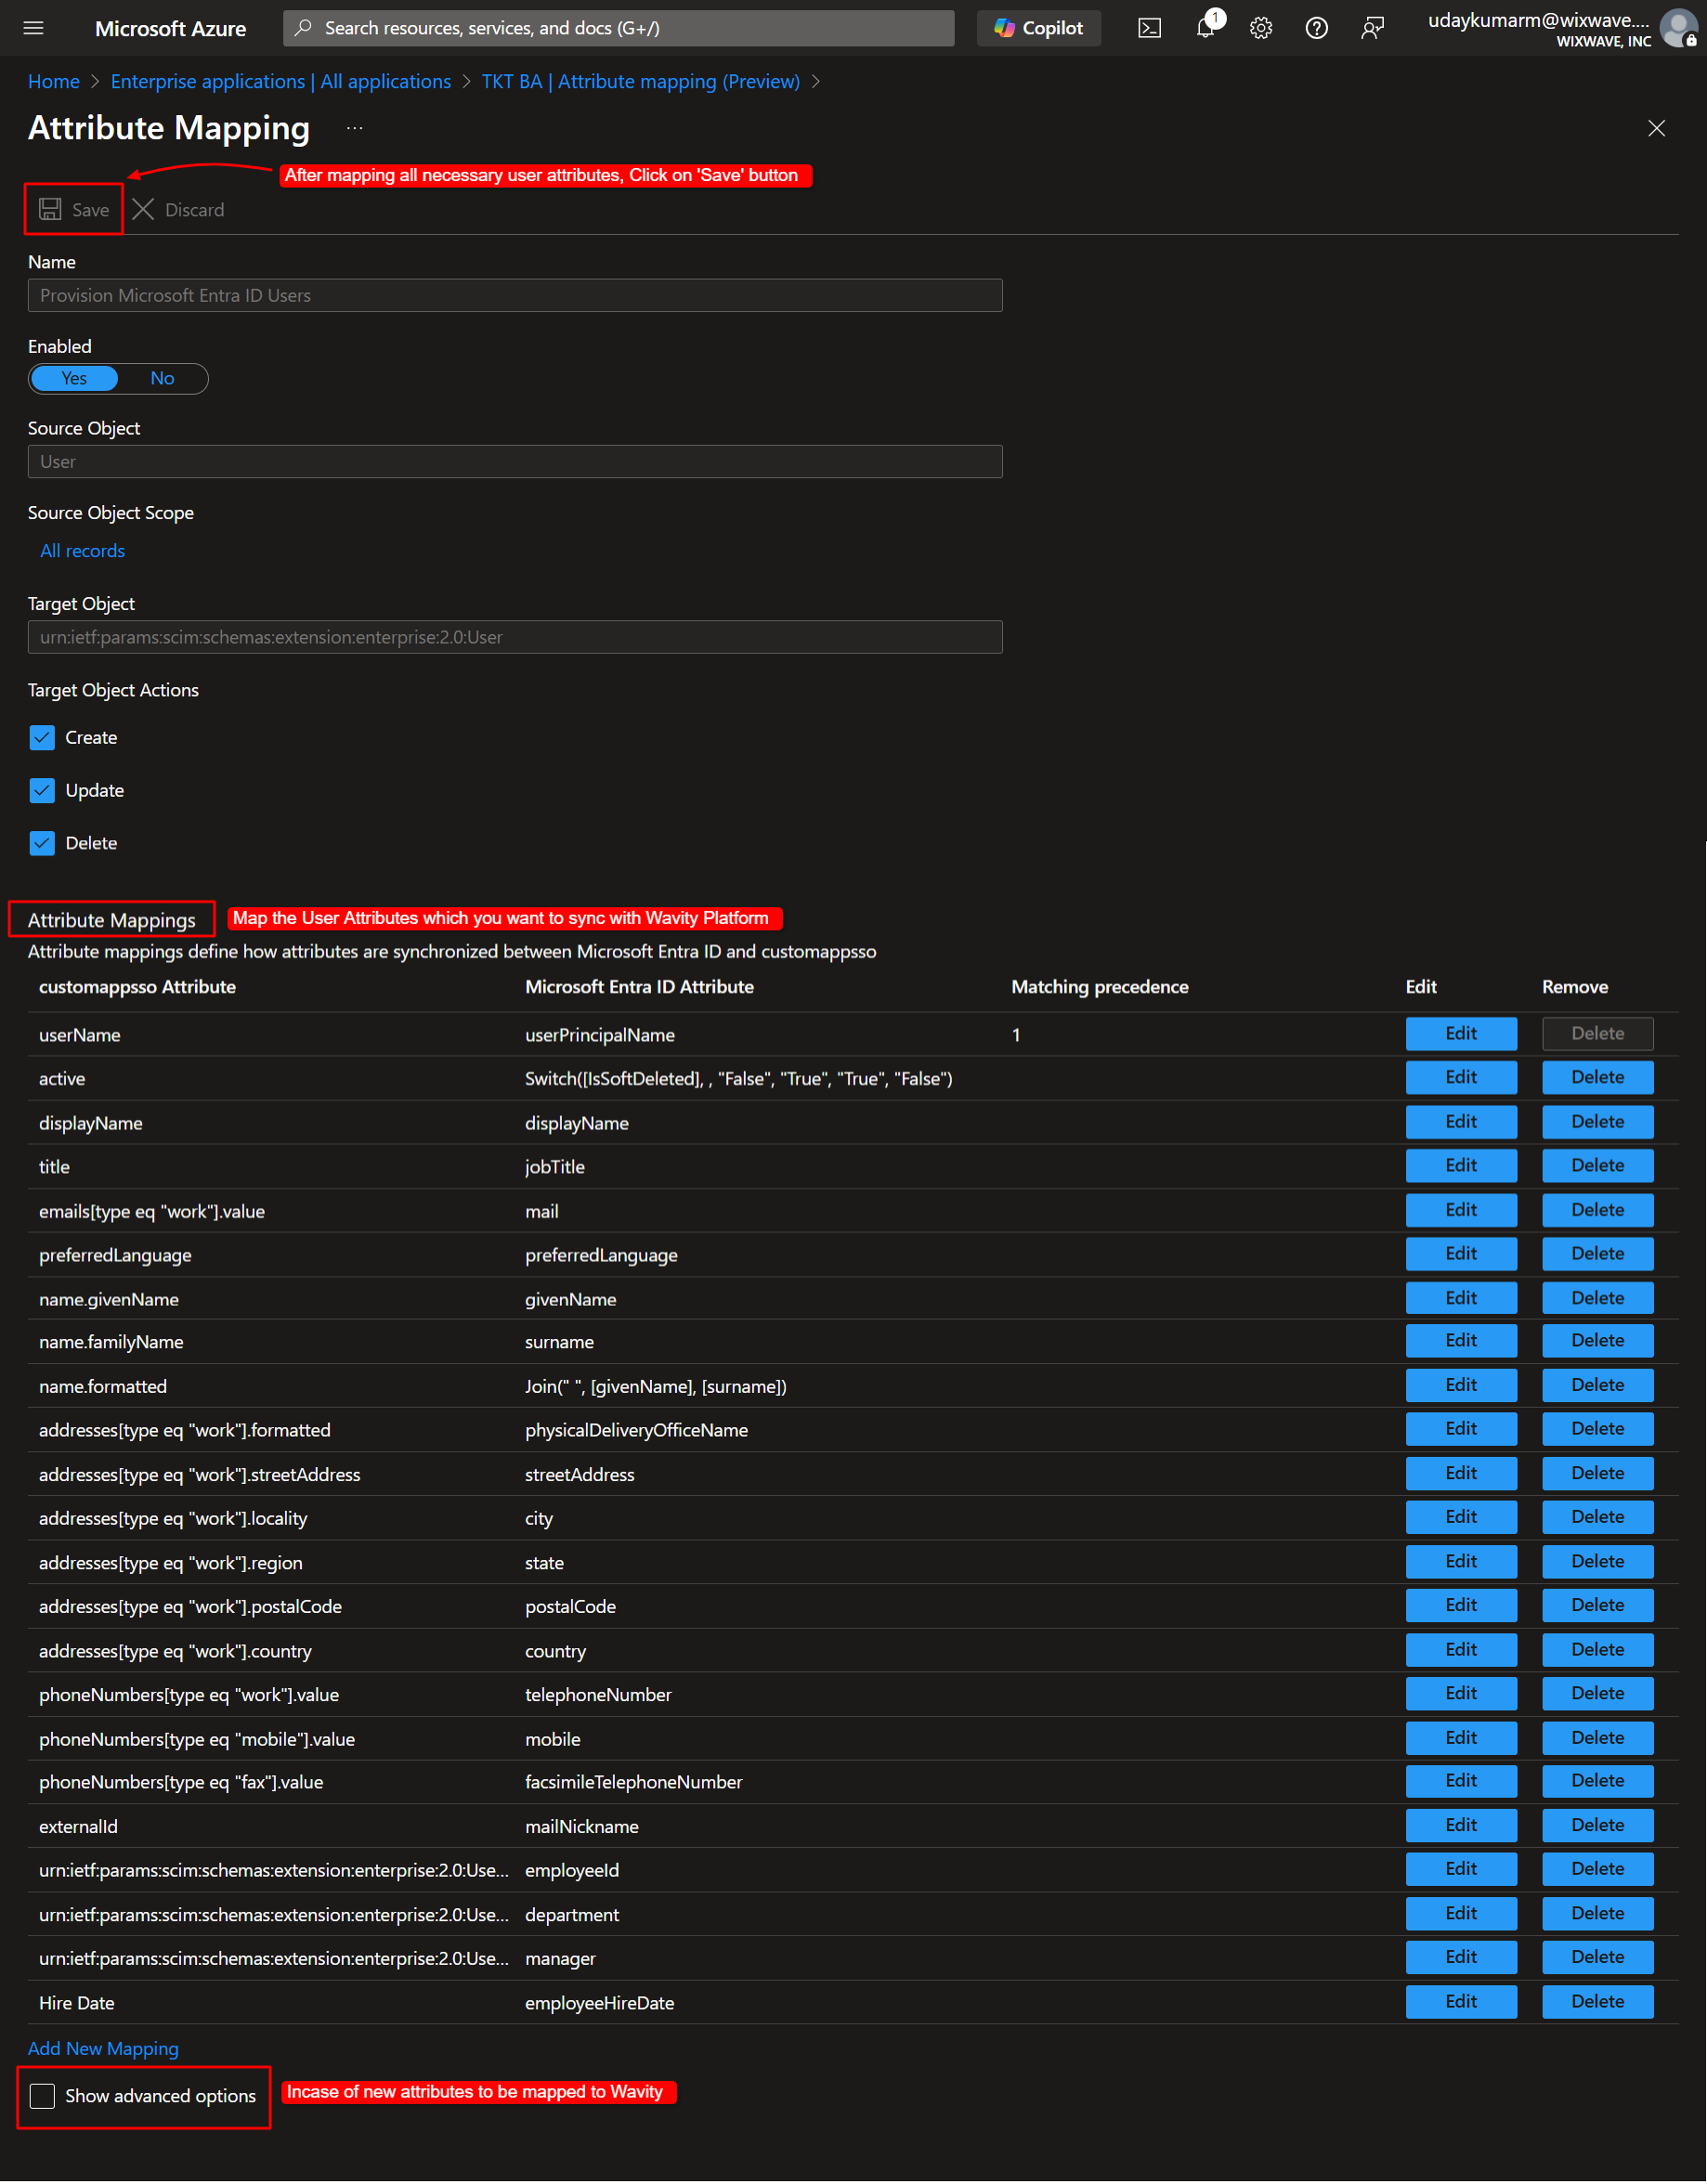
Review and map the necessary user attributes to sync with Wavity.
Click ‘Show advanced options’ to map any custom attributes.
Click ‘Save’ when done.
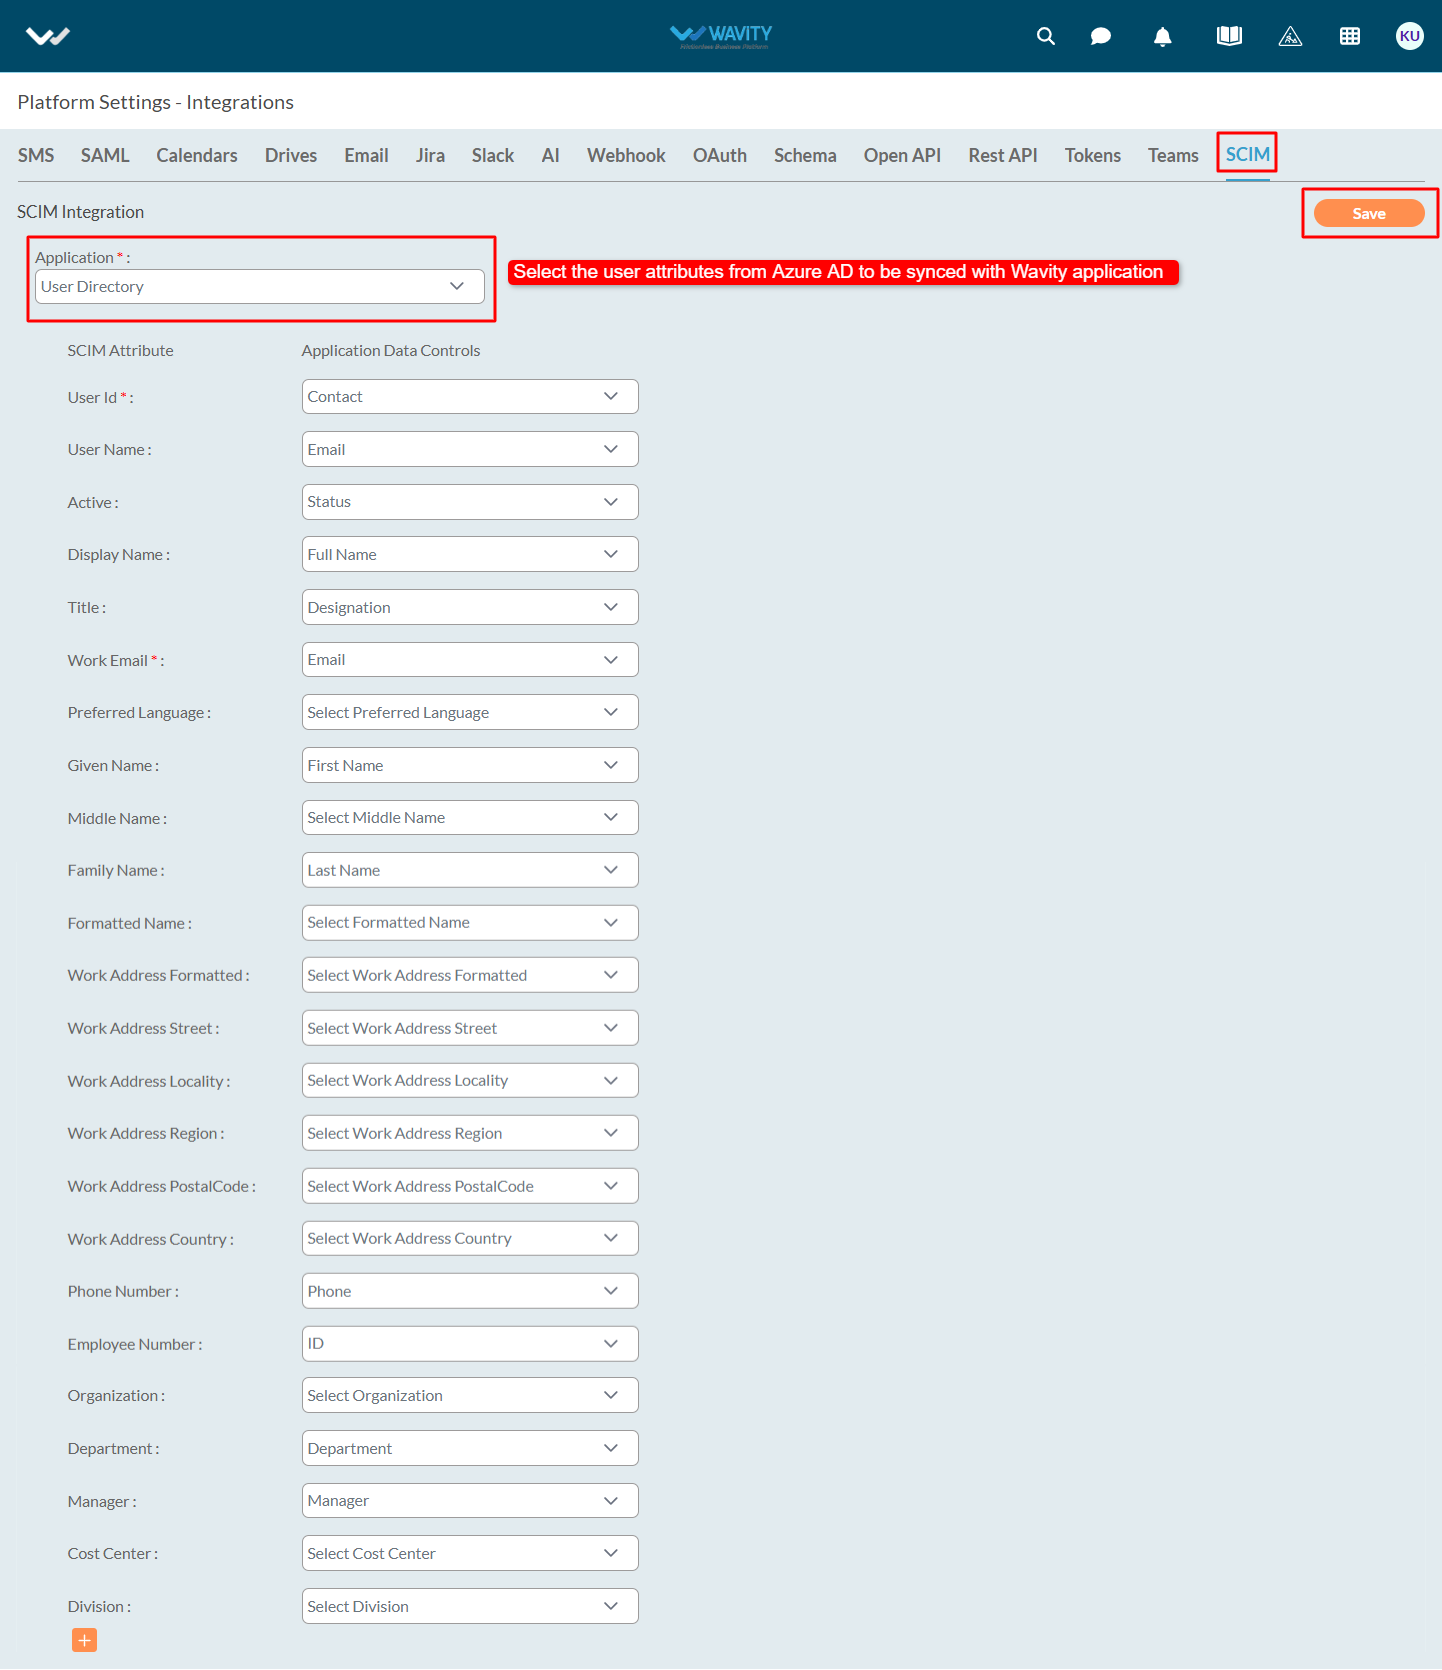
To Finalize SCIM Setup in Wavity: In Wavity, go to the SCIM settings page. Select the corresponding Wavity application for syncing user attributes. Click on ‘Save’ button once done.
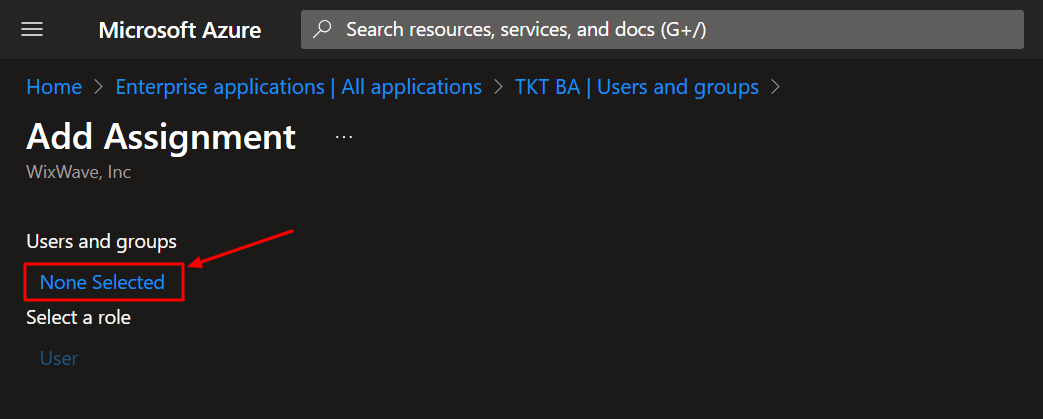
To Assign Users & Groups in Azure: In Azure, navigate to the Users and Groups section of the Wavity application.
Click ‘Add user/group’ → then ‘None selected’.
Select all the users and groups for which data attributes will be synced with Wavity platform.
Once done, click on ‘Select’ button and then on ‘Assign’ button.
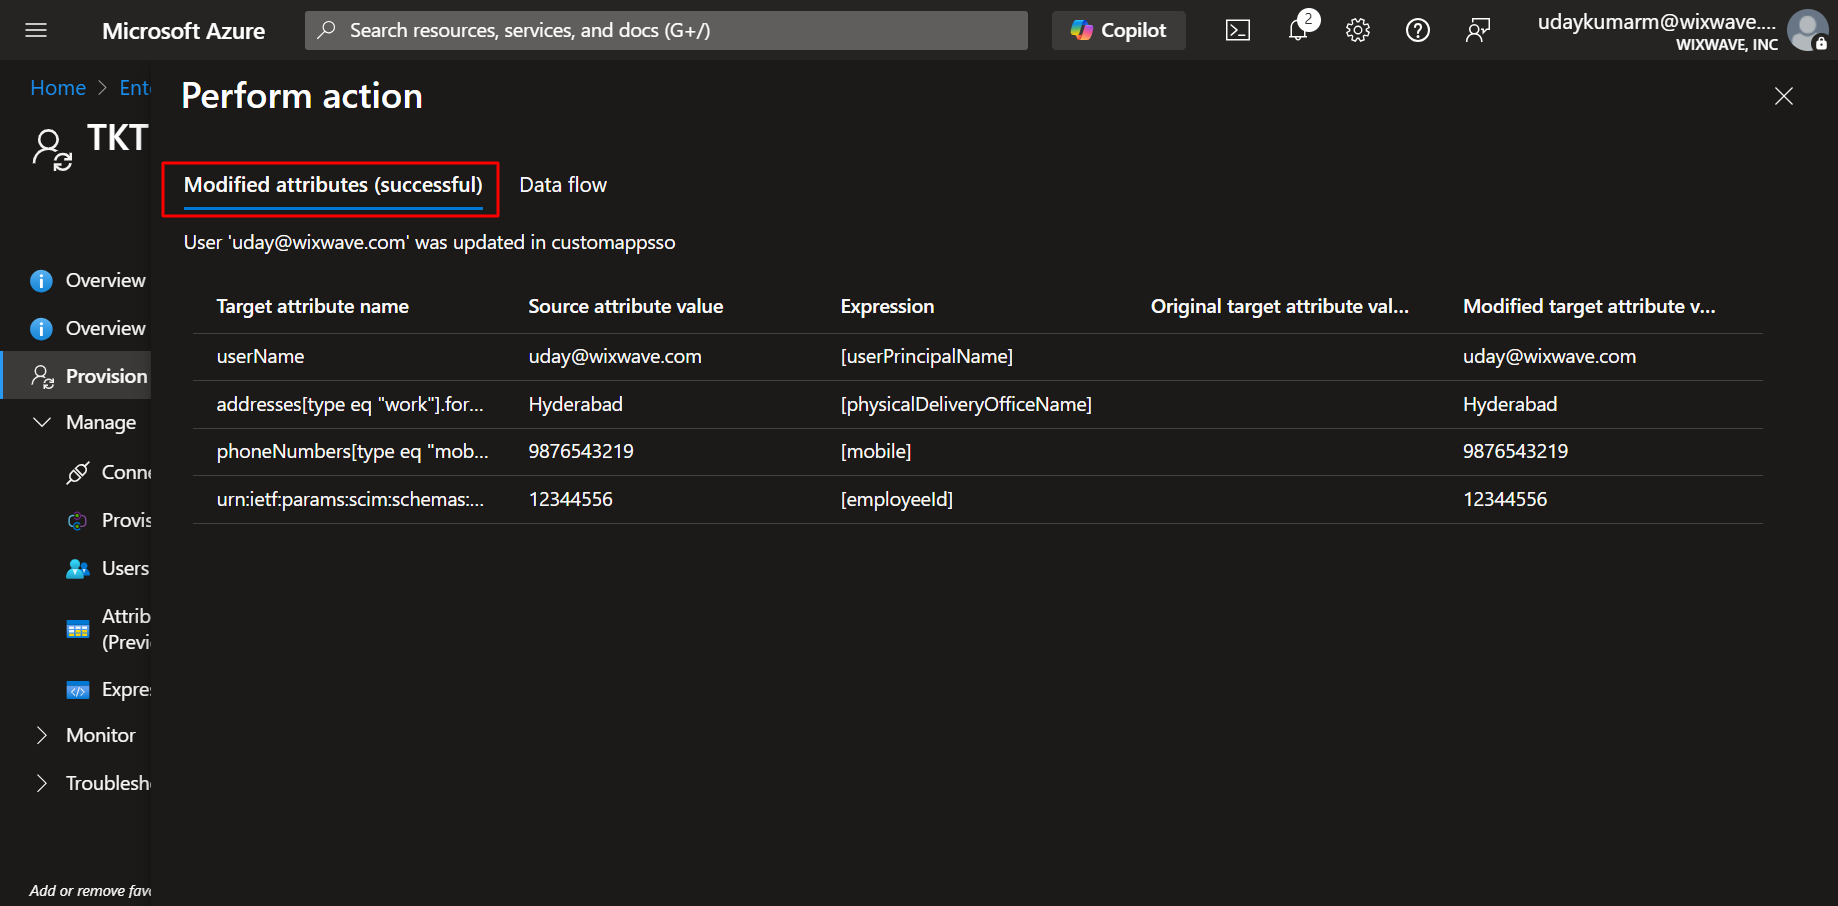
To Perform On-Demand Provisioning: Navigate to the ‘Provision on demand’ page in Azure. Add a user in the ‘Select user’ dropdown.
Click on ‘Provision’ to add recently selected users and group members to do on-demand provision. This will instantly sync users/groups into the Wavity platform.
Review the displayed user attributes as shown in below image.
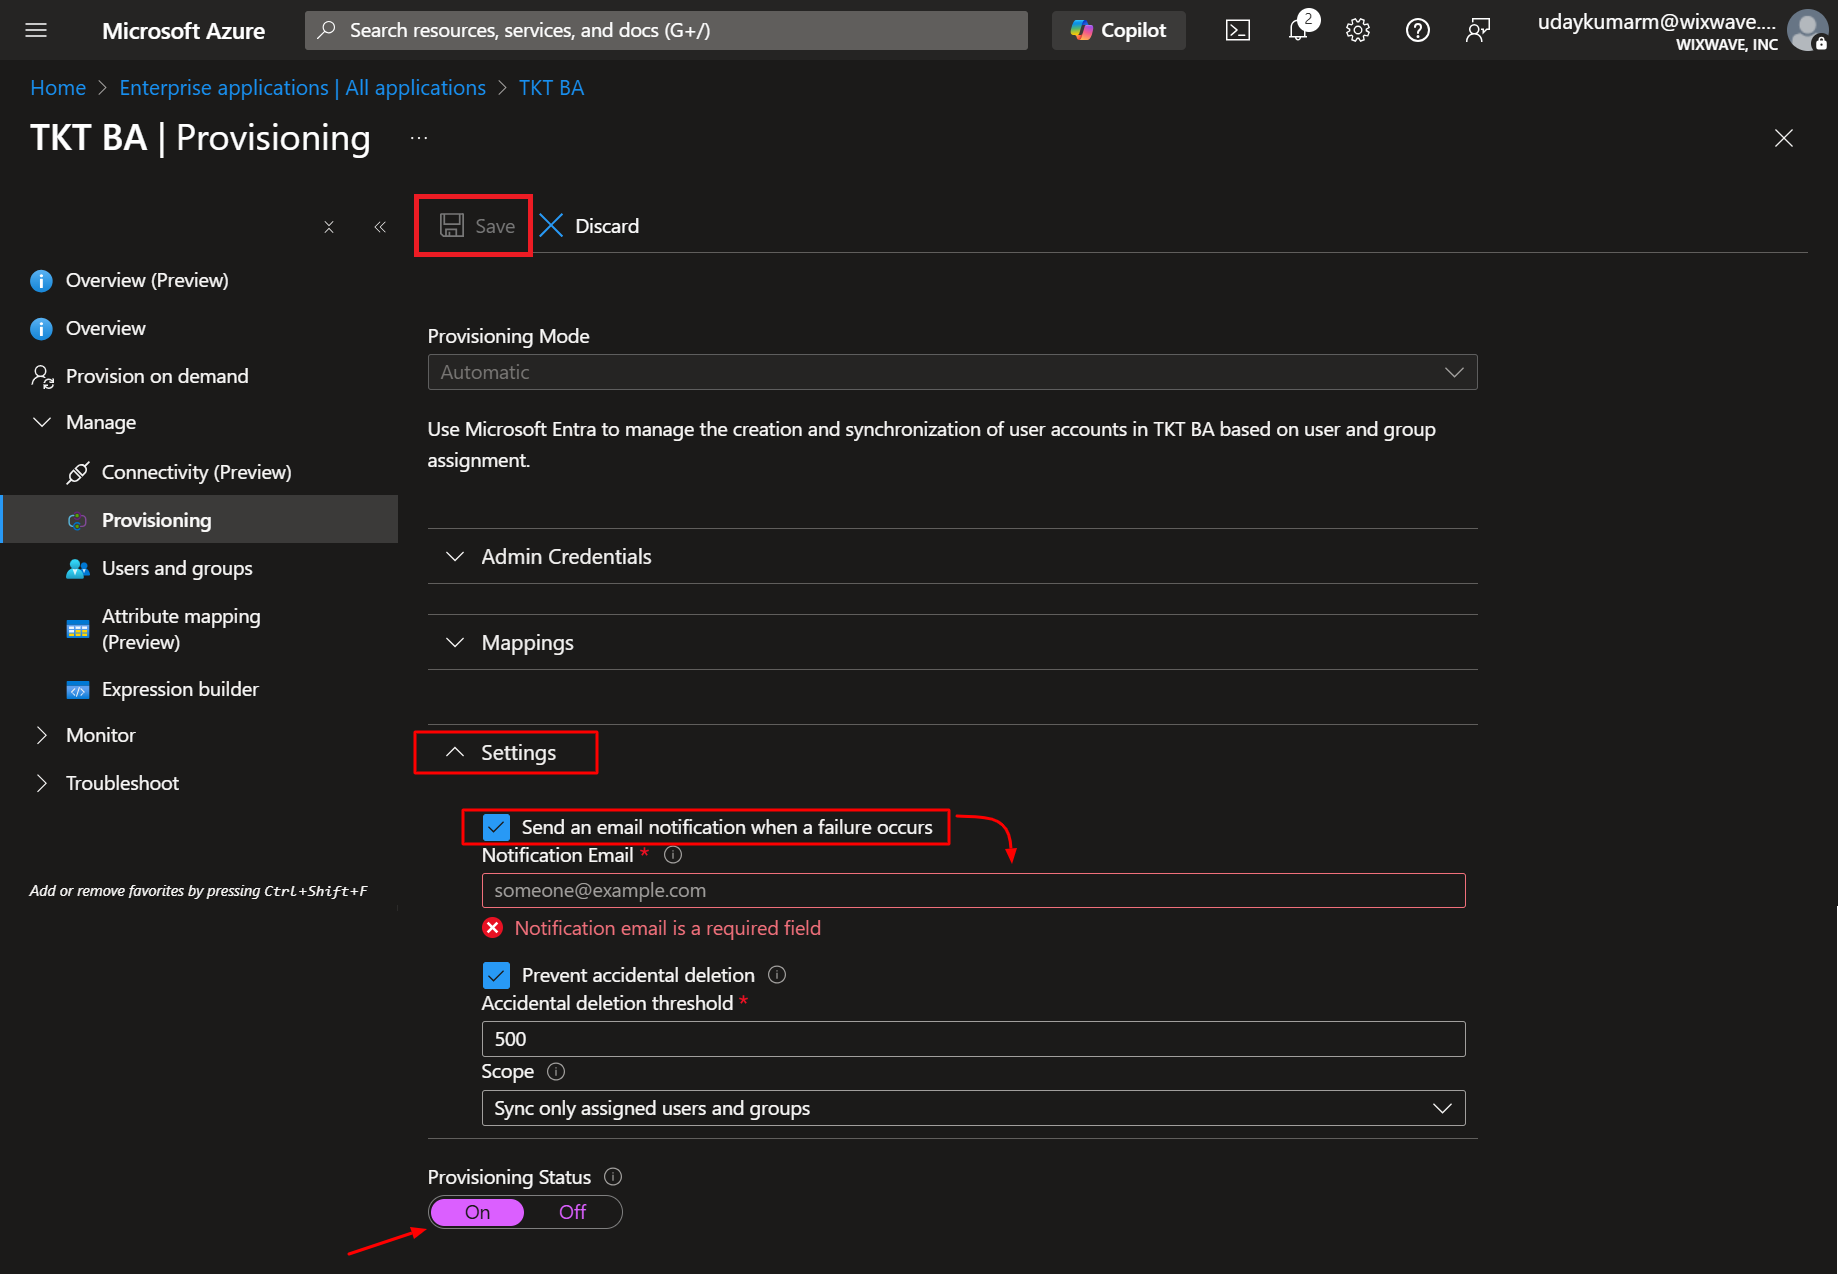
To Activate Automatic Provisioning: Return to the Provisioning settings in Azure. Set Provisioning Status to On. Add an email address for failure notifications. Click ‘Save’.
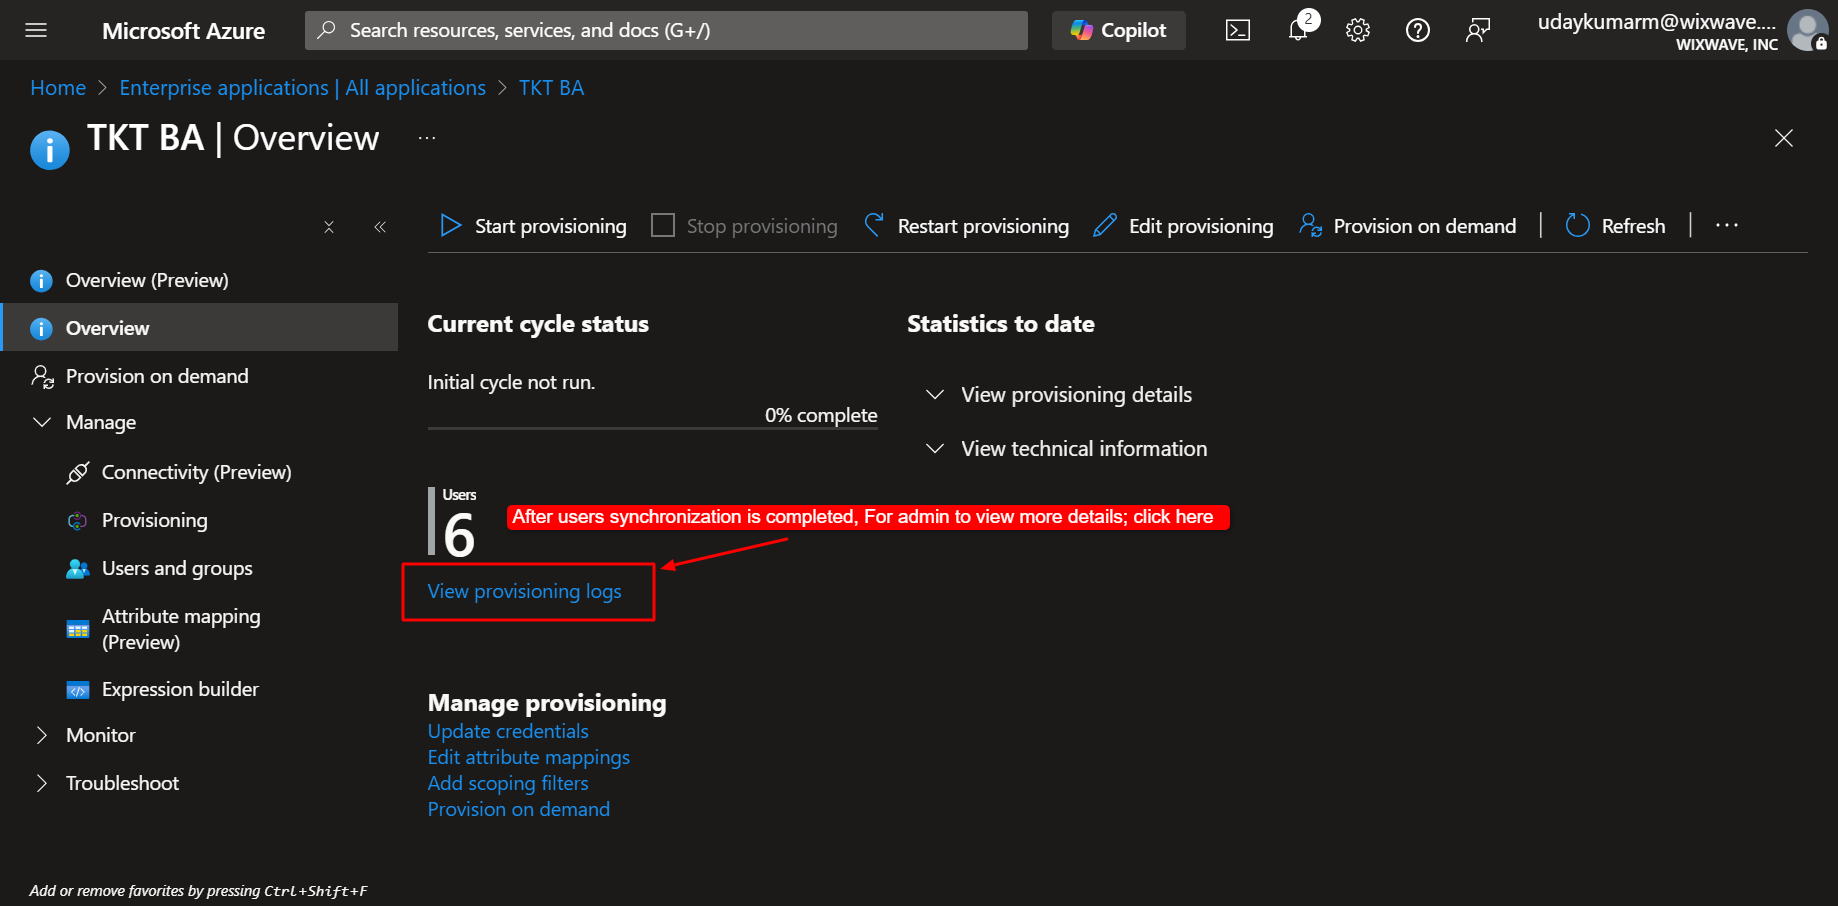
To Monitor Provisioning Status: Go to the Overview page of the Azure Wavity application. Click ‘View provisioning logs’ to verify synchronization activities and confirm successful user provisioning.