Schema Overview:
In Wavity, a schema acts as a structured framework for transmitting data between Wavity and various external applications or services. It defines the format, organization, and type of data being exchanged, ensuring that both the sending and receiving systems can accurately interpret and process the information.
The schema essentially defines the organization of the data, detailing its fields, datatypes, and relationships. This structured format enables smooth integration and communication between different platforms. By adhering to a standardized schema, data transfer becomes more consistent and accurate, minimizing errors and enhancing compatibility between Wavity and other systems.
Creating Schema in Wavity
To create aSchema in Wavity, simply follow these steps:
- Login to the Wavity admin account.
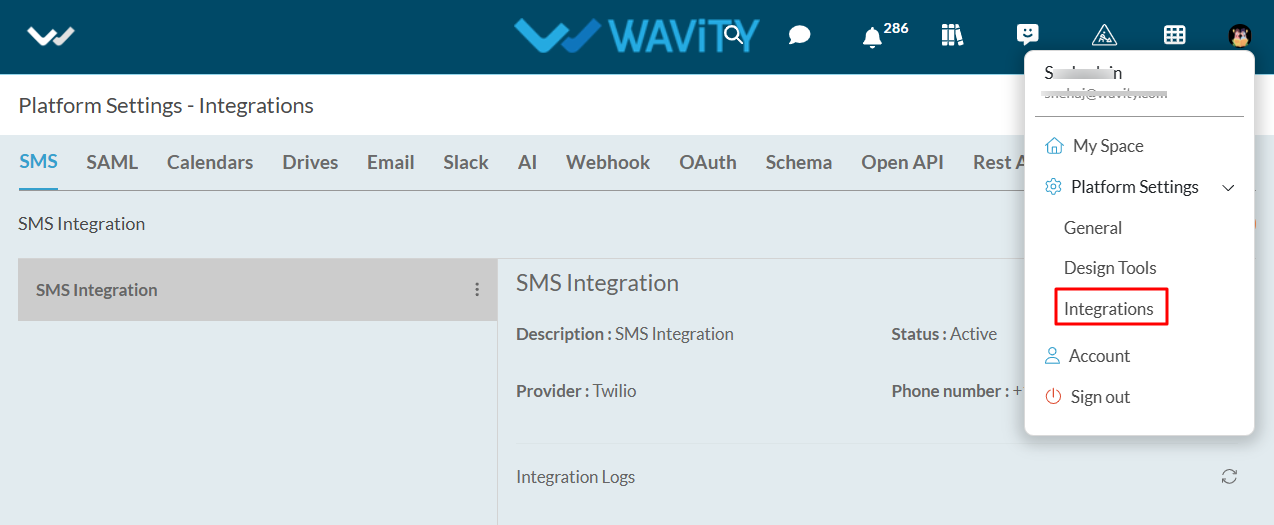
- Click on the Profile icon and select 'Integrations’.

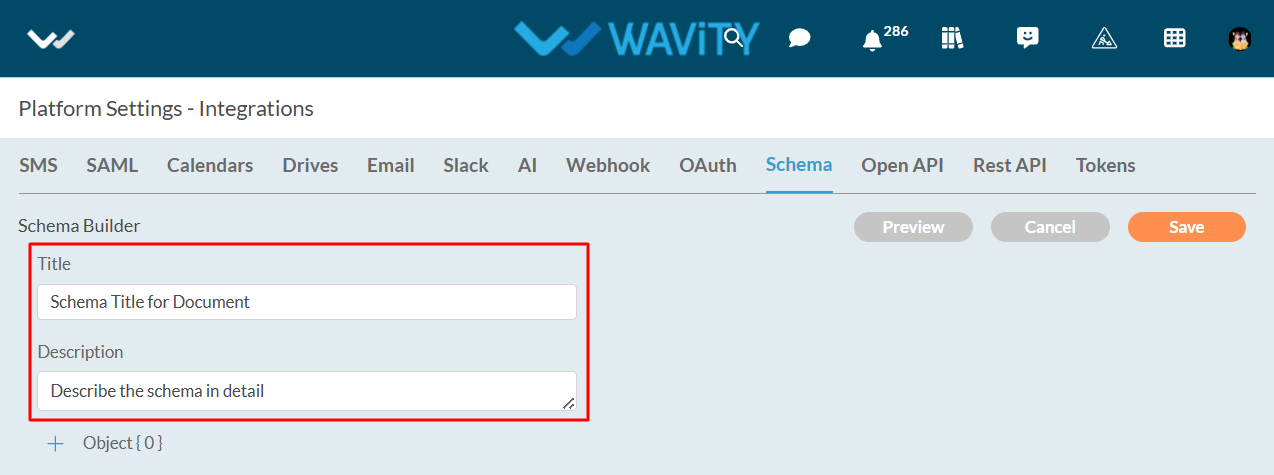
- Click on the Schema Tab, and then click on the "Create" button under Schema.

- Provide the title and description of Schema.

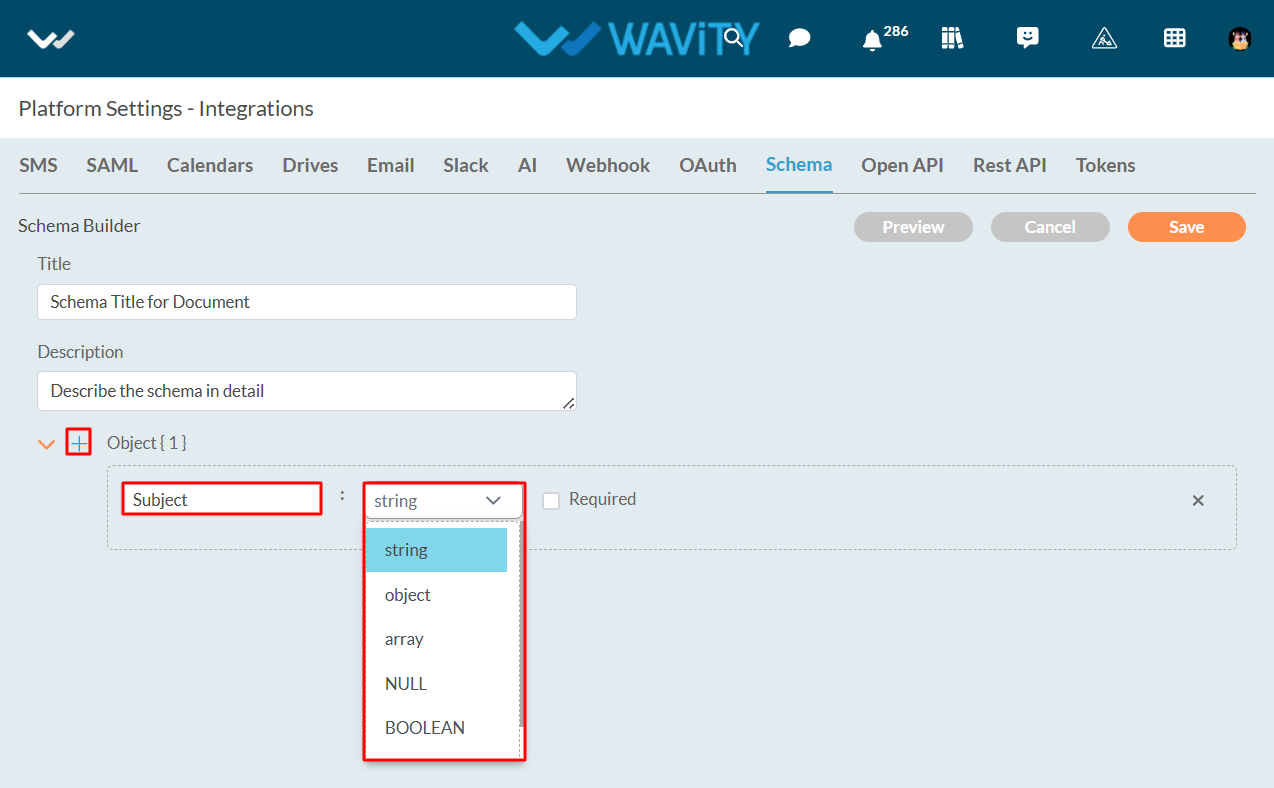
- Click on ‘+’ icon to add objects. Now, you can name the title of object and select object values as shown in below image.

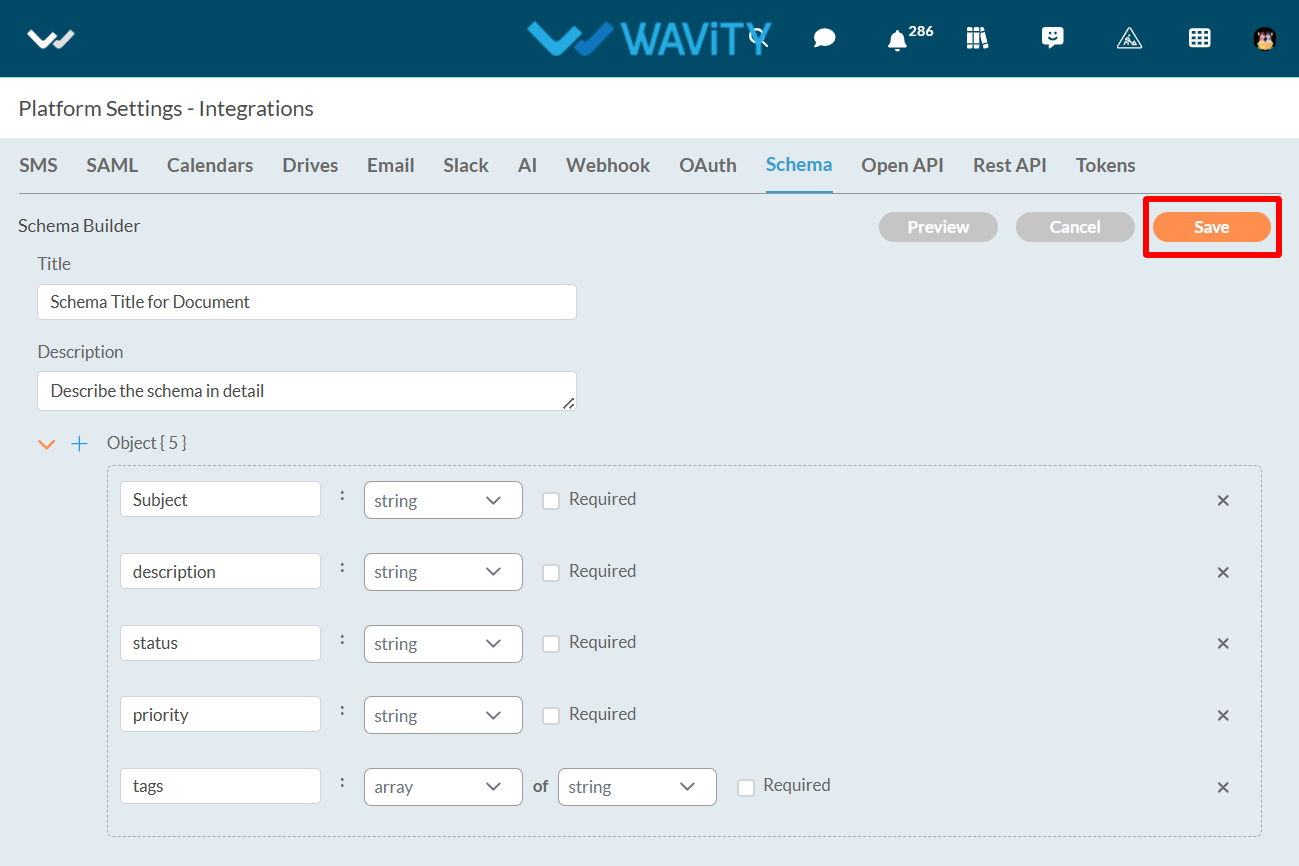
- Add multiple objects as per your requirement. Click on “Save” button to create a new schema. You can add the Schema to any of your Webhook Integration and API Integration as a payload.

