Setting Up a Customer Self-Service Portal
- A customer self-service portal allows users to manage their support requests, track ticket statuses, and submit new issues all in one place. It also integrates with the knowledge base, offering relevant articles, FAQs, and troubleshooting tips based on the customer’s queries.
- Only an Admin of your organization has the ability to set up and configure the customer portal.
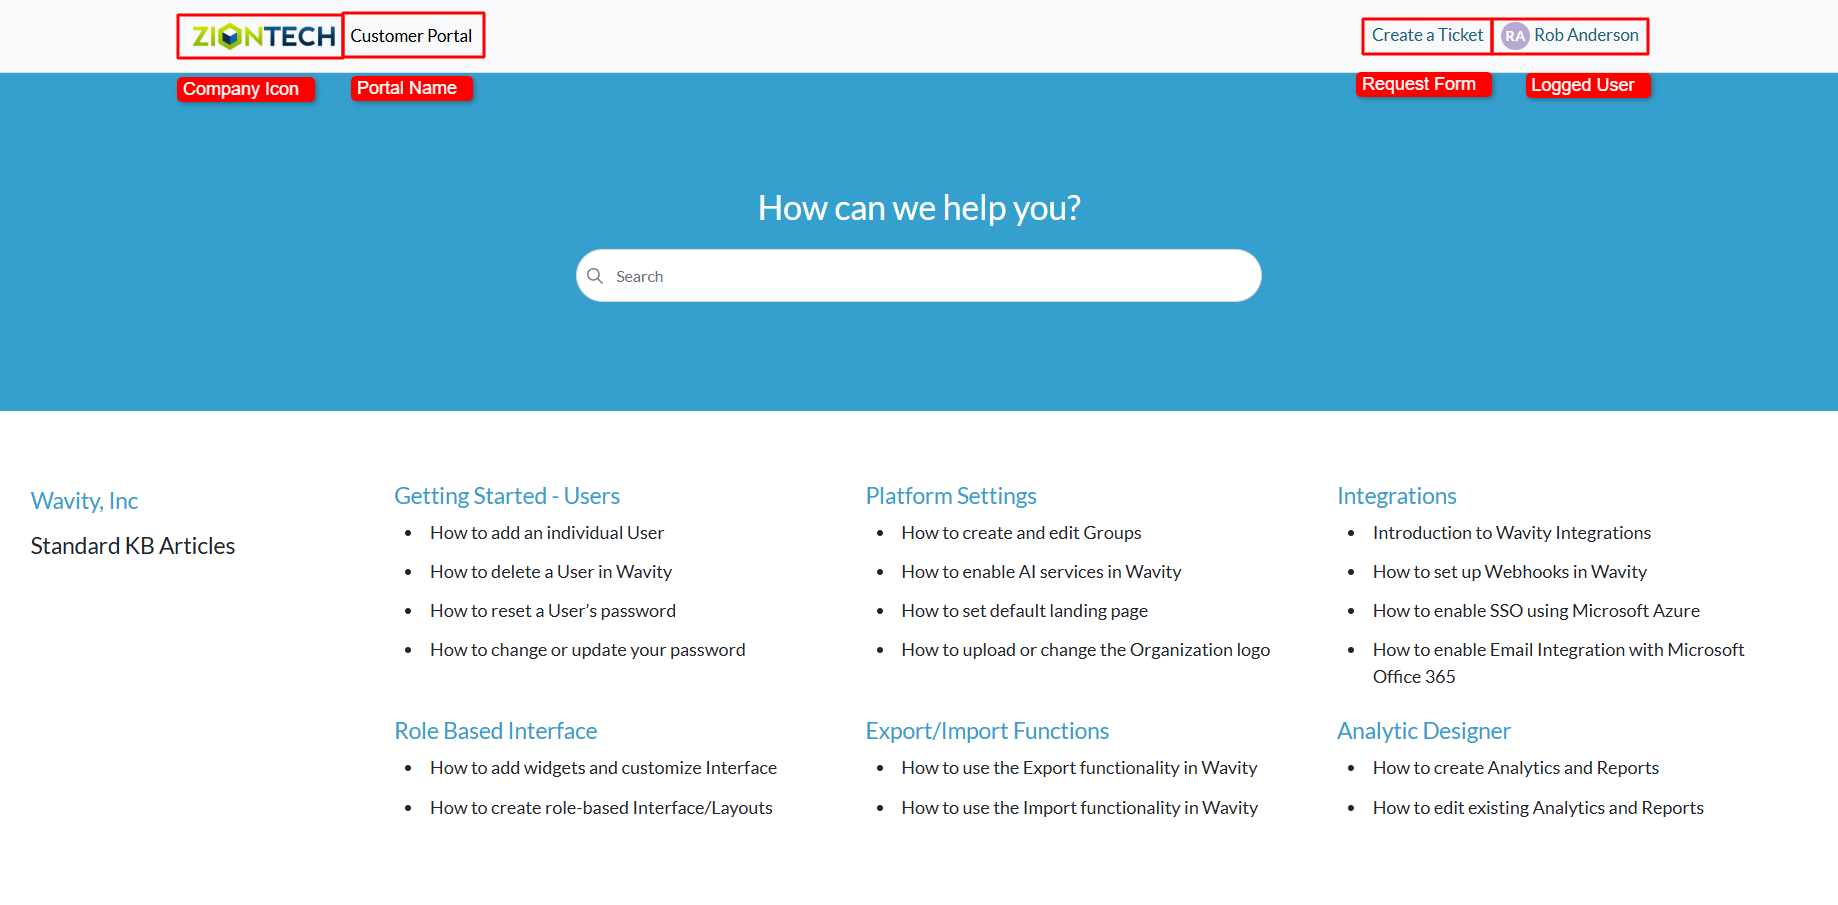
- To begin, click on the Portal icon as shown in the image below.

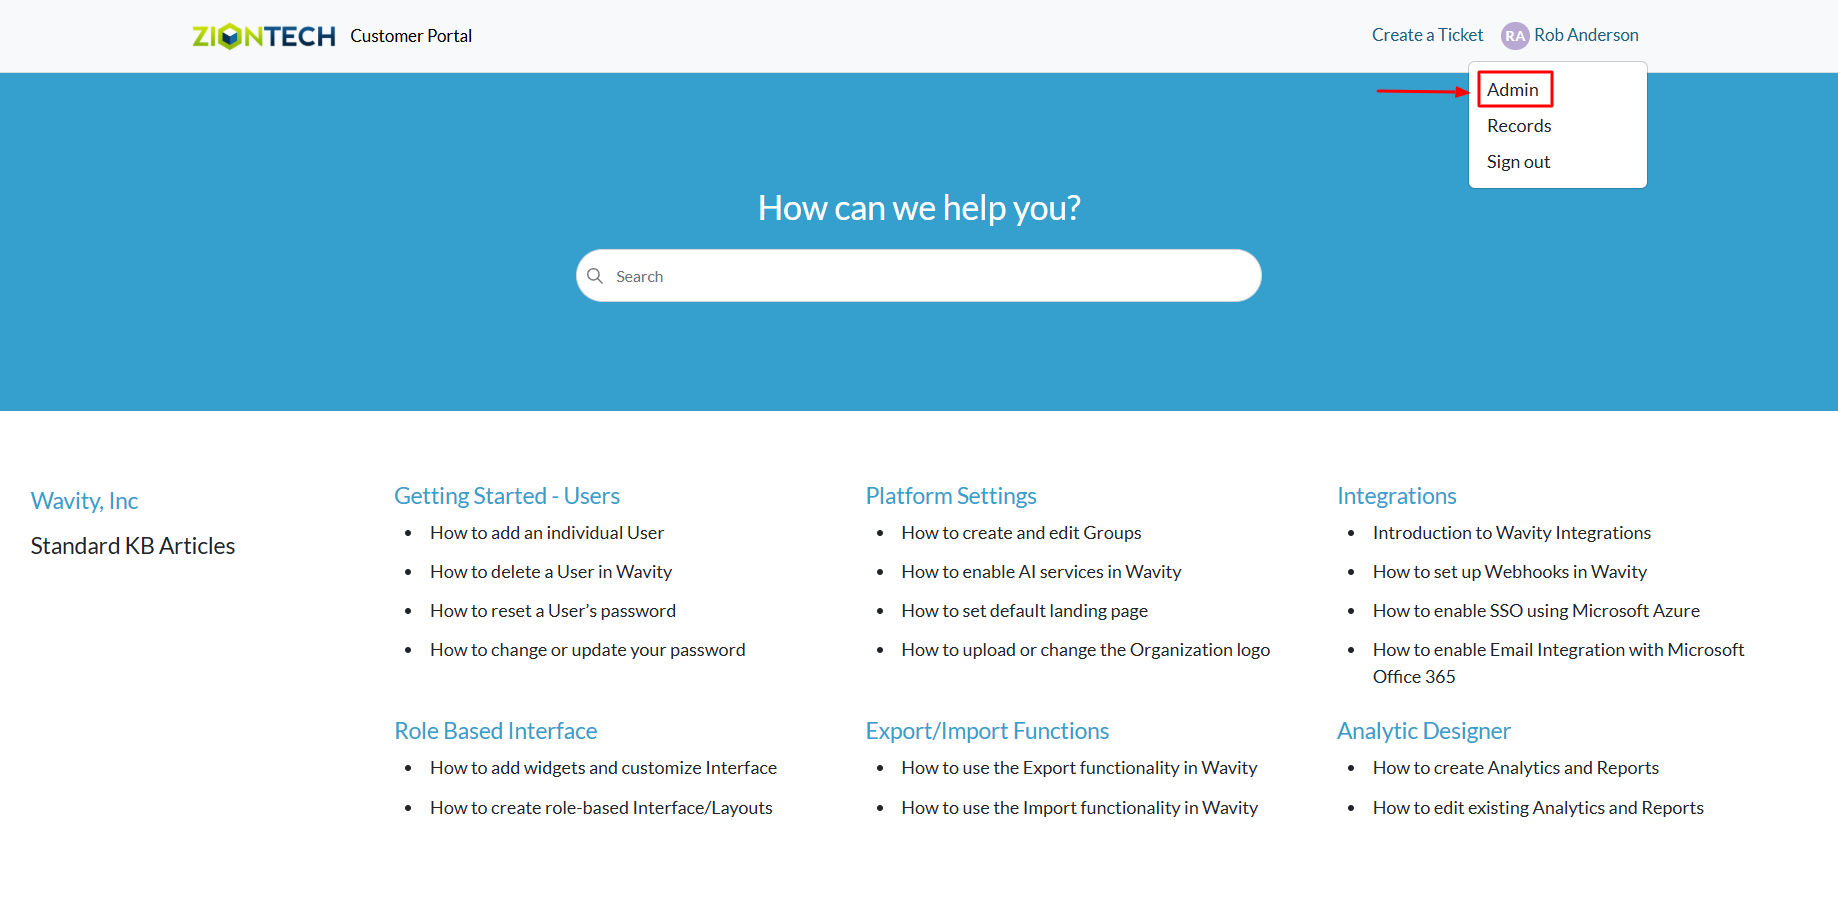
- Click on Admin, as you’ll be configuring the portal settings.
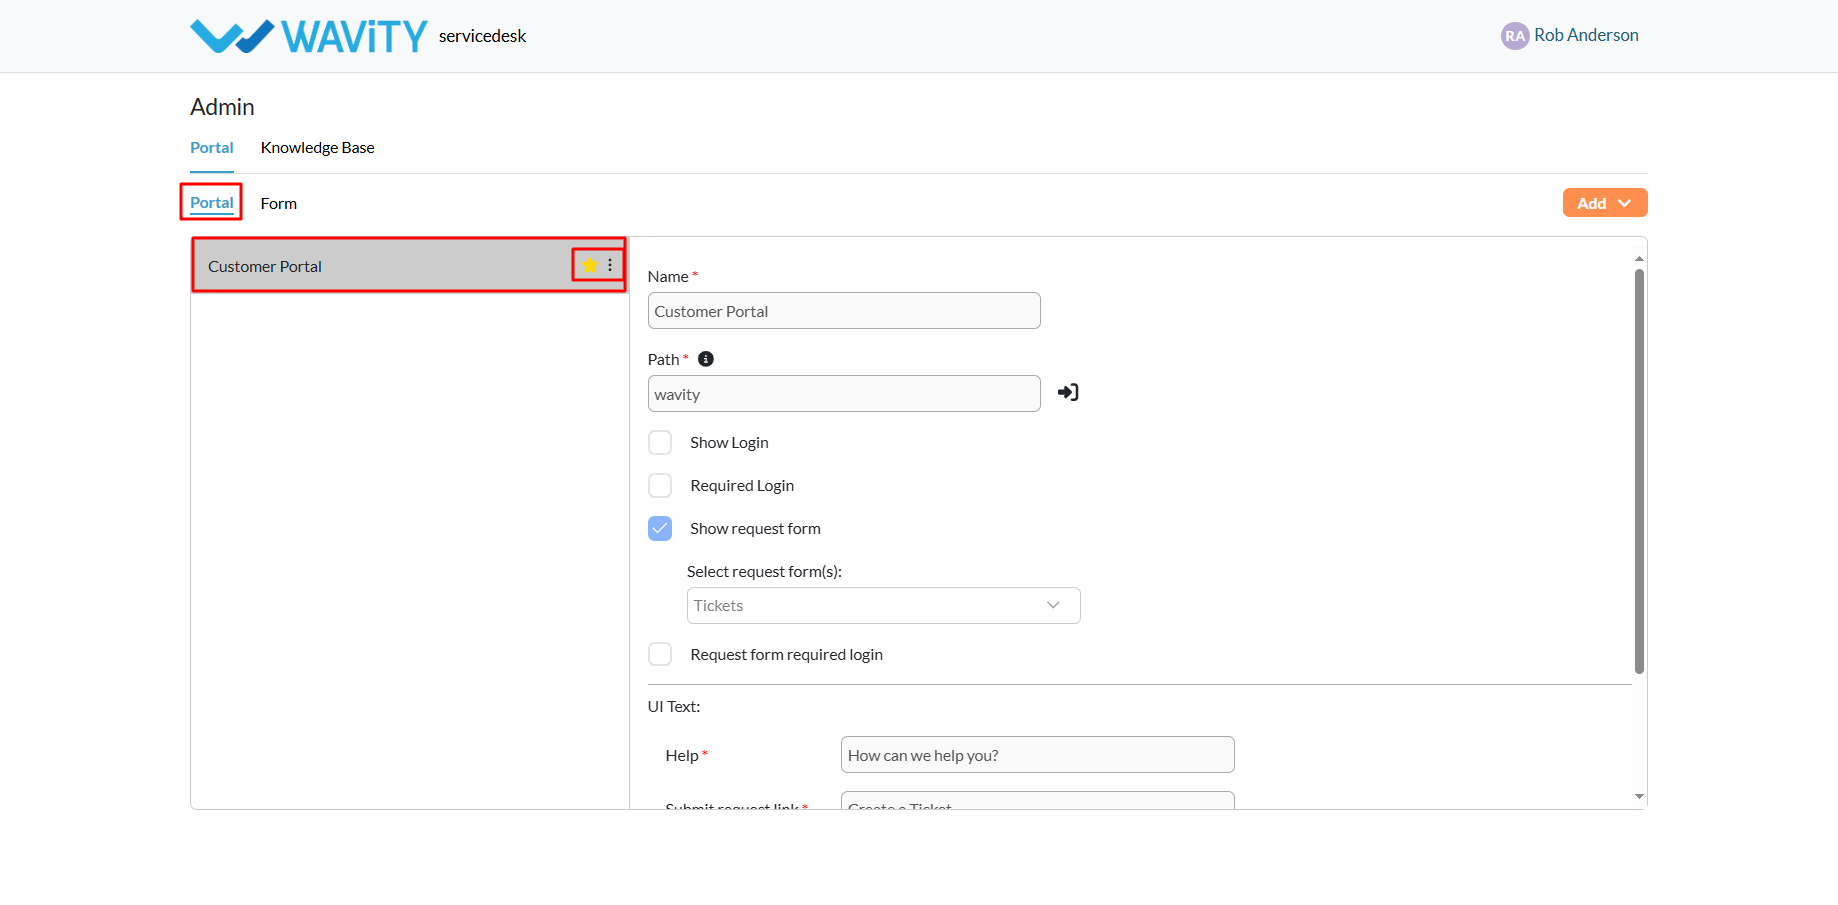
- The Customer Portal Admin Page will open, displaying any currently active portals. From here, you can also choose to edit an existing portal.
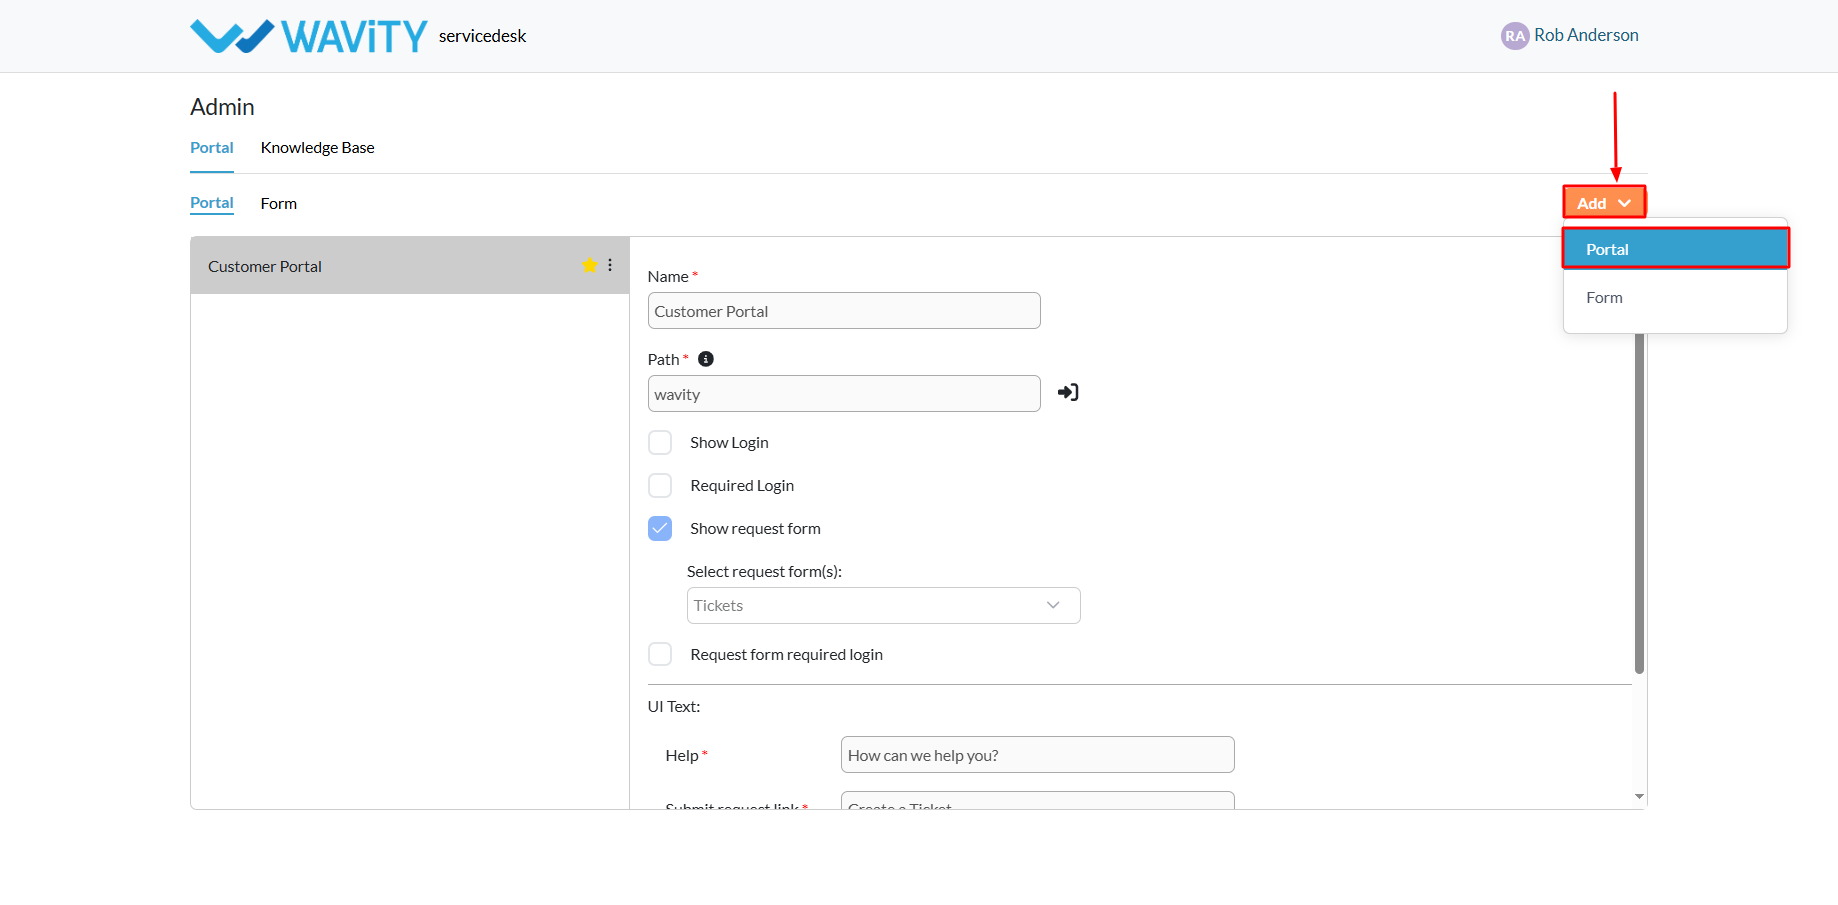
- Click on the Add button and choose Portal to start setting up a new one.
- Enter a name for your portal.
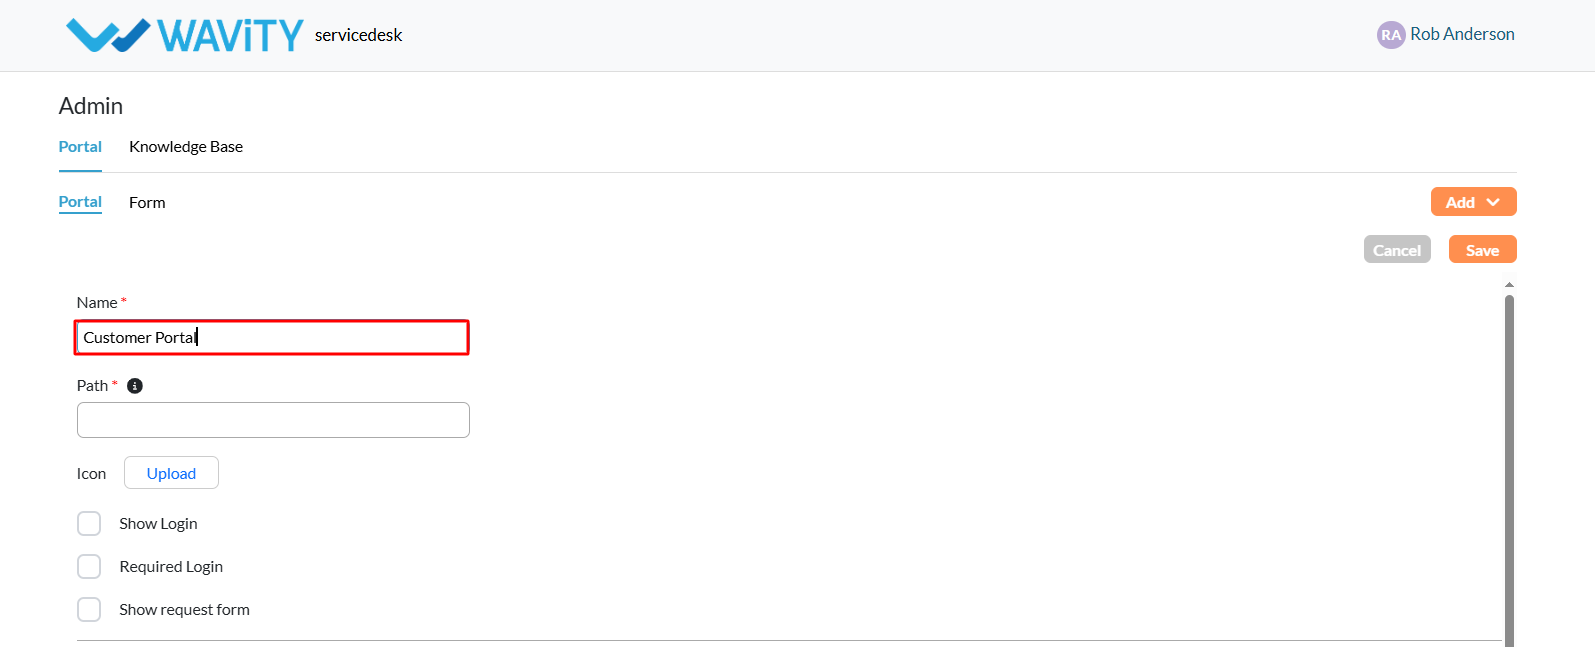
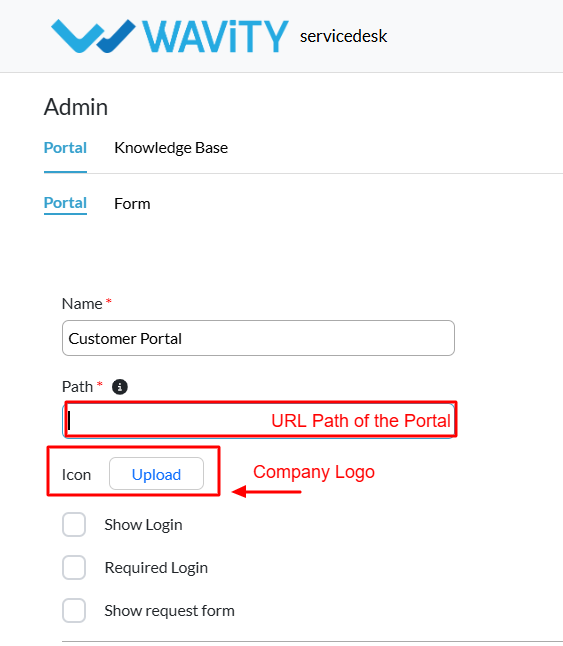
- Specify the URL path for the portal. Note: only letters and numbers are allowed in the URL, but the path cannot consist of numbers alone.
- Upload your company logo by attaching the appropriate icon as shown.
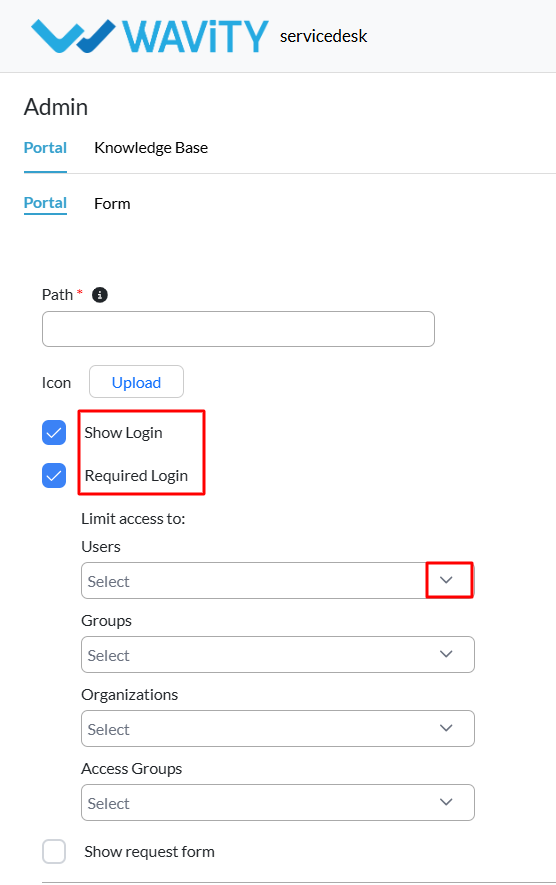
- Define user access settings: To require users to log in before accessing the portal, enable both “Show Login” and “Required Login."
- After selecting “Required Login,” you’ll be prompted to choose specific users, groups, organizations, or access groups from the Wavity tenant who should have access to the portal.
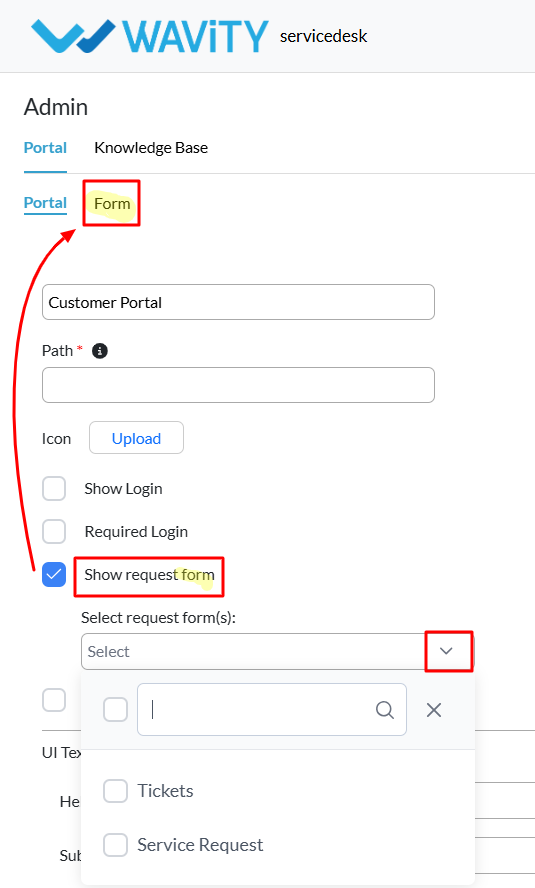
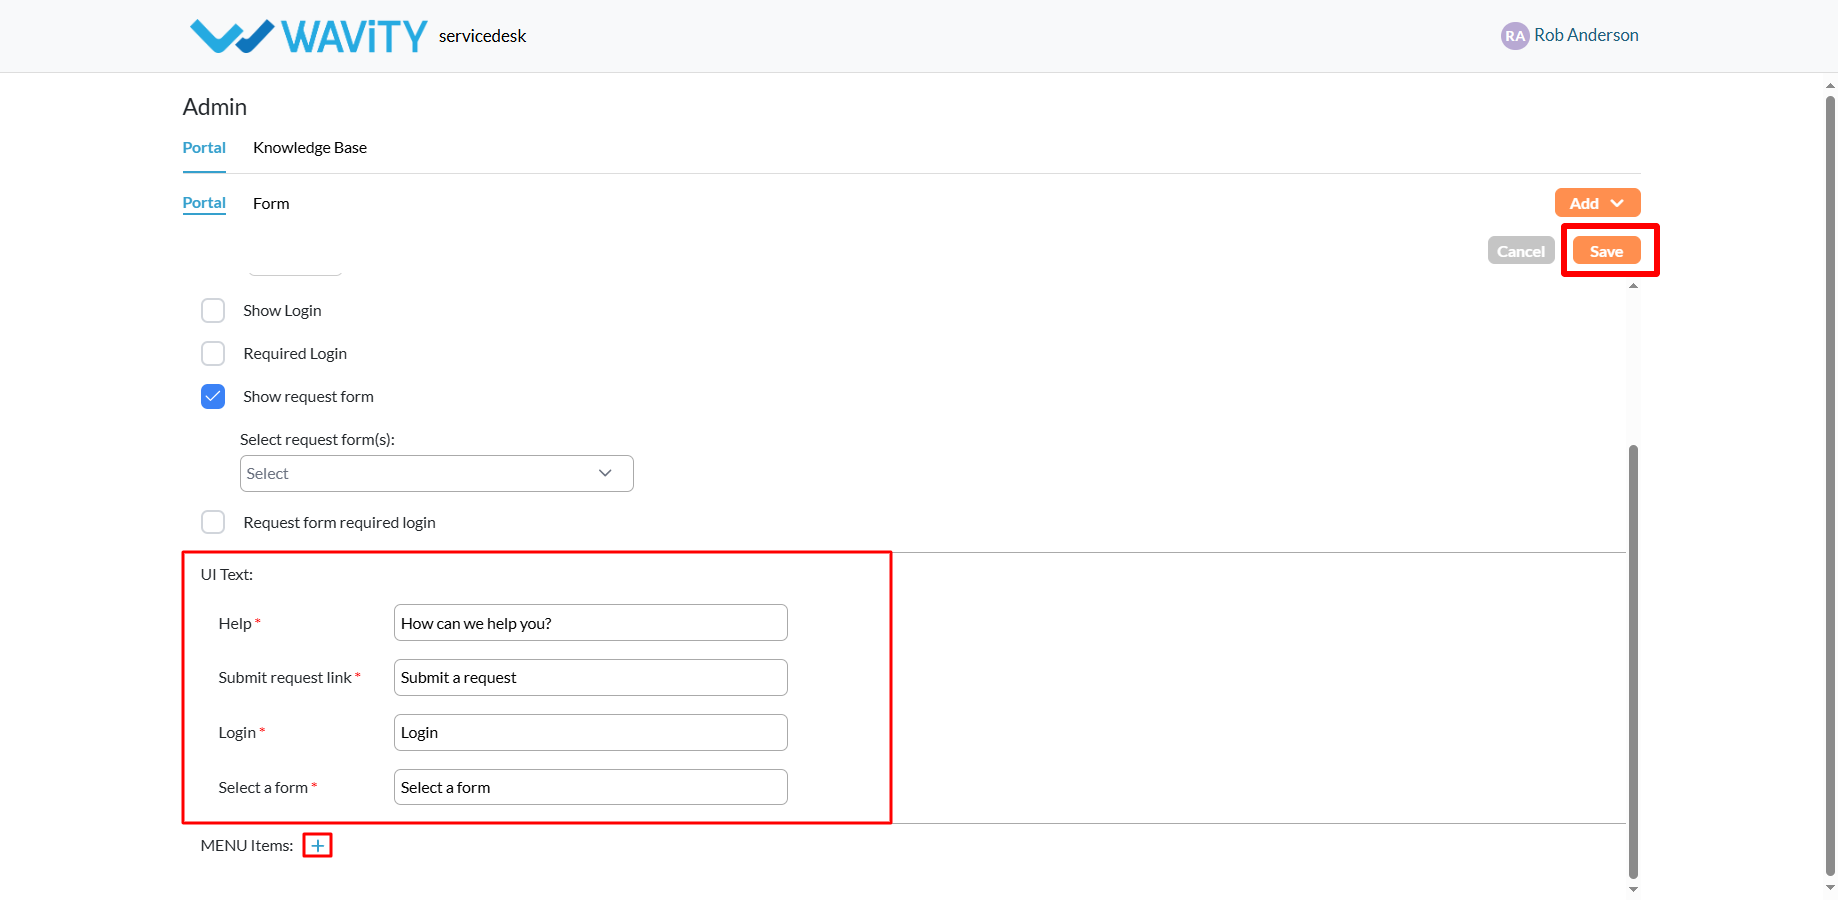
- To allow users to submit requests: Enable the “Show Request Form” option.
- Select an existing form from your portal. You can also edit forms via the Form section.
- Edit or update the UI text that users see when interacting with the portal.
- Add menu items to organize and categorize the portal content more effectively.
- Click the “Save” button to complete your portal setup.
- An example of a fully configured portal is shown below, featuring a company logo, portal name, request form, and a logged-in user interface.