Setting up Scheduled Reports
- In the Wavity platform, reports can be automatically sent to users via email at a specific time or on a specific day using schedulers.
- Only Admin users have access to create scheduled reports.
- To create a scheduled report:
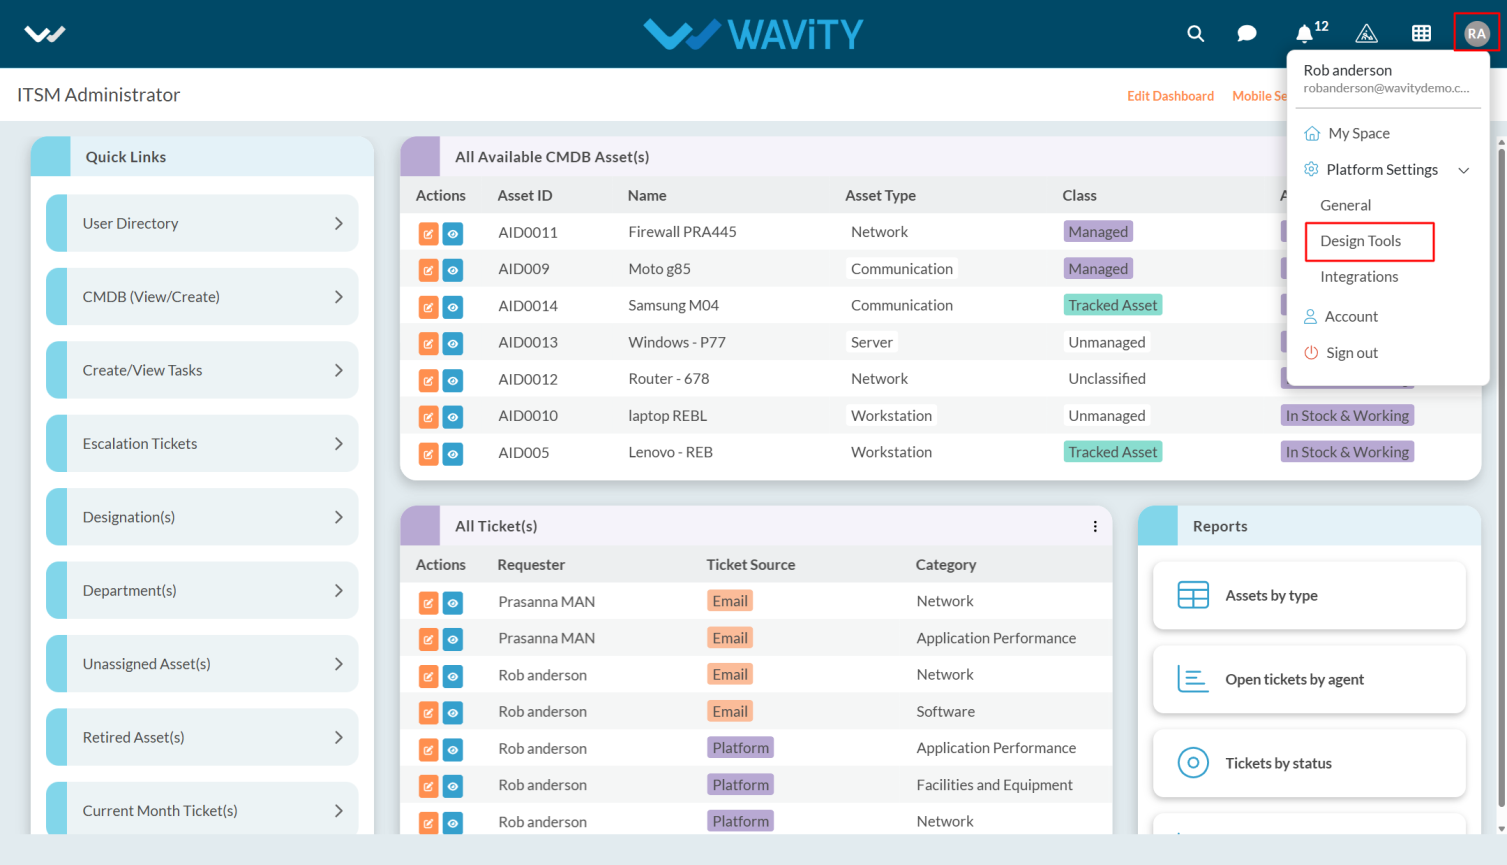
- Click on the Profile icon and Select Design Tools.
- Click on the Reports tab, and then click the Create button as shown in the image below.

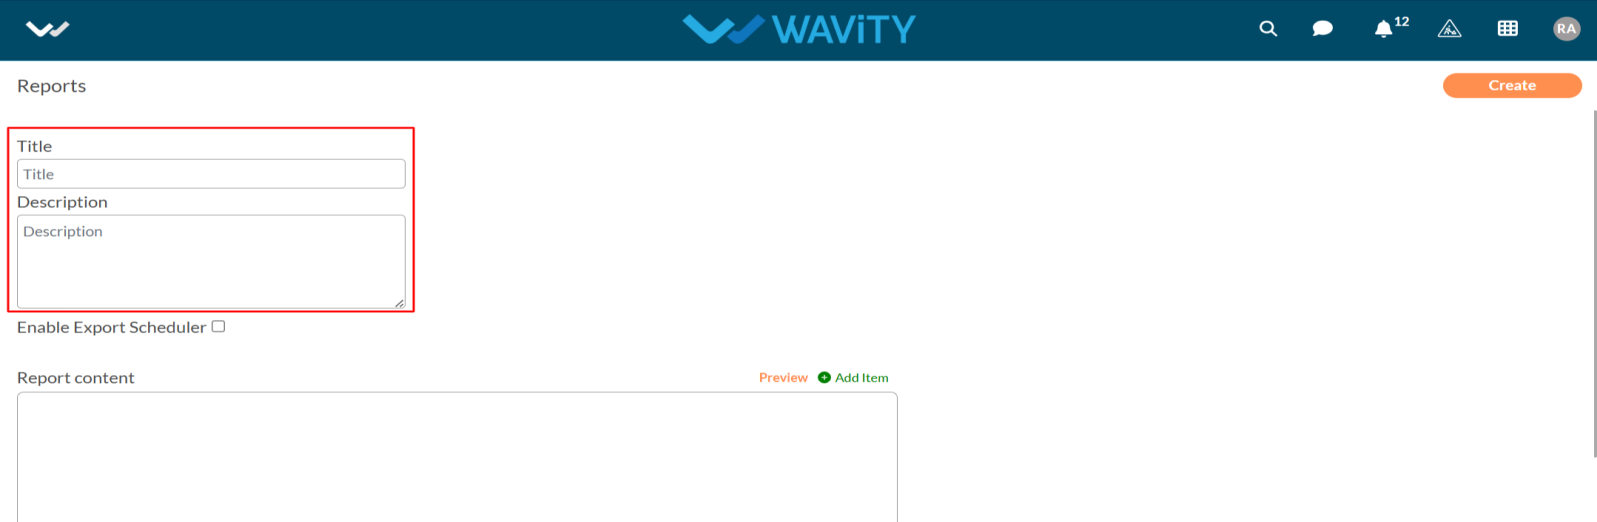
- Enter the Title and Description for the report.
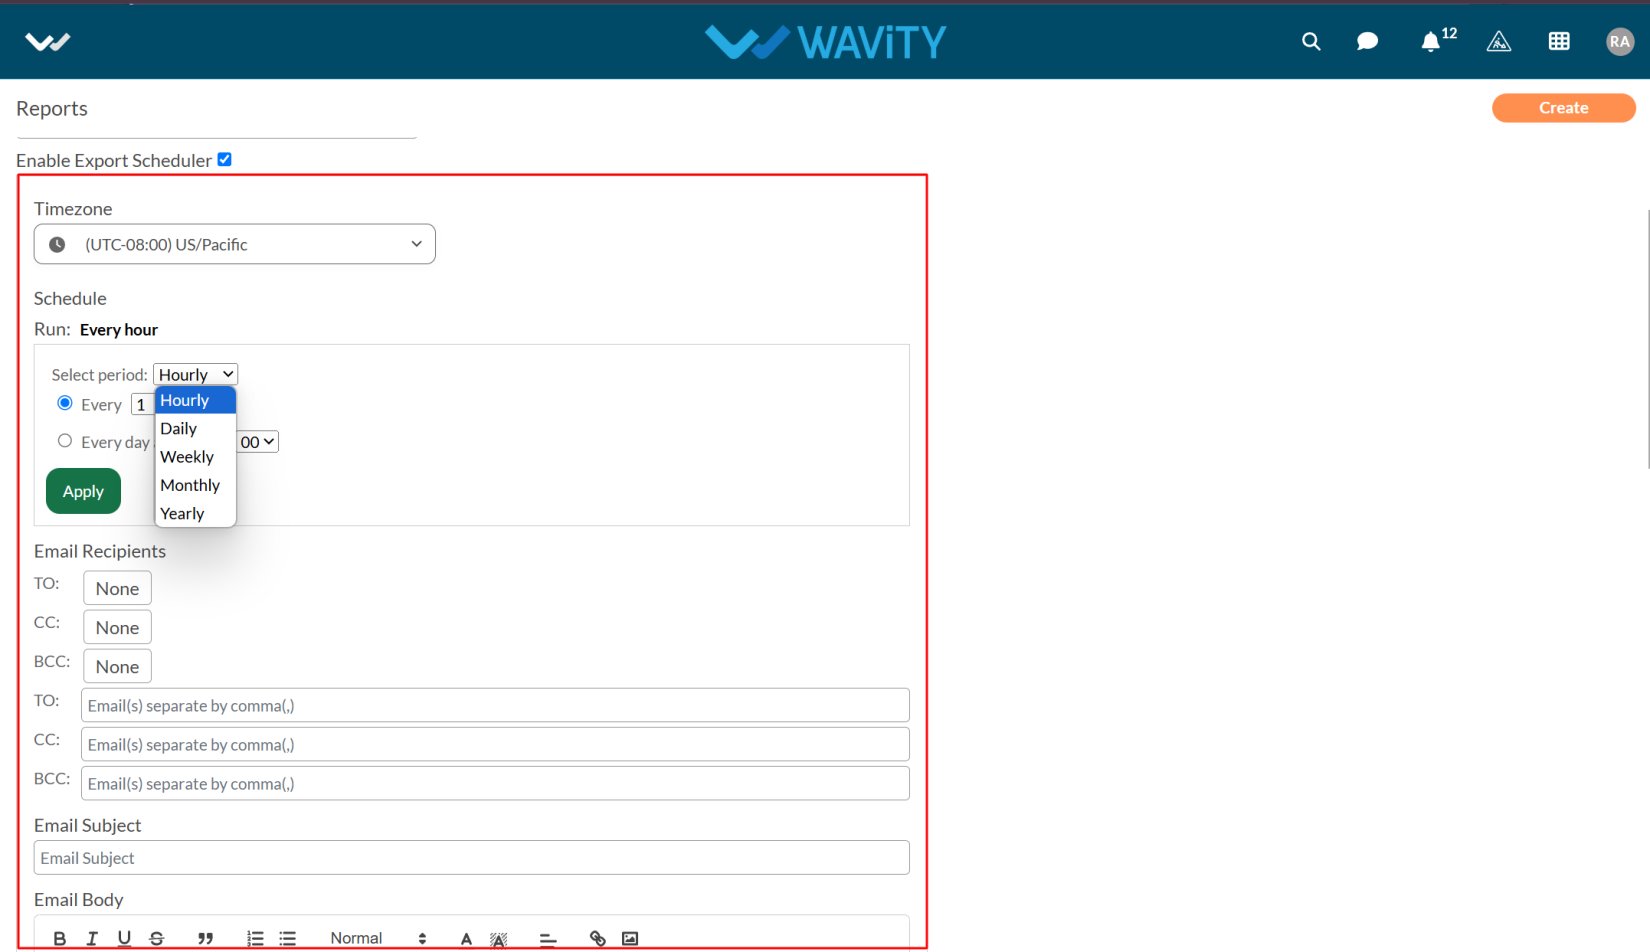
- Now, enable the Export Scheduler.
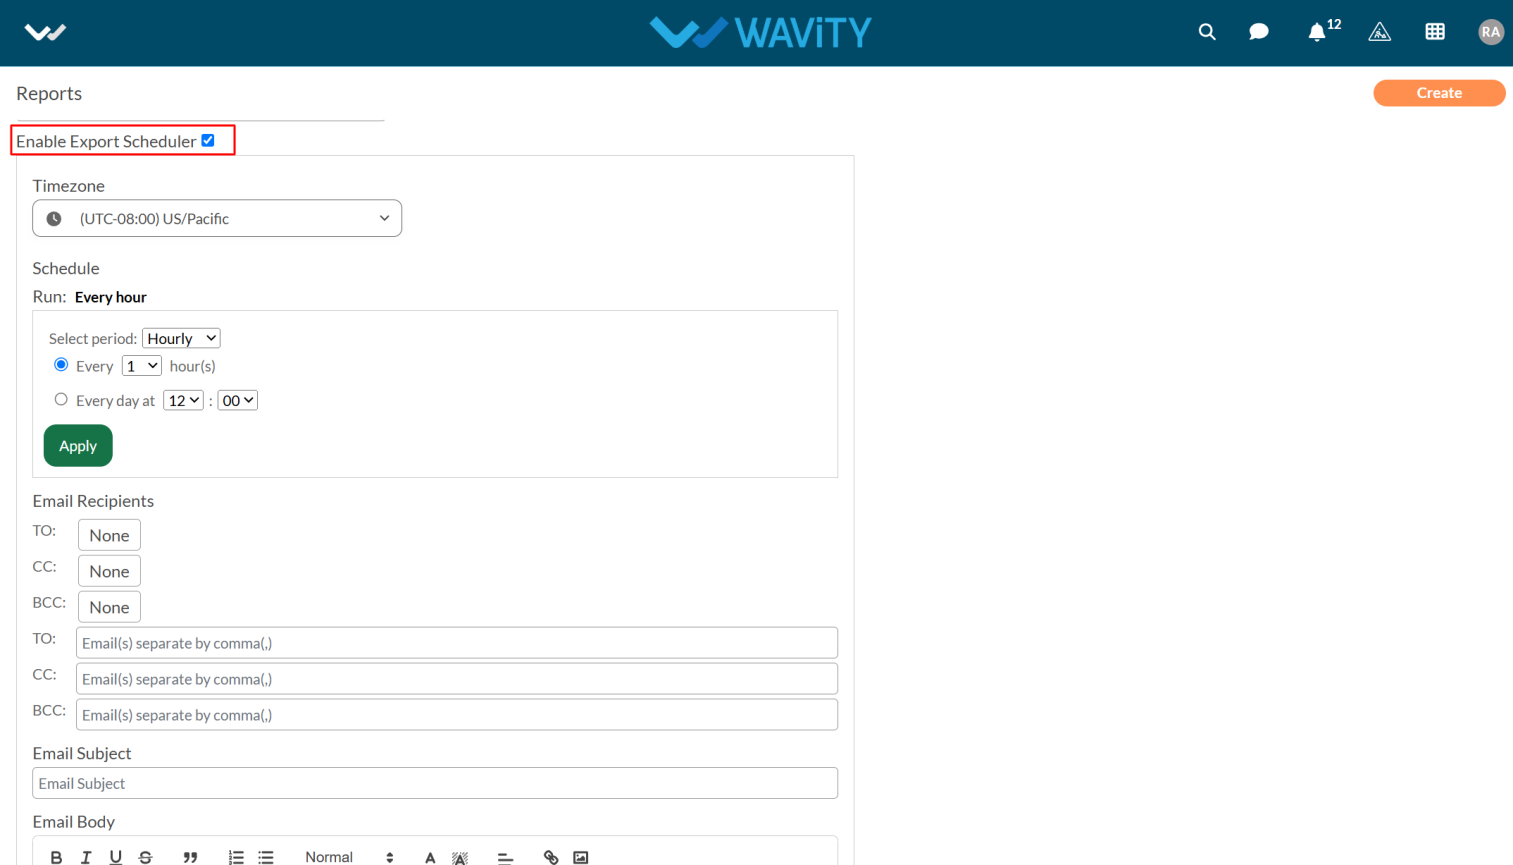
- Now select the time zone and period and fill up the required details in Email Recipients.
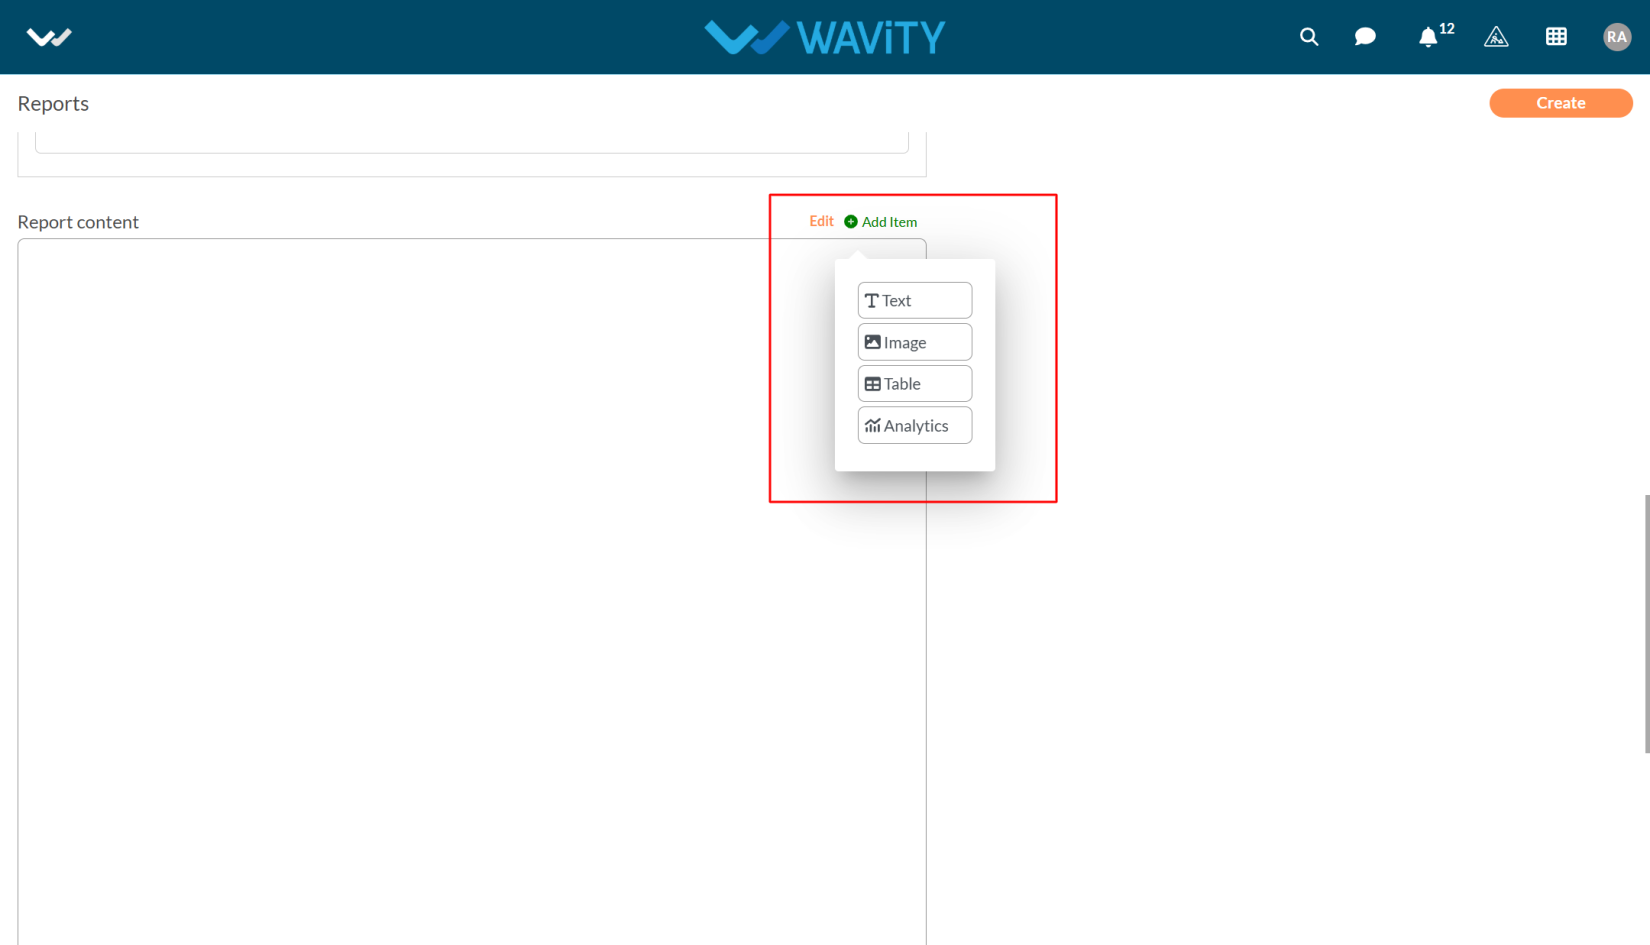
- After entering the details, scroll down to view the Report Content section.
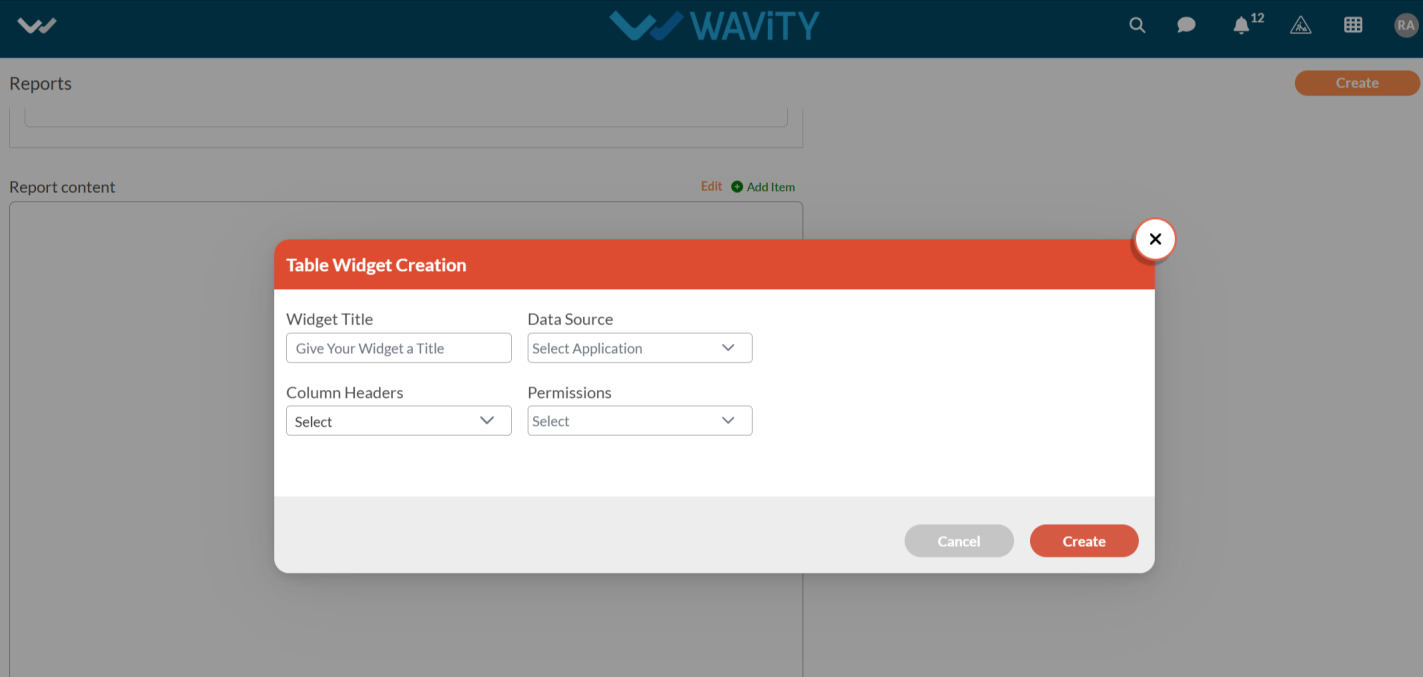
- Click on the Edit as shown in the below image.

- Click on the Add item and select the report as you want.
- You can select report in Text, Image, Table and Analytics.
- For Table and Analytics reports, you need to select the application from which you want to generate the reports.
- Now click on the create button & Report will be active.